Stages
Stages module in BridgeLCS enhances job management and enables efficient monitoring and organization of tasks, by assigning stages to specific activity codes.
Here are the general steps to create a Stage in BridgeLCS.
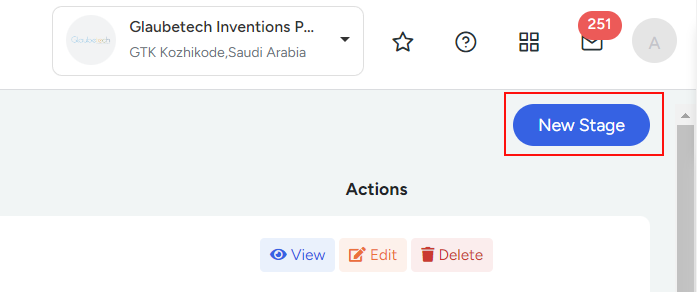
- Step 1: Go to Bridge Spotlight→ Stages → New Stage
-
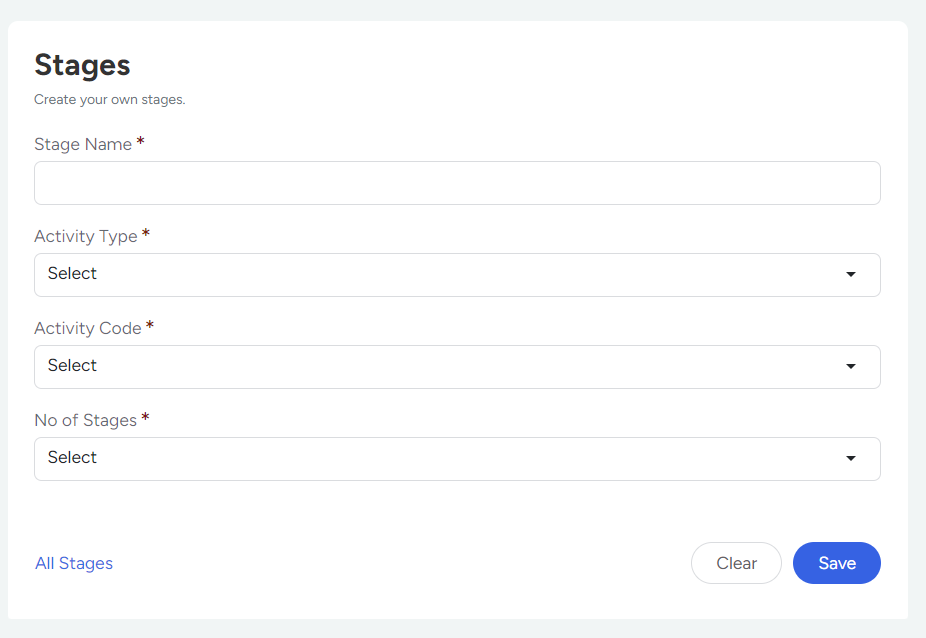
- Step 2: Stage Configuration
-
Provide the stage name.
Choose the activity type,activity code and number of stages from the dropdown. Click on Save once done.
- Step 3:Task Allocation
-
The number of stages selected in Step2, will be displayed.
Within each stage, you will find four distinct sections namely Columns,Documents,Invoices and To Do.
Select Stage1
Based on the requirements, enable necessary conditions for the stage by following the below steps.
A repetitive pattern is observed, to allocate tasks for other stages.
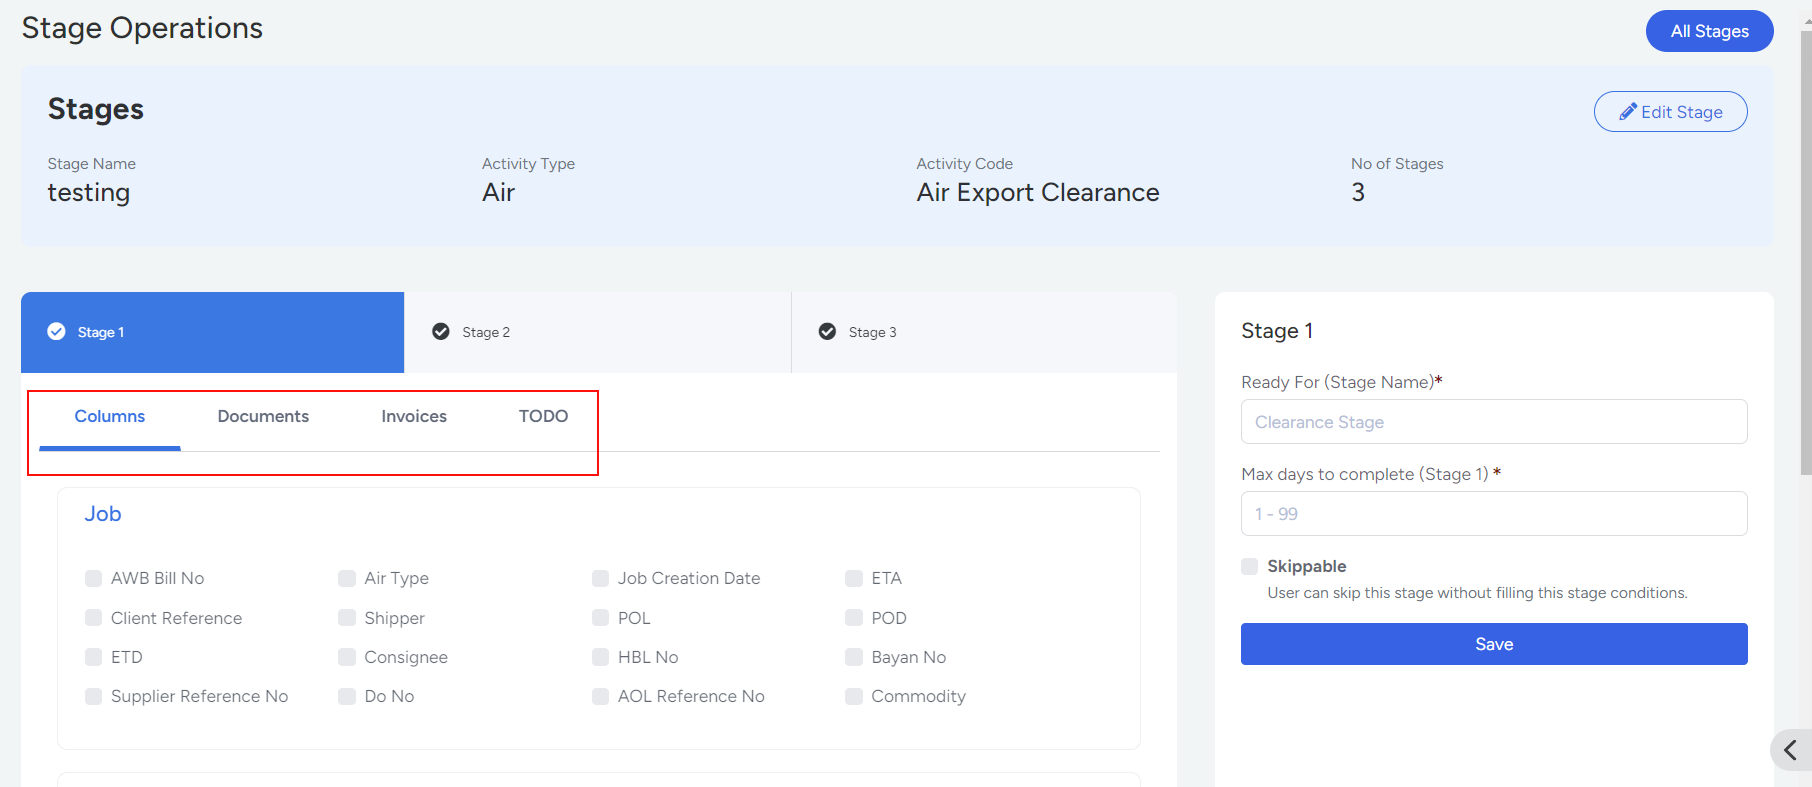
- Step 4: Update Columns Section
-
The Columns section has four subsections namely Job, General, Clearance, and Warehouse.
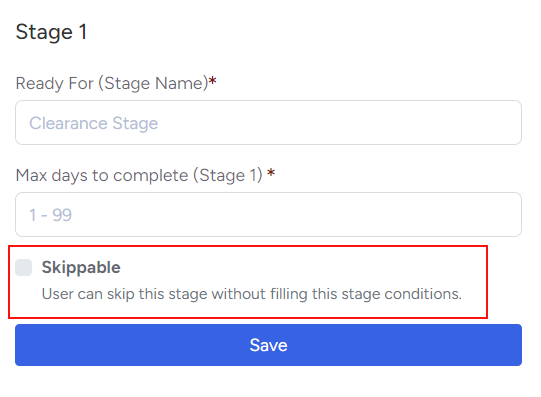
Depending on your needs, enable the checkboxes for the four distinct sections under Columns. On the right side of the page, enter the stage name and specify the number of days required to complete that particular stage.

Enable skippable, if the stage has to be skipped without fulfilling the conditions.
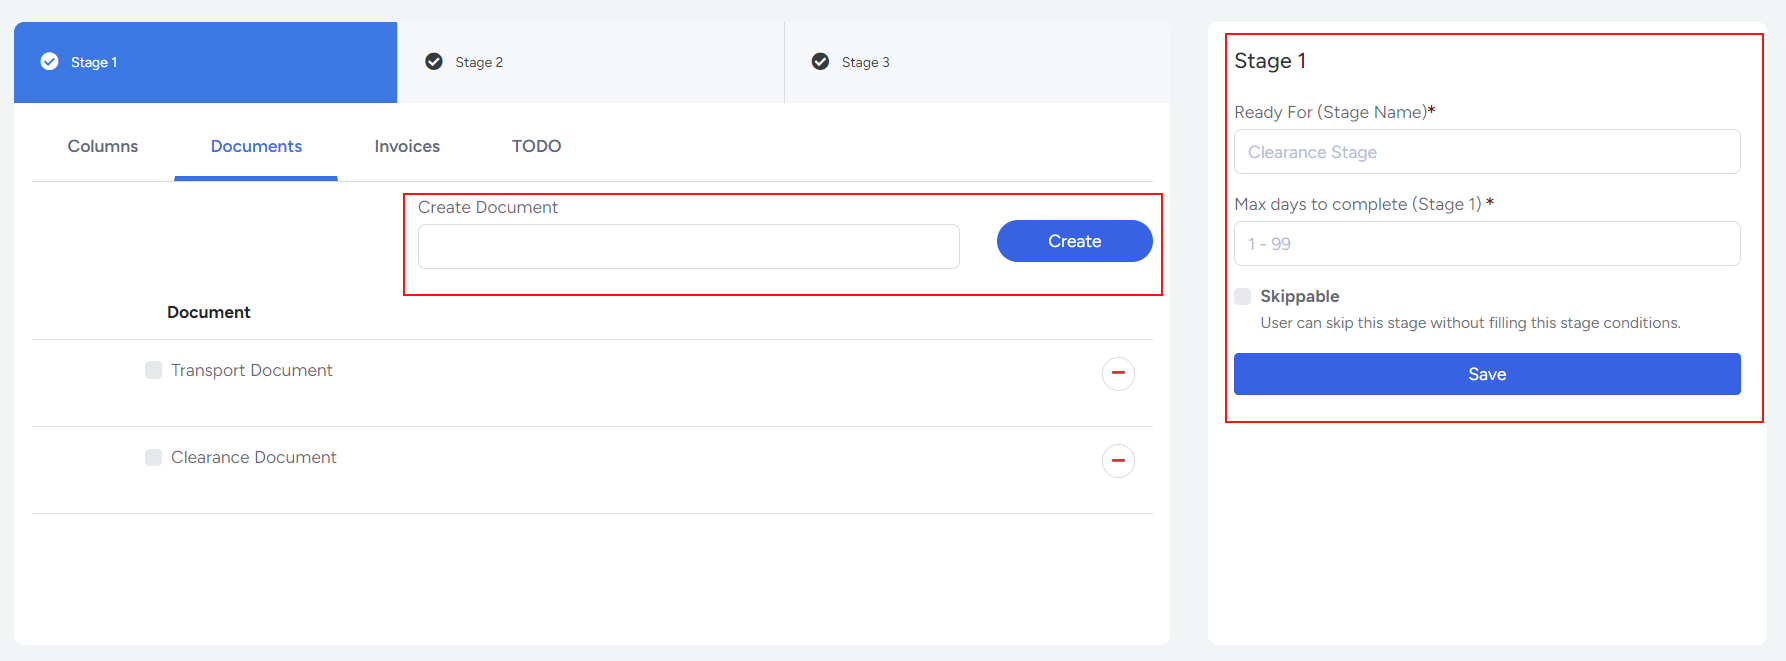
- Step 5:Update Documents Section
-
Provide a name for the document and click on the Create button
Choose the document as per your needs.
The selected document will reflect on the right hand side of the page.
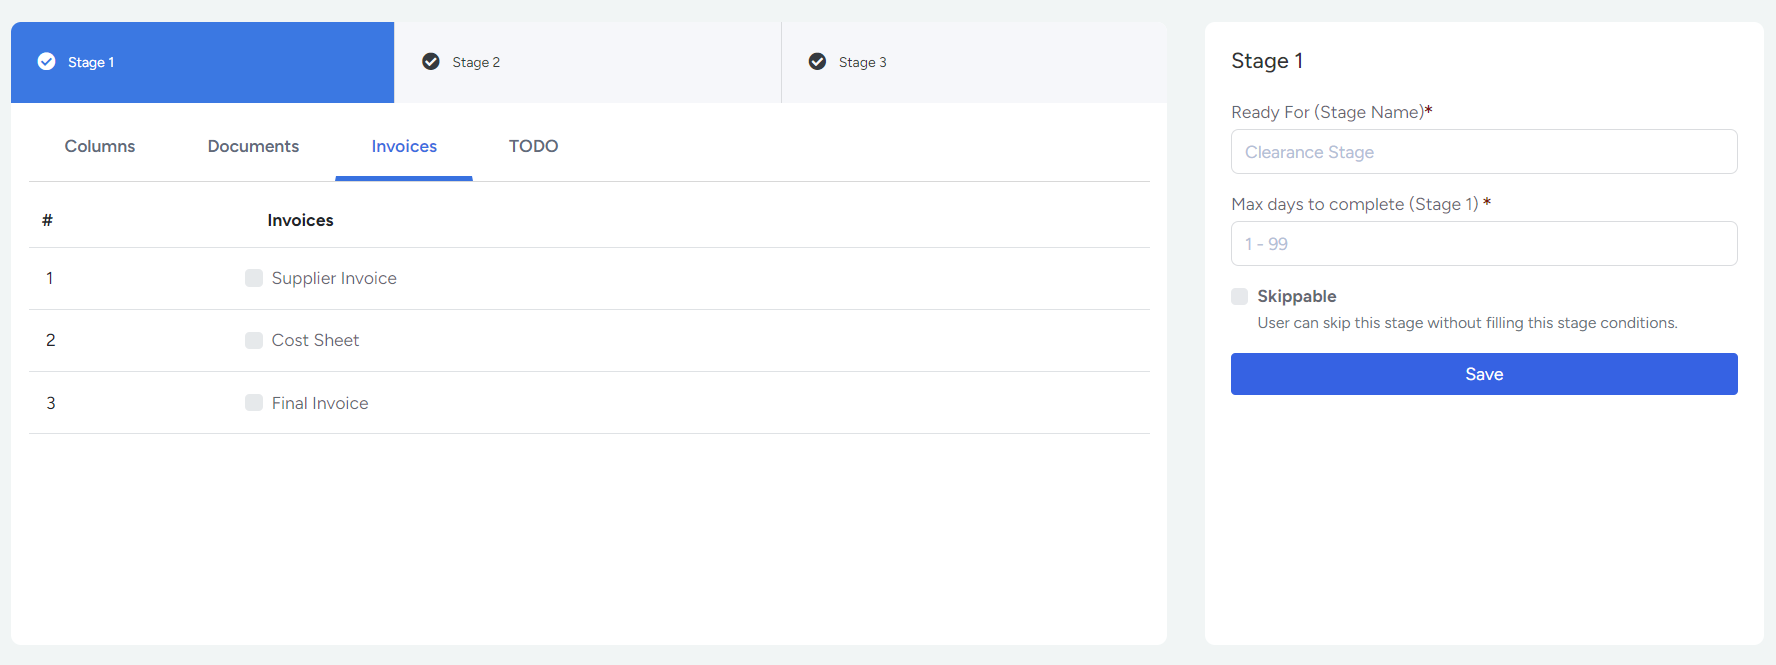
- Step 6: Select Invoices Section
-
Choose the specific Invoice that needs to be updated in a particular stage.
The selected invoice will reflect on the right hand side of the page.
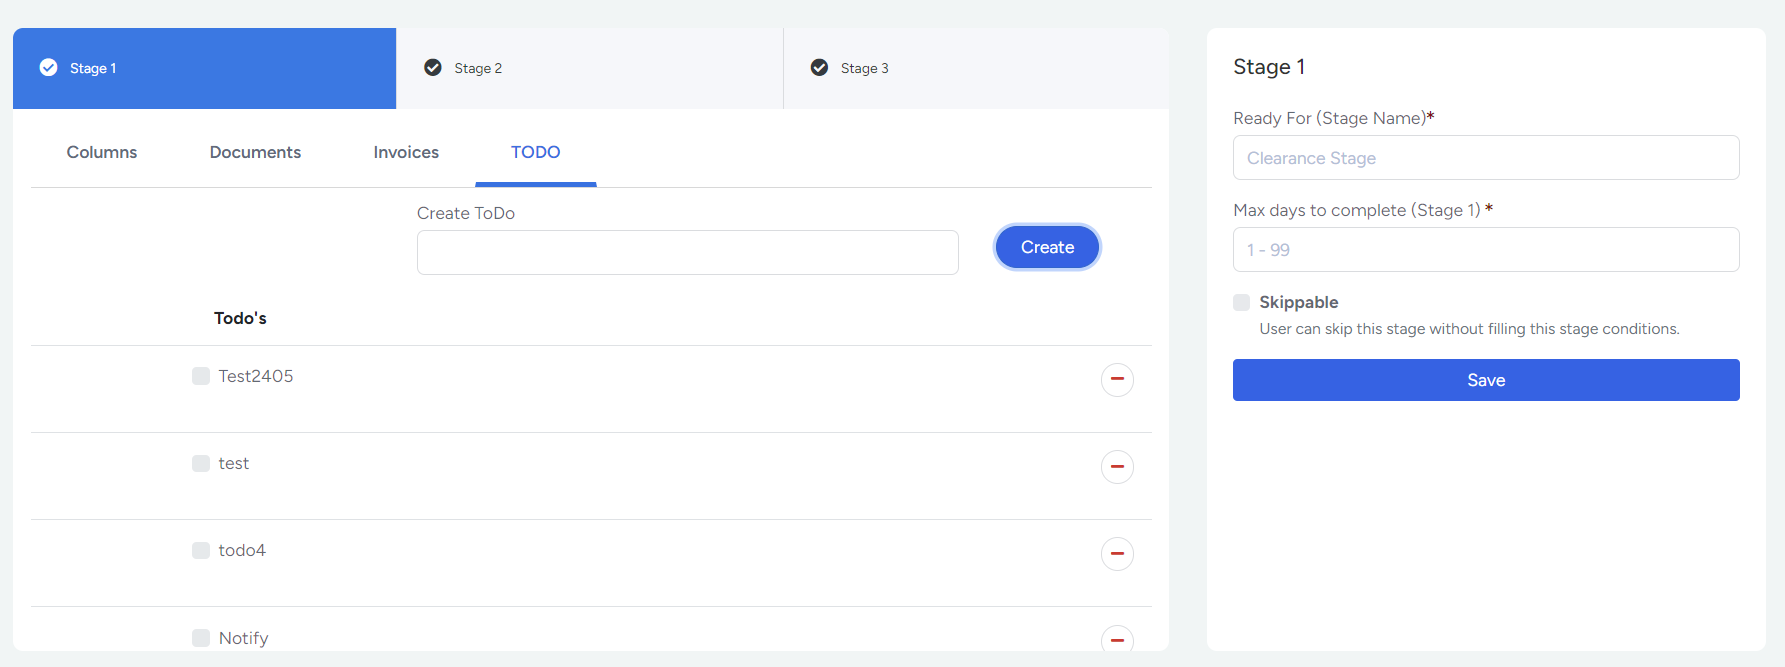
- Step 7: Update To Do Section
-
Enter a suitable name for the To-Do task based on your requirements, and then click on the Create button.
Choose the task as per your needs.
The selected To Do task will reflect on the right hand side of the page. Click on Save.
Created stages will be displayed in the list and can be Viewed, Edited and Deleted.
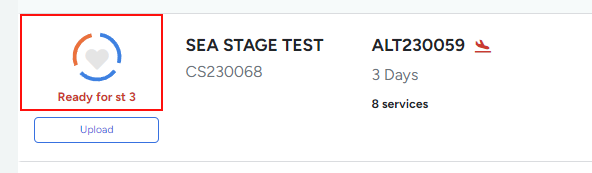
- Step 8: Manage the Stages
-
Create a Job, for the activity code that includes newly added Stages.
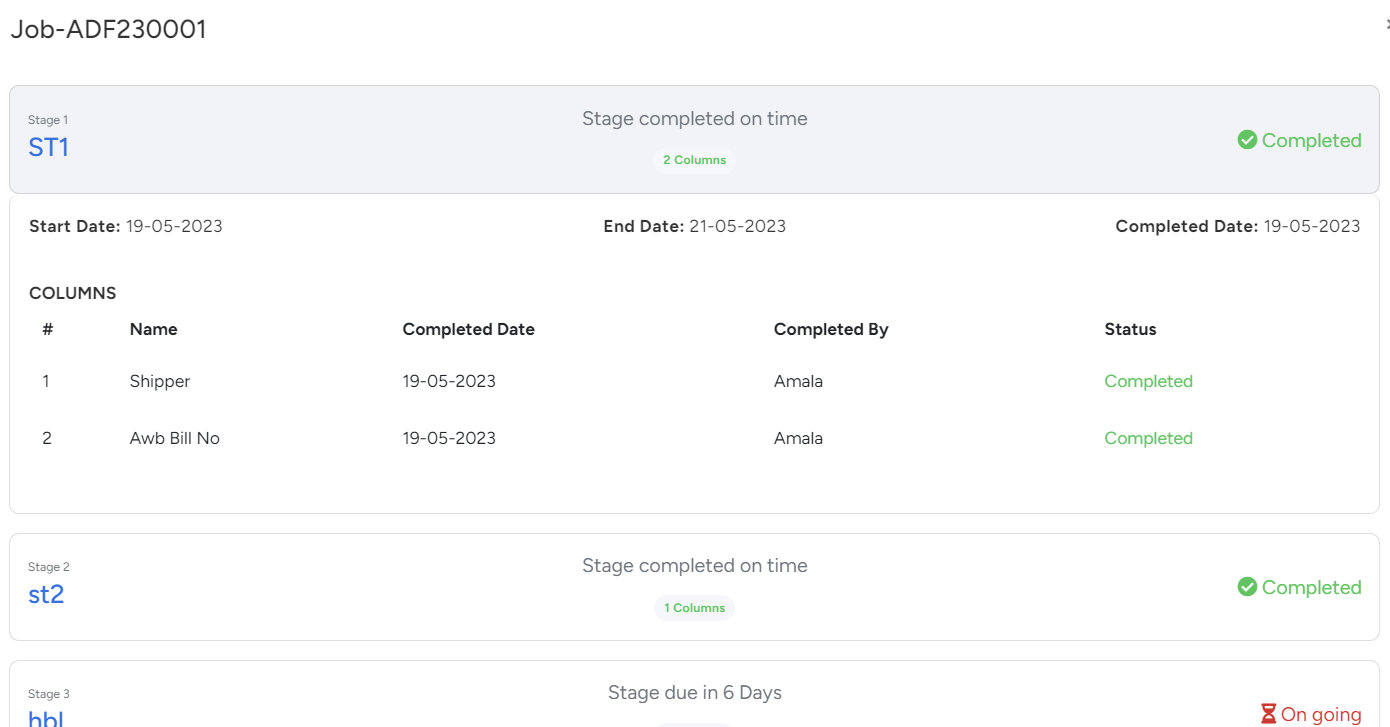
Step Indicator reveals the number of stages involved in a specific job.
Click on the stage to view the conditions to be fulfilled.Pending and completed tasks will be displayed.
Enable Switch to default stage if stages are not required for the specific job.
Fulfill all the required stages in order to successfully complete a job.
Job Share
The Job share module eases the process of data sharing.This feature helps forwarders to effortlessly collaborate, by sharing jobs with their suppliers and sub-branches.It's important to note that suppliers must possess a valid VAT.
Stages module in BridgeLCS enhances job management and enables efficient monitoring and organization of tasks, by assigning stages to specific activity codes.
NOTE
- AWB number must be unique
Here are the general steps for Job Share in BridgeLCS.
- Step 1: Copy the company tax number from Branch1 Settings.
-

- Step 2:
While creating supplier in Branch2, paste the copied tax number from Branch1. In this case, when creating the supplier enter the name of Branch 2, as Branch 2 will act as the supplier for Branch 1.
- Step 3:
While creating job in Branch 2,mention the created supplier in the supplier column.
- Step 4: In Branch 1, Go to Bridge Spotlight→ Job Share → Click on Link Job
-

- Step 5:
Enter the details of the Job and Save.
- Step 6:
Created Job will reflect in Branch 1 with a different Job Number.
- Step 7:
In Branch 2, to Sync the shipment changes,Edit the Job and click on Sync changes.
Viceversa steps are followed while creating job in Branch 1.
- Step 6:
Spaces
Space between BridgeLCS is an advanced file management system. The important objective of this module is to categorise and organise the documents and files uploaded.
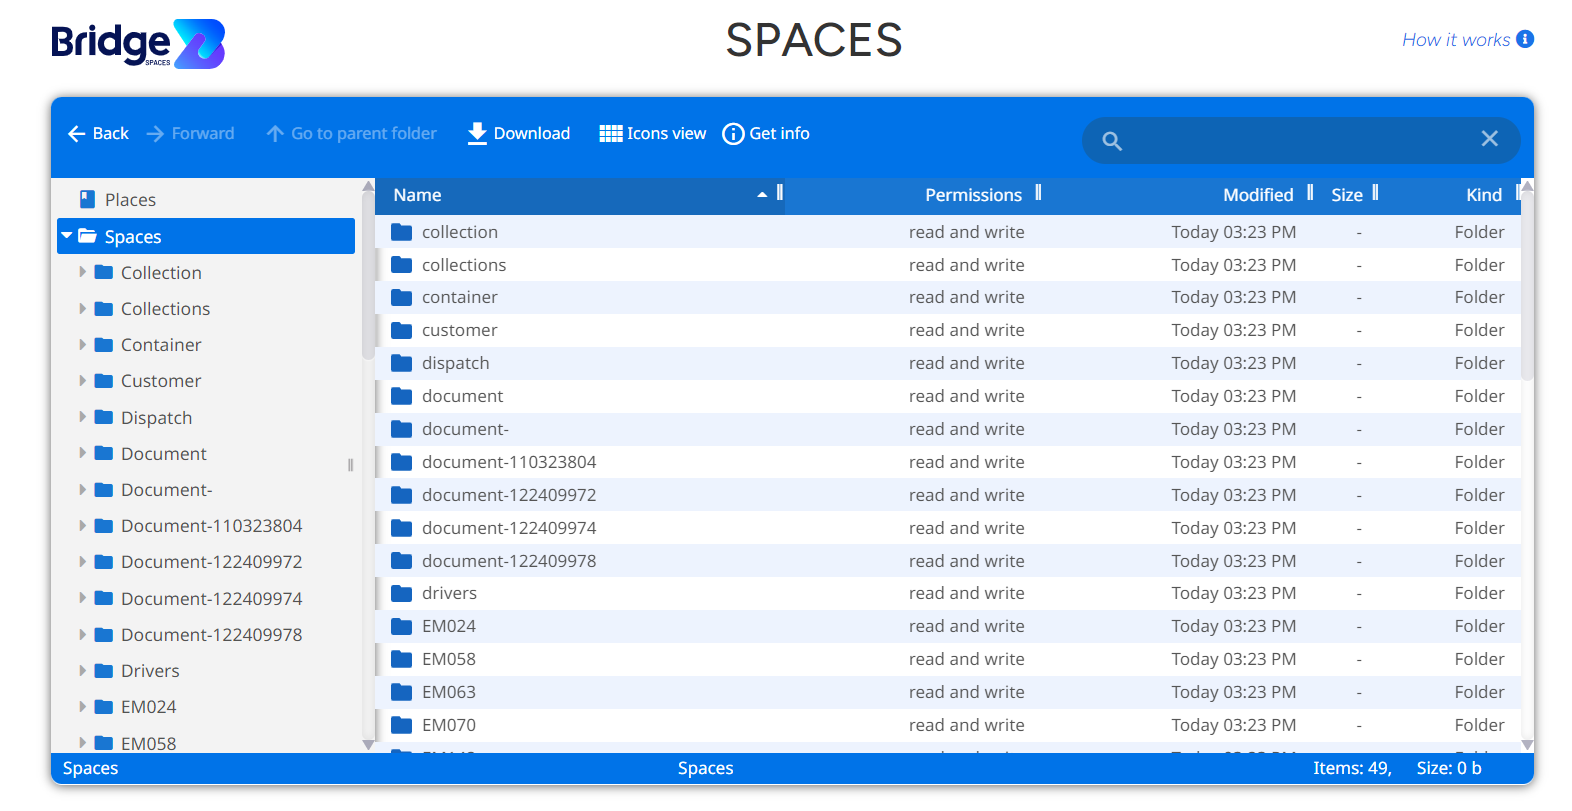
Here are the general steps to view the files in BridgeLCS.
- Step 1: .
- Go to Bridge Spotlight and click on Spaces
- Step 2:
- List of folders will be displayed on the side bar.
- Step 3:
- To view the subfolders, click on the arrow.Click on the required folder, to access the document.
Advanced Features
Download
Icons View or List View
Search Field with multiple filter options
NOTE
- In order to successfully complete a job, all stages must be completed.
- You can create stages for unlimited activities in the enterprise package whereas in the growth package, stages can be created for up to 5 activities.
Share my Invoice
The Share Invoice feature in BridgeLCS allows you to easily share invoices within the platform. However, for a smooth and seamless exchange, the other company must also use BridgeLCS. This ensures both parties can send and receive invoices efficiently.
- Step 1
- Create a Customer Profile
- Navigate to the Customers Module →Customers.
- Click New Customer to add a new profile.
- Fill in the required details:
- Customer Name
- Tax Number (mandatory for sharing invoices)
- Other necessary information.
- Click Save to complete the customer profile creation.
- Step 2
- Accept Terms and Conditions for Share Invoice Feature
- Go to the BridgeSpotlight Module and select Share My Invoice.
- A pop-up will display the Terms and Conditions for using the Share Invoice feature.
- Review and accept the terms to proceed. This step ensures compliance and grants access to the feature.

- Step 3
- Generate and Share an Invoice
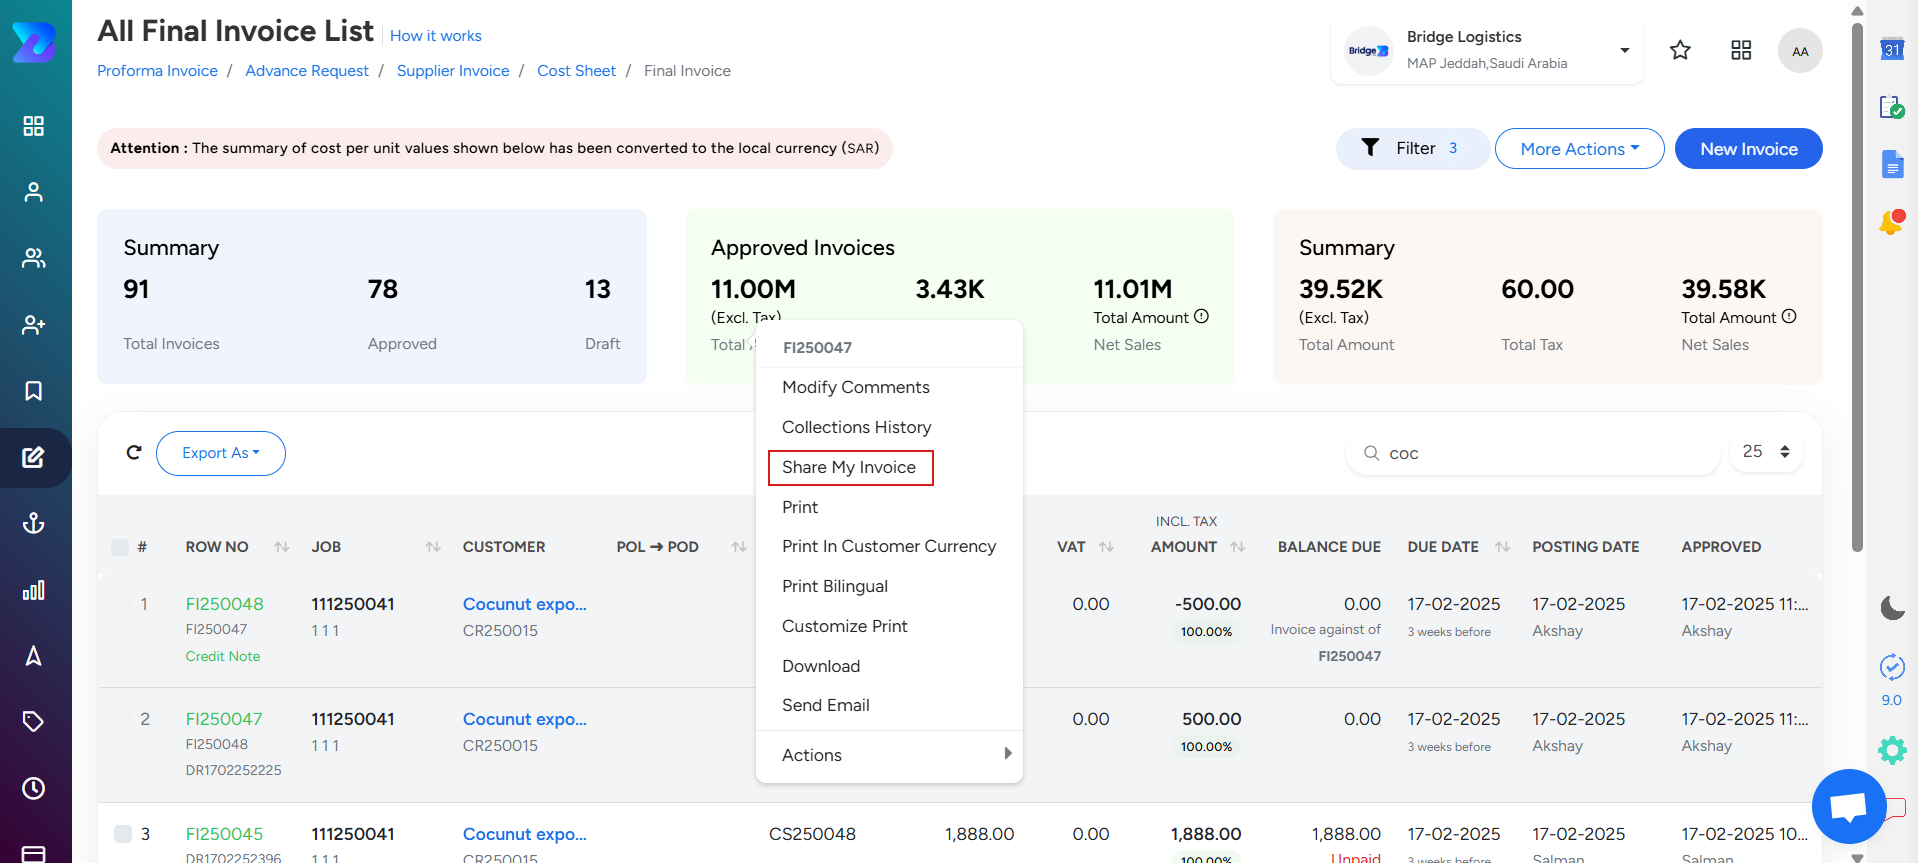
- Navigate to the Operations Module → Invoice.
- Generate an invoice for the newly created customer.
- Right-click on the specific final invoice you want to share.
- Select Share My Invoice from the menu.
- A confirmation pop-up will appear. Click Share my invoice to send the invoice to the customer.
- Step 4
- Manage Shared Invoices
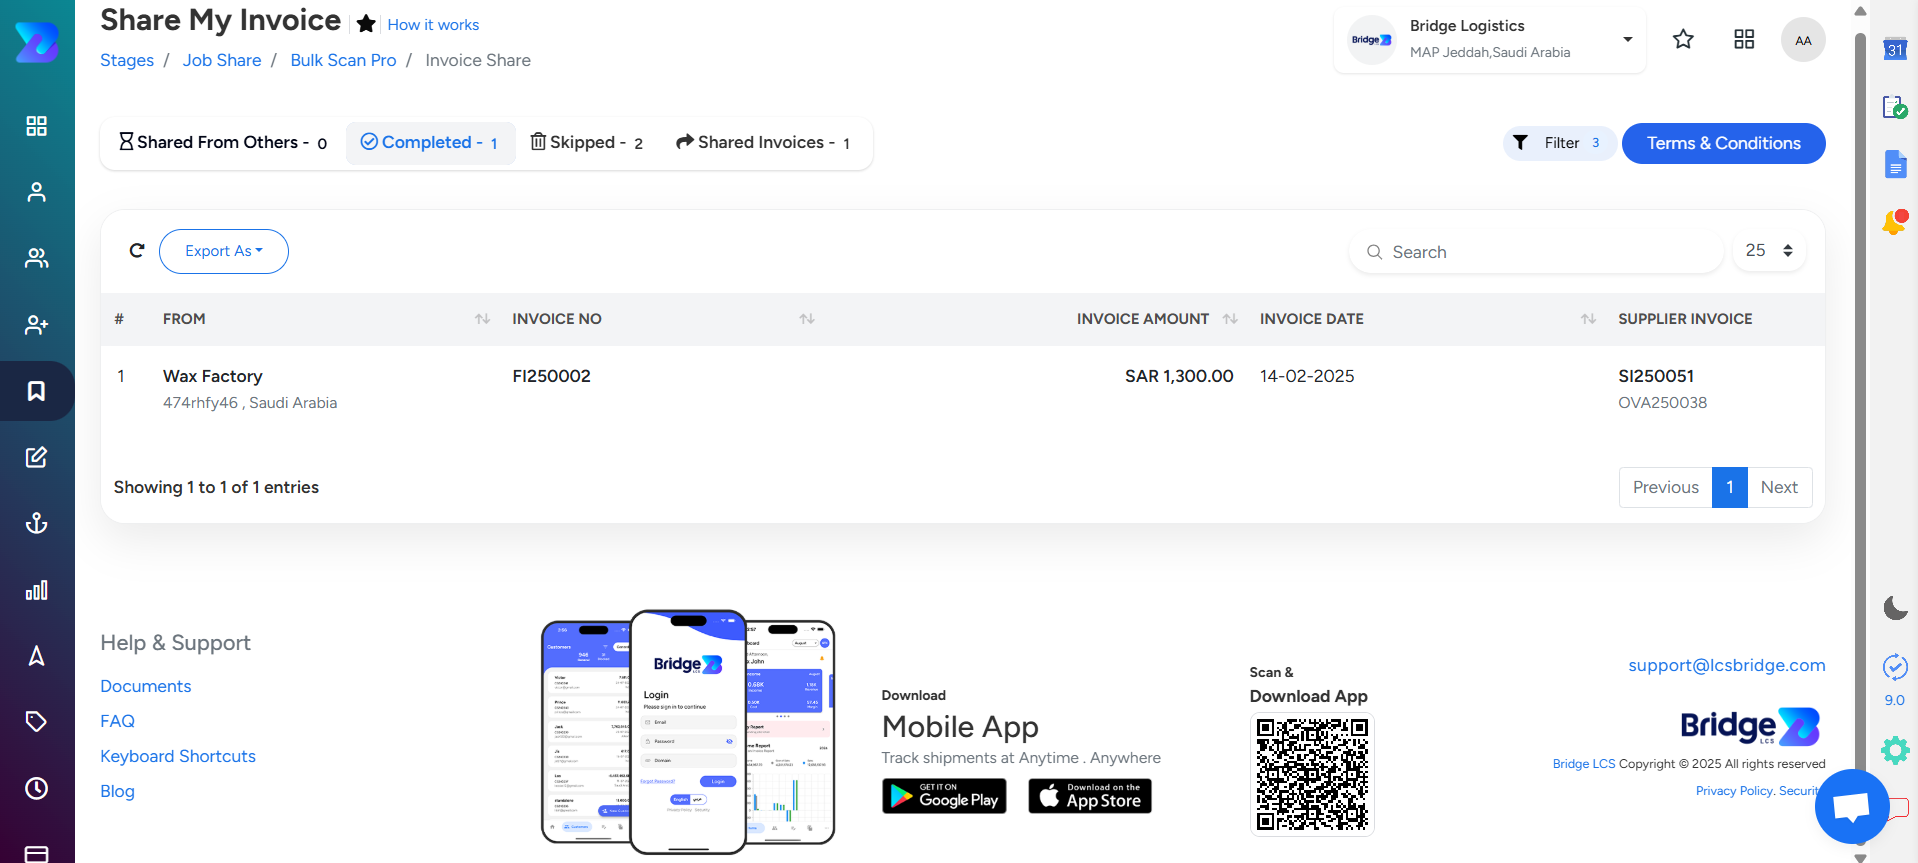
Go to the BridgeSpotlight Module and select Share My Invoice. You will see four tabs:1. Shared from Others
- This tab acts as an inbox for invoices sent to your company by other BridgeLCS users.
- Details displayed include:
- From,Invoice Number,Invoice Amount,Invoice Date, Actions (Convert to Invoice or Skip), Download as PDF option.
To process an invoice:
- Click Convert to Invoice.
- A Supplier Invoice Window will pop up.
- Review the details and click Save to complete the process.
- The invoice will move to the Completed Tab.
2. Completed Tab:
- Displays all invoices that have been fully processed.
- Serves as a record of completed transactions for easy reference and tracking.
3. Skipped Tab
- Invoices moved here are those you chose to Skip instead of processing or converting.
4. Shared Invoices Tab:
The Shared Invoices tab displays all invoices that have been shared with others. It also includes an option to view the invoice, allowing you to navigate directly to the print page for quick access.
- The VAT number of the customer should be recorded in the system inorder to share the invoice.
- The Export As feature allows users to copy and to export the list in CSV and Excel.
Bulk Scan Pro
The BULK SCAN PRO feature allows you to upload multiple invoices received from suppliers for scanning and processing directly into the system. Using advanced OCR, Optical Character Recognition technology, it extracts key data from scanned invoices, streamlining data entry and making invoice management efficient.
- Step 1
- Access Bulk Scan Pro Invoice Navigate to the Bridge Spotlight Module → Bulk Scan Pro.
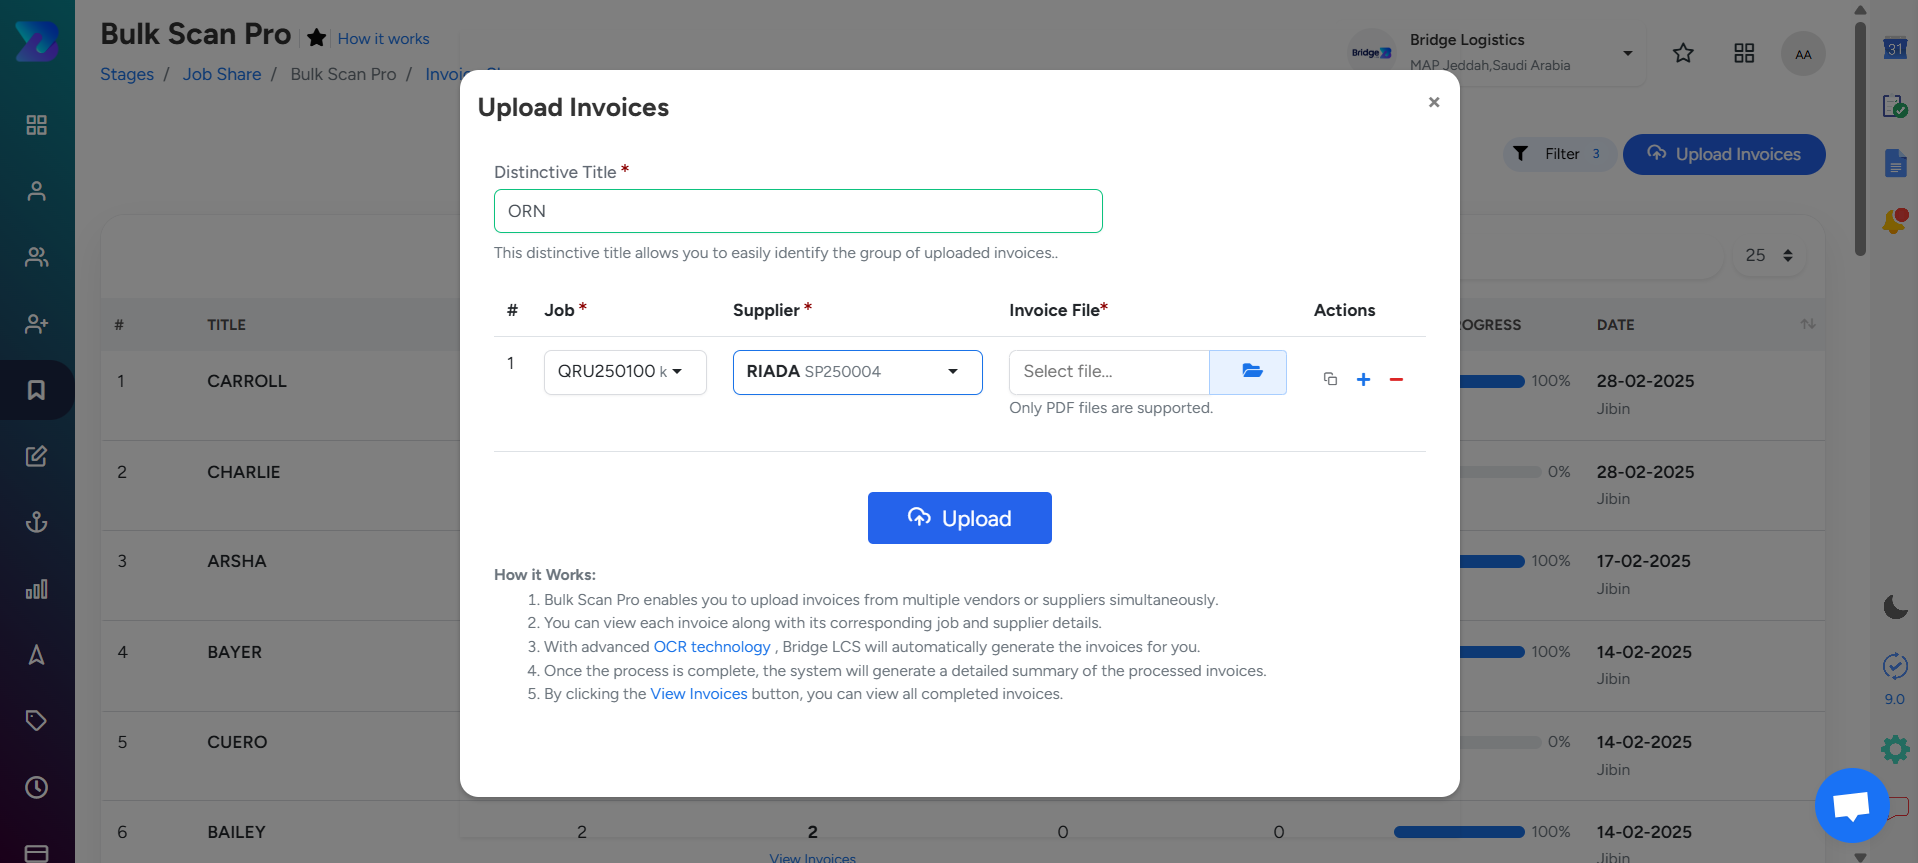
- Step 2
- Upload Invoices
- Click on Bulk Scan Pro.
- Select Upload Invoice to open the upload interface.
- The interface provides the following fields:
- Distinctive Title: Add a distinctive title to identify the group easily.
- Job: Add a job to the invoice.
- Supplier: Select the supplier.
- Invoice File: Upload the invoice files.
- If required use the Clone button to replicate rows for uploading multiple files. Once all details are filled, click the Upload button.
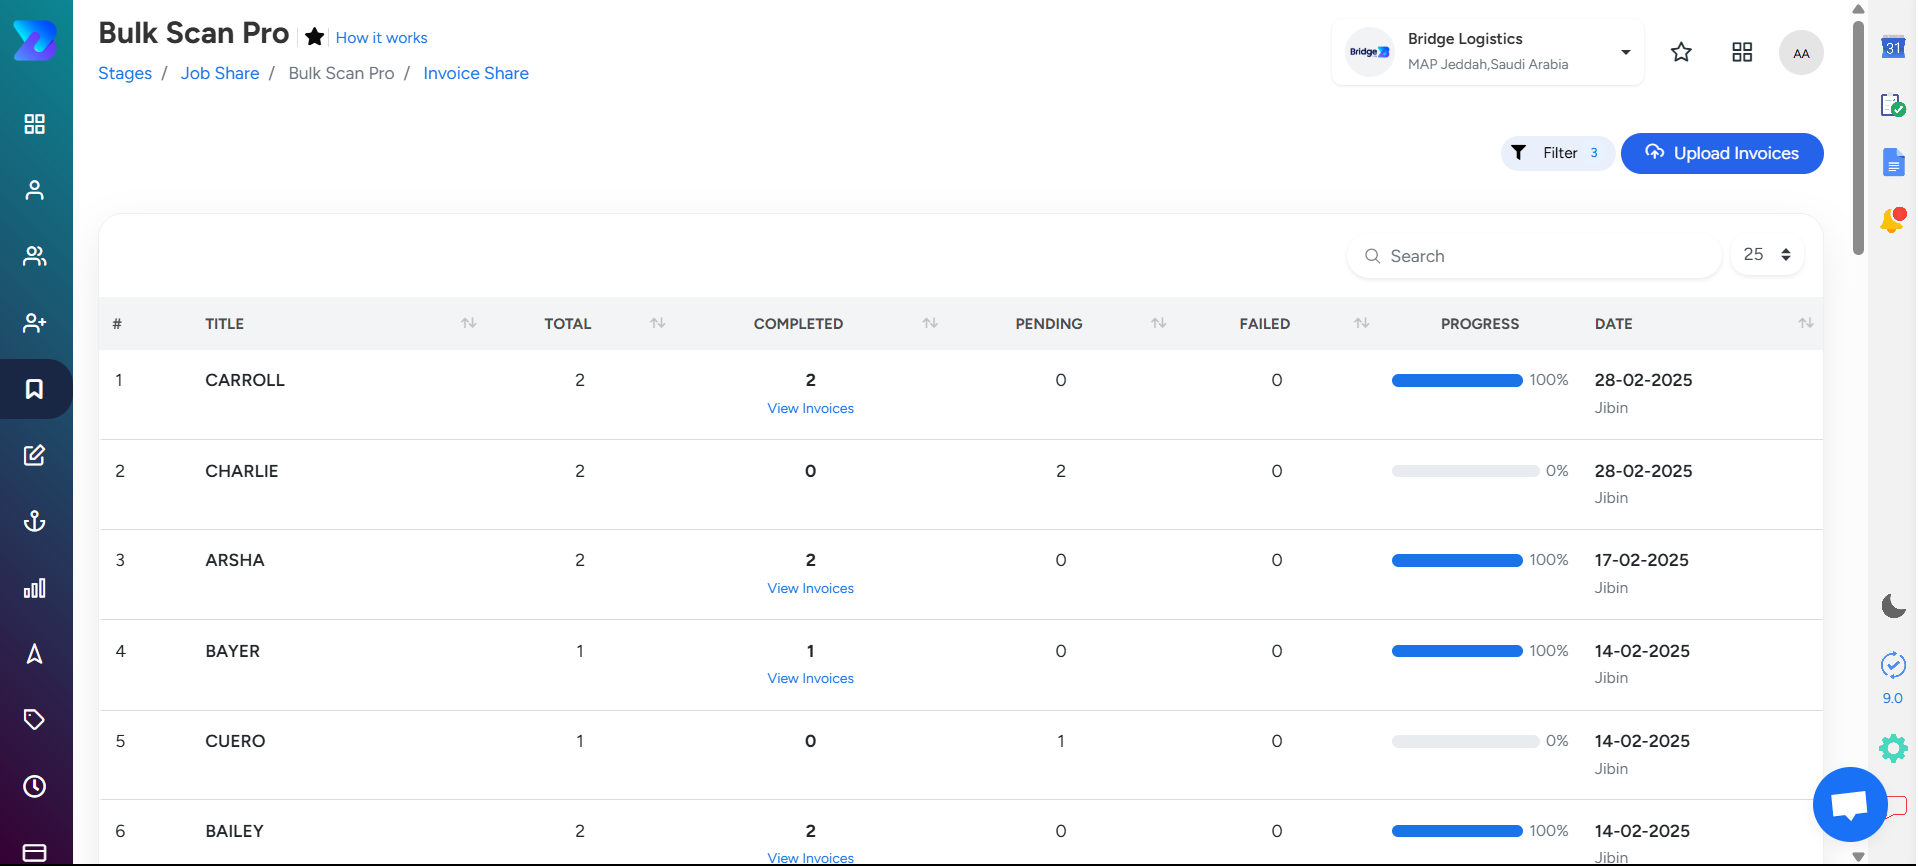
- Step 3
- Review Uploaded Details
- After uploading, the following details will be displayed on the screen:
- Title
- Total
- Completed
- Pending
- Failed
- Progress
- Date
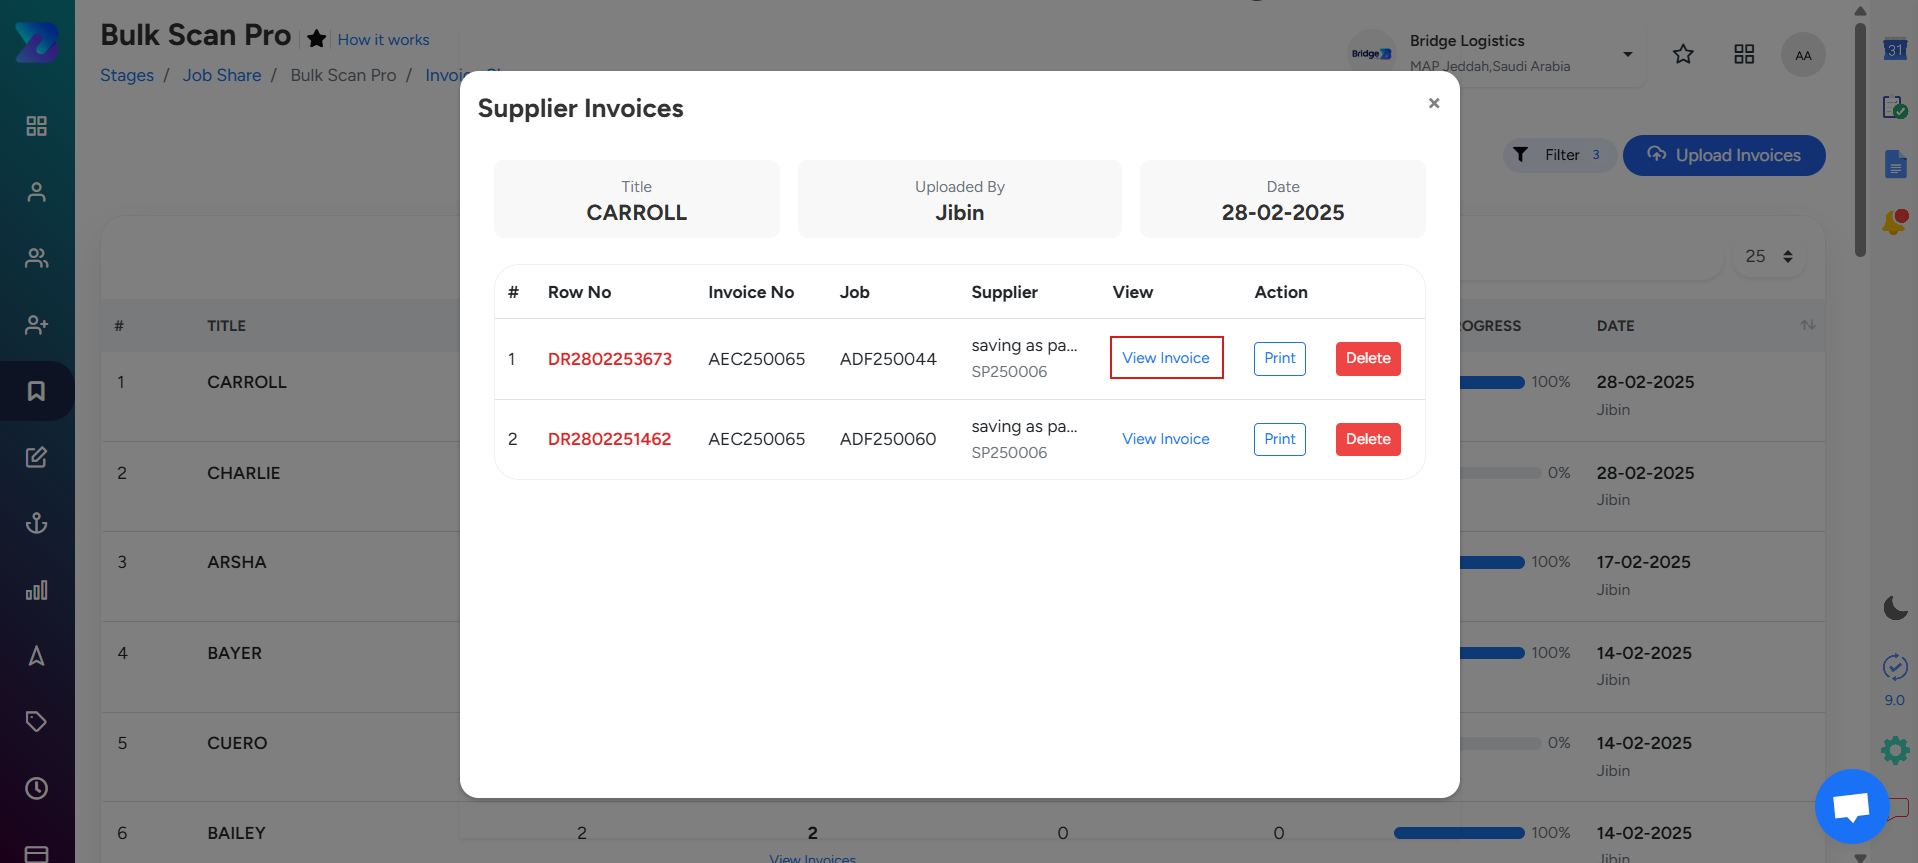
- Step 4
- To view, Verify and Approve Invoices
- Click on View Invoices available under the completed column.
- A Supplier Invoice Popup Window will appear
- Click on View Invoice to navigate to the supplier invoice.
- Cross-check the data for accuracy.
- Click Verify and Save to confirm.
- Step 5
- To Approve Invoices
- The scanned invoice will be in Draft status.
- Right-click on the specific supplier invoice.
- Select Approve.
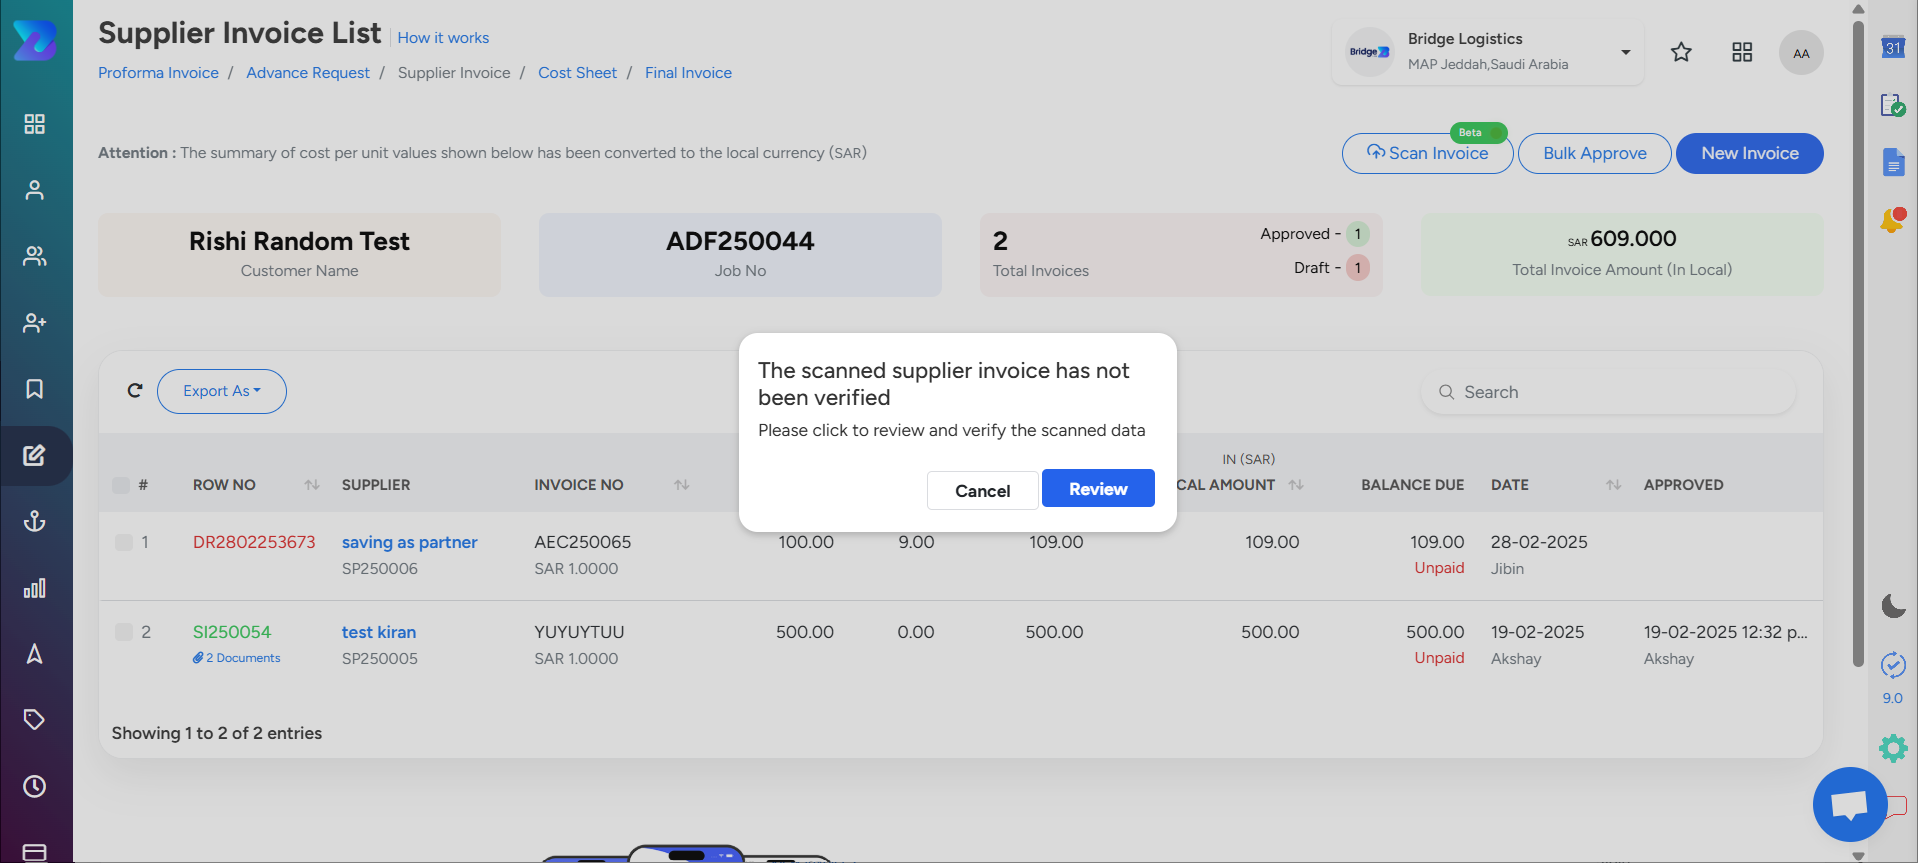
- Step 6
- For Unverified Invoice Approval.
- If the invoice has not been edited or reviewed.
- Right-click on the specific supplier invoice and approve
- A prompt will appear stating, “The scanned supplier invoice has not been verified.
- Please click to review.
- Follow the step 4 and 5
Note:
- The scan invoice feature utilizes cloud-based OCR technology in the background, the imported data may not always be accurate. Please review and verify the invoice data before proceeding further
- Only pdf files are supported