Transportation
Truck Allocation
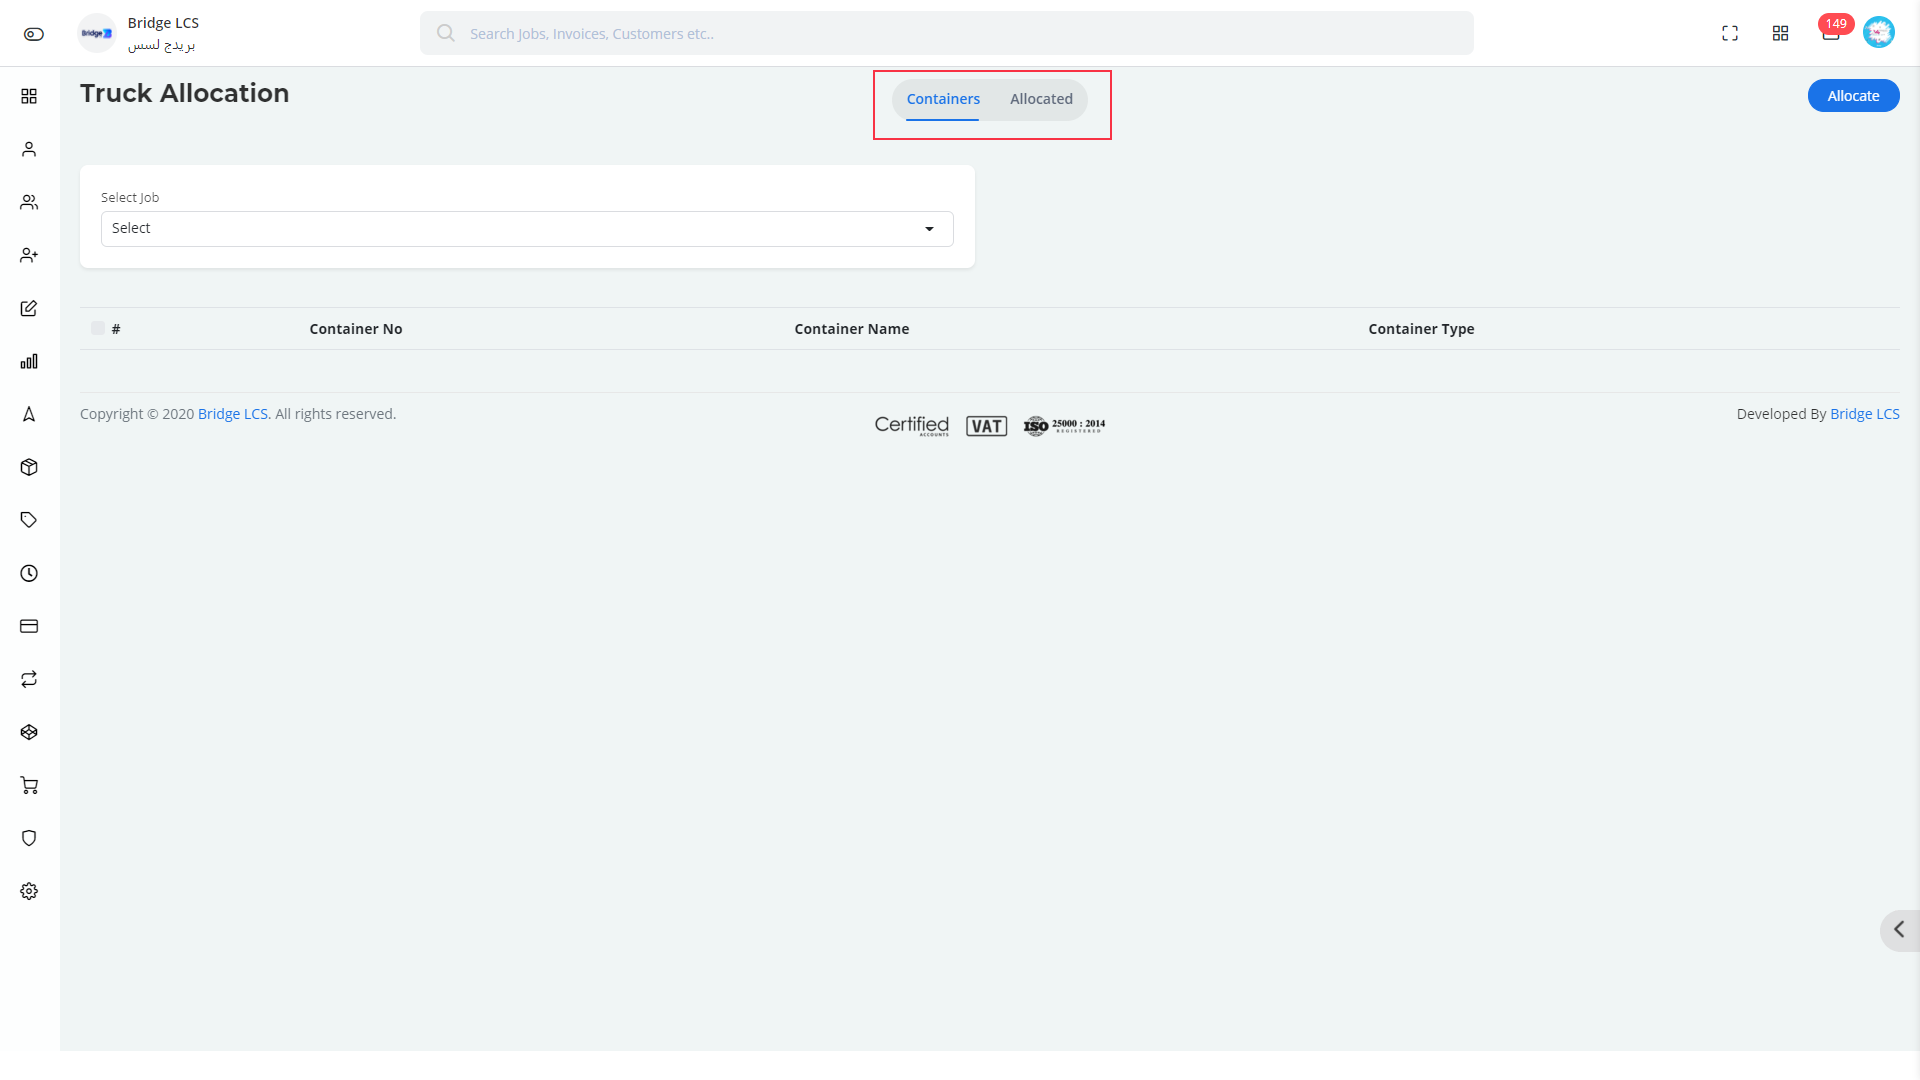
Truck Allocation has two subsegments which explains the following
- Containers
- Allocated
Flow Chart
Containers
List out the containers which are based on the chosen job having at least one container with terminal.
How to Allocate Containers to Trucks and Drivers
- Step 1
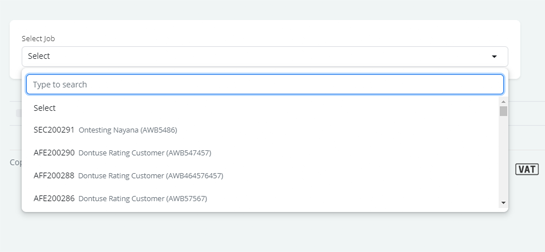
- Select the Job for which you need to assign a truck from the drop down given in the top section {Jobs having no less than one Container with terminal needs to be selected}
- Step 2
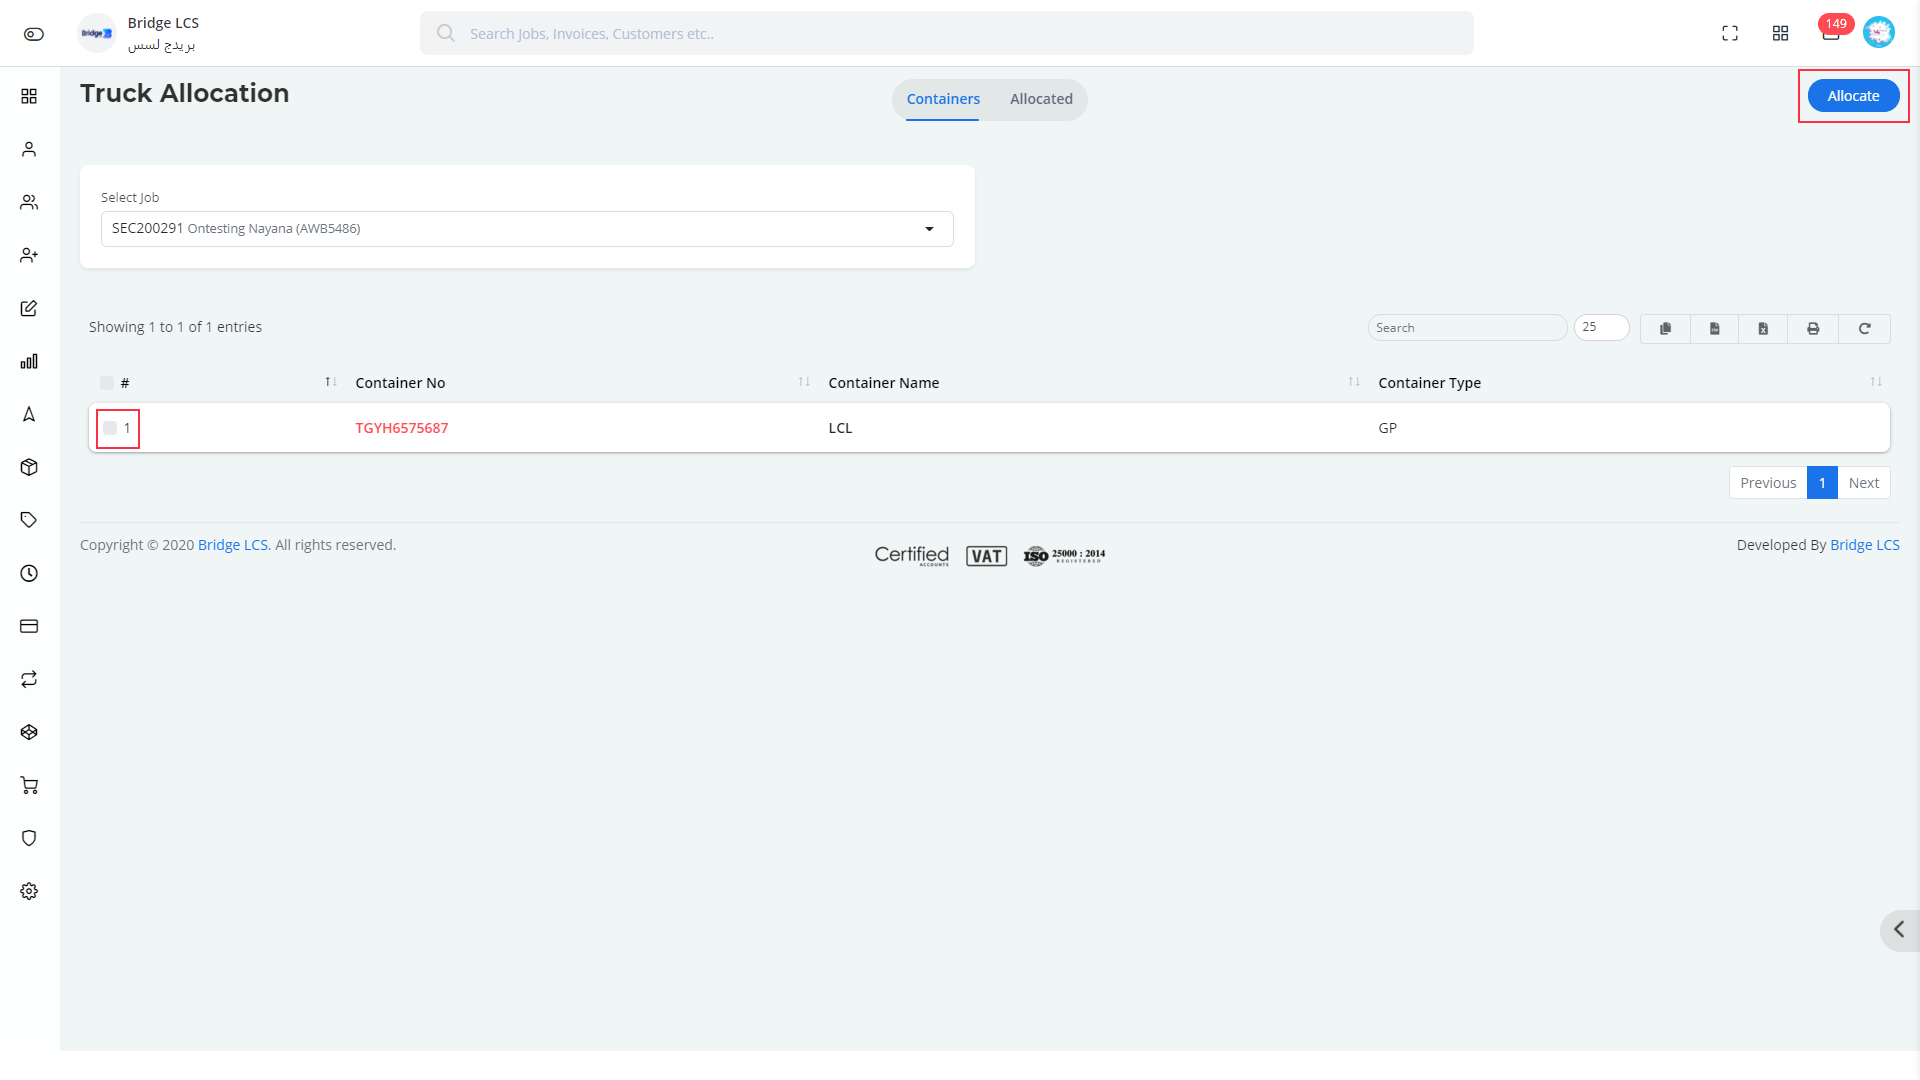
- Select the list of containers to be allocated and Select Allocate Button available on the right Corner.
- Step 3
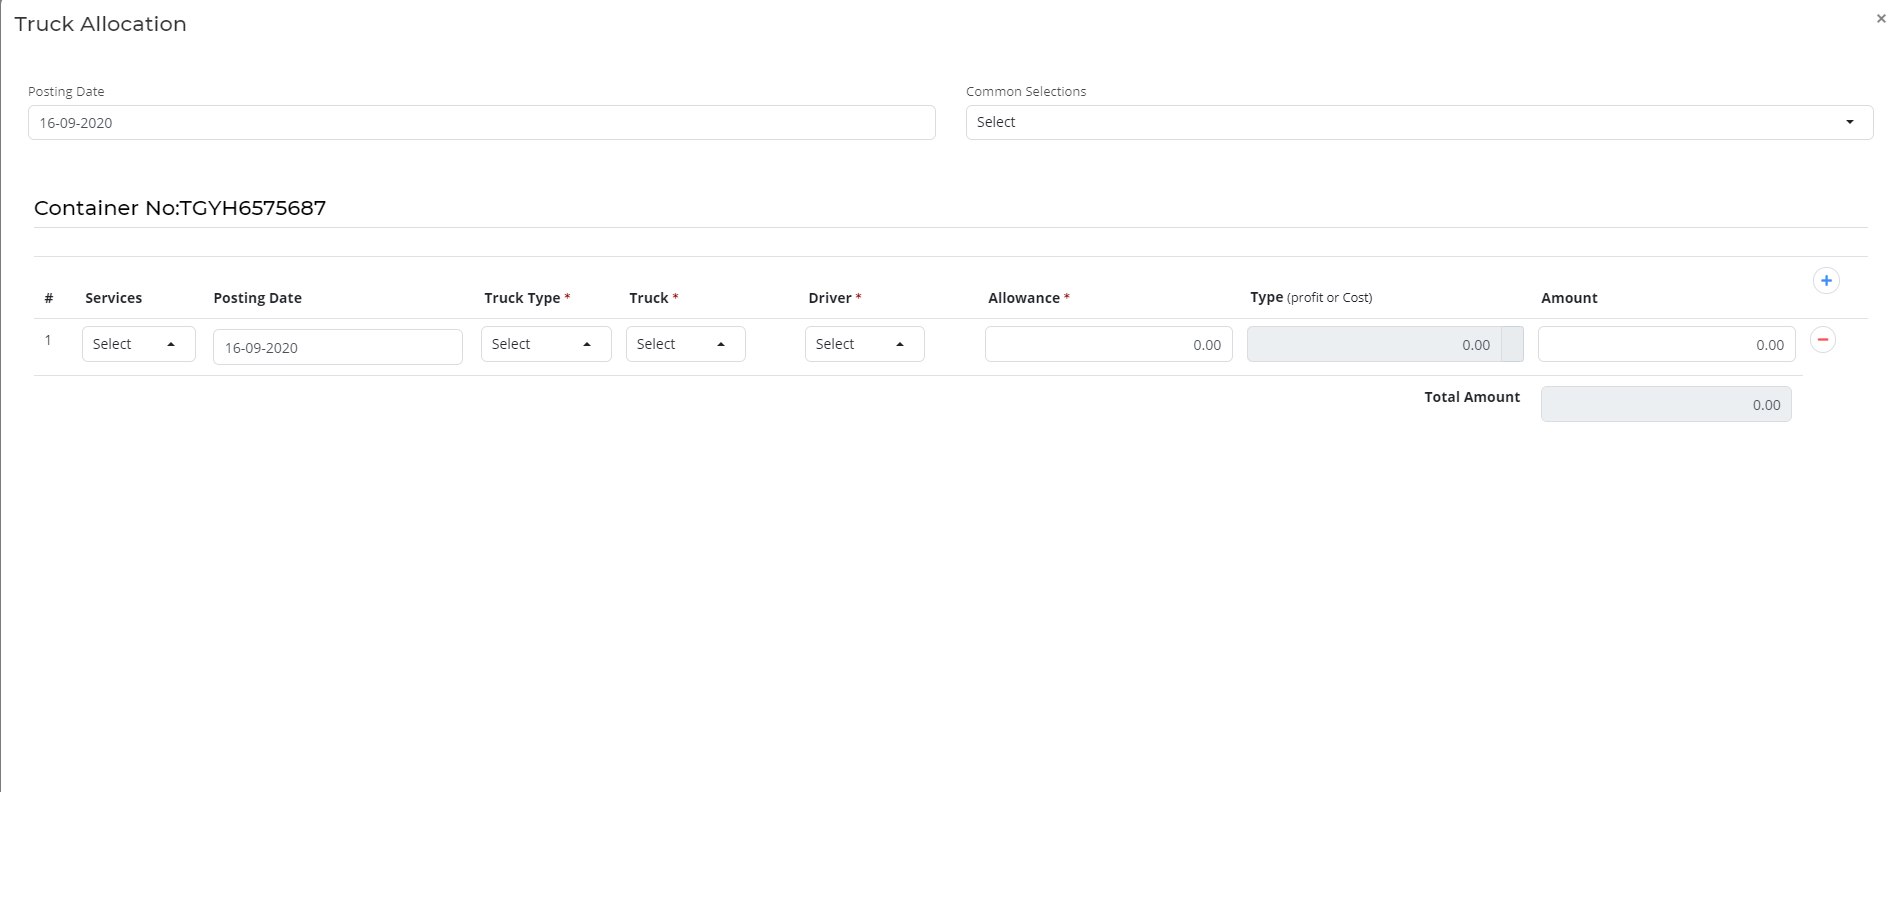
- A pop up window will be opened where the following needs to be filled,
The Top Section has Posting date and Common Selections.
- Step 4
- Select the type of truck (*){Company / Company1/Lease} , truck (*)associated with the type of truck and driver(*).
- Step 5
- Enter the driver allowance(*), type and Amount(*)
- Step 6
- Click Save to proceed.
Once it is Saved, the Container is moved to the Allocated Section.
Allocated
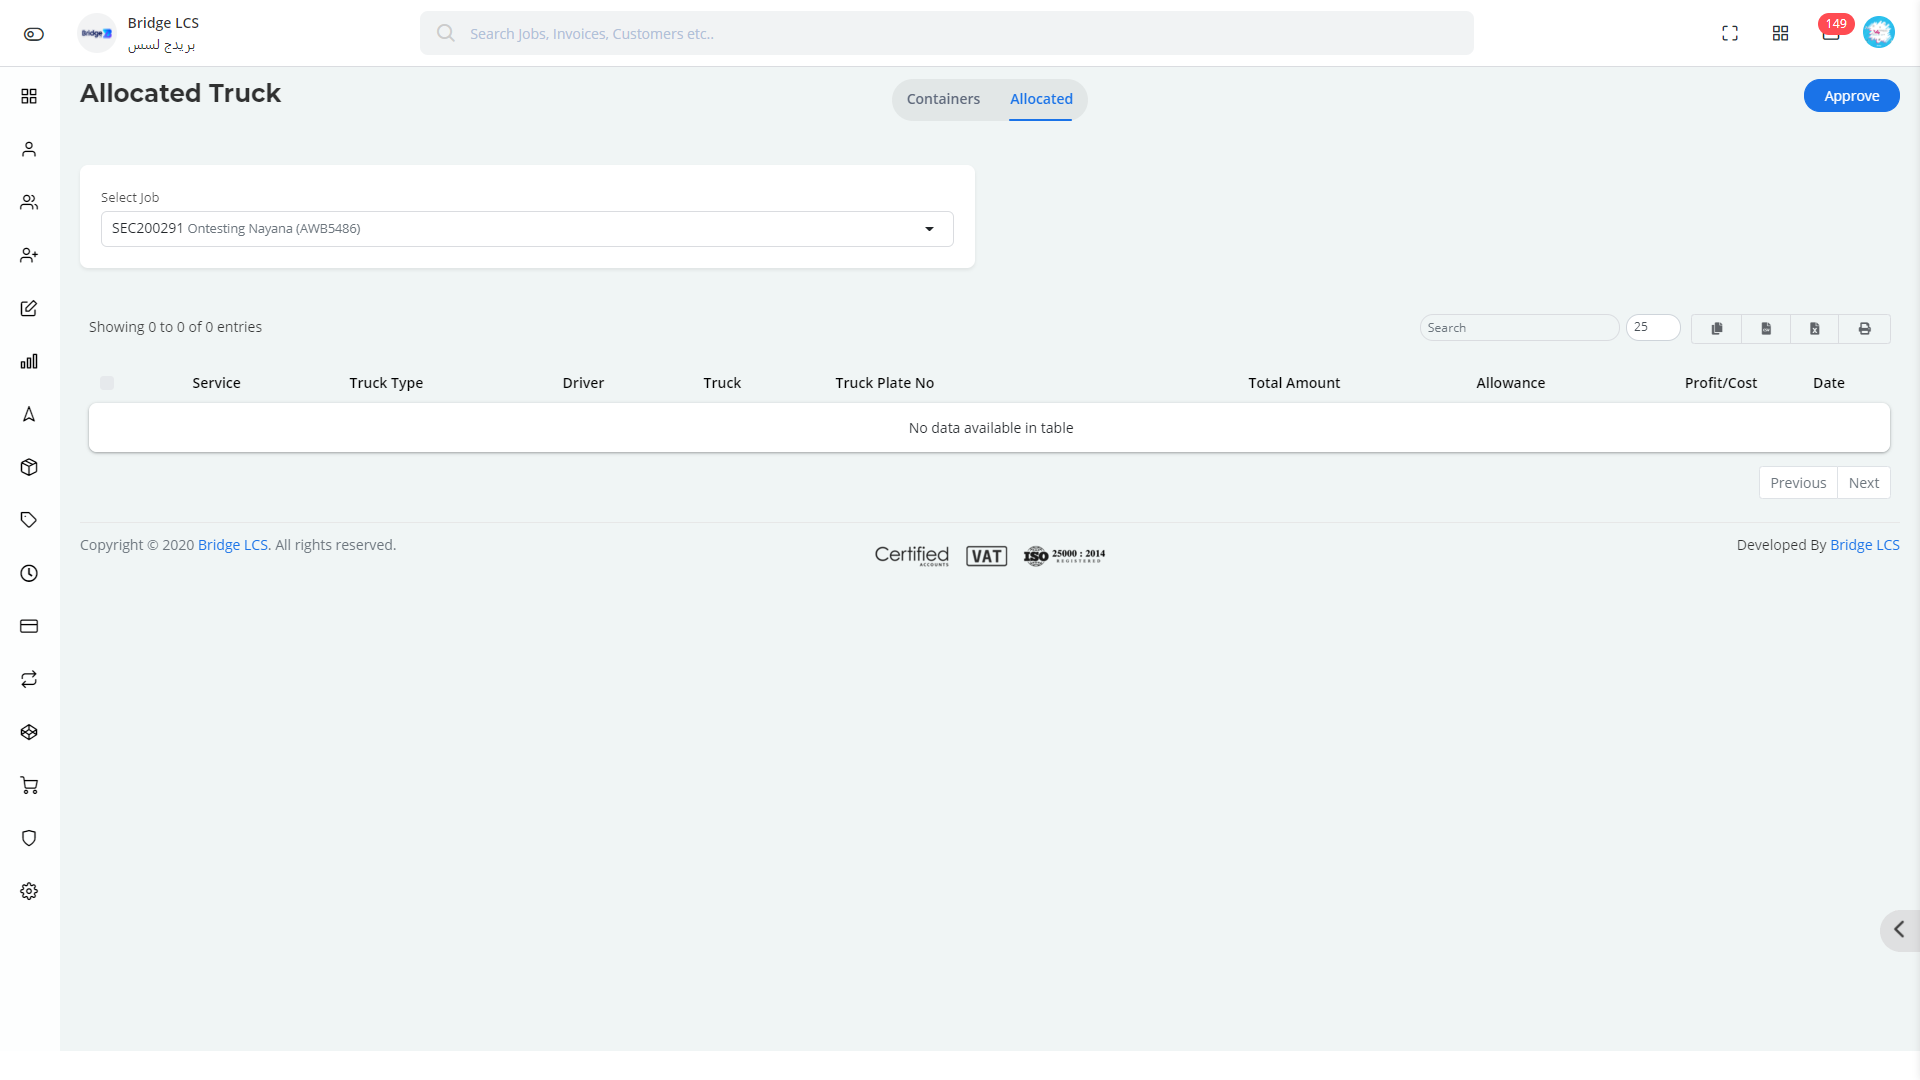
The Allocated section has the list of allocated containers based on the job selected in the previous section . This can be changed or a different list can be fetched by selecting the required job.
The Initial Stage of Allocated Truck is Unapproved which is indicated in Red Color and this needs to be Approved to work on this further.
Approved list is indicated in the Green Color Service Name.
Approved Container cannot be edited unless it is disapproved again.
The Video inserted below explains you the working of " Truck Allocation " to have a better understanding
Driver Manager
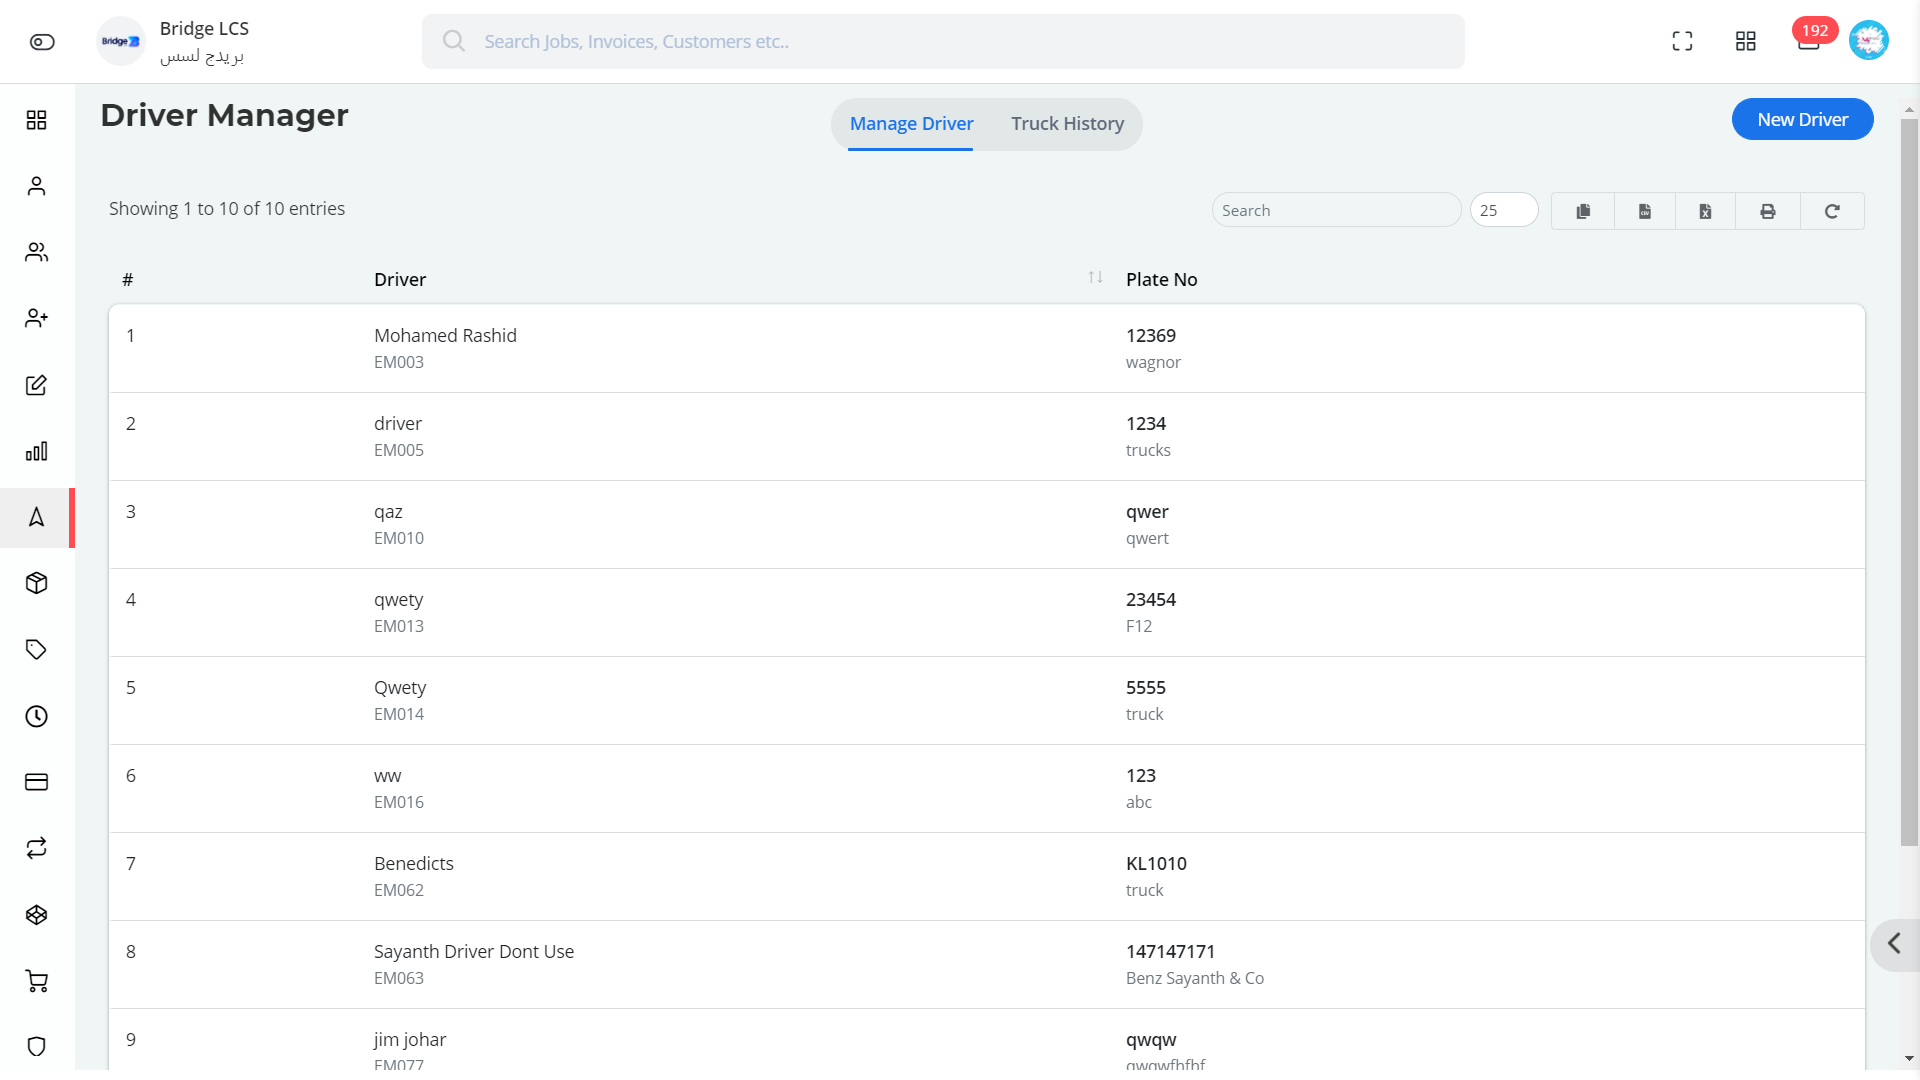
The Driver Manager section depicts the driver along with the truck / Vehicle assigned.
This further has two sub segments ,
- Manage Driver
- Truck History
Manage Driver
This section has the list of drivers which is assigned to a particular Truck.
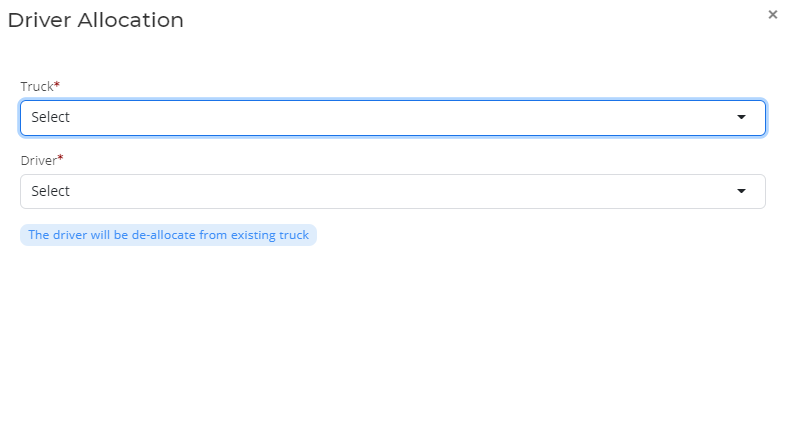
How to Allocate New Driver
- Step 1
- Go to Transportation --> Driver Manager --> New Driver.
- Step 2
- Select the Truck (*) { created through Masters --> Truck } and Driver (*) { created through settings --> Employees).
- Step 3
- Click Save to proceed.

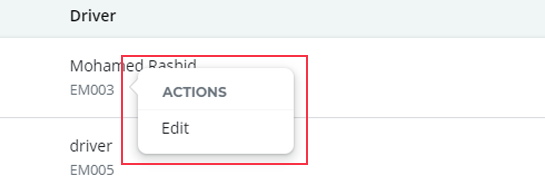
Actions Performed
Right Click on the column to get the Edit Option.
Double Clicking on the column gives you the view of attributes given.
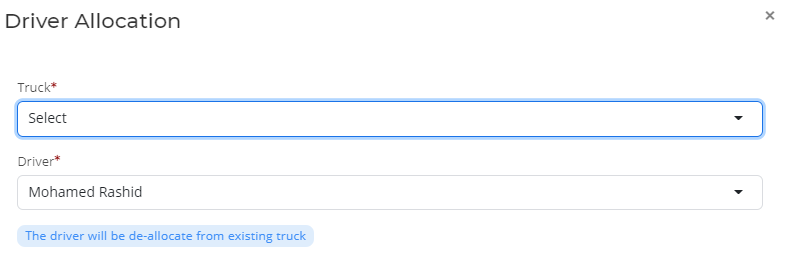
Truck History
Truck History furnishes the number of times the truck is used / allotted for a particular service.
This also shows the current driver assigned to the truck.
Actions Performed
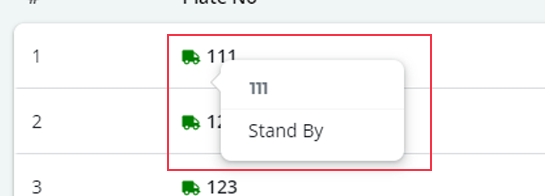
Right Clicking on the column provides the below options based on the status of the truck,
Standby {indicated in Red Colour }- If the status of the truck is in ready to use, you can convert it to standby .
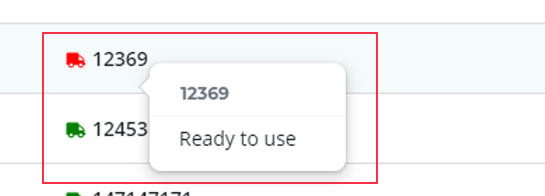
Ready to use {indicated in Green Colour } - If the status of the truck is in Standby, you can convert it to read to use.
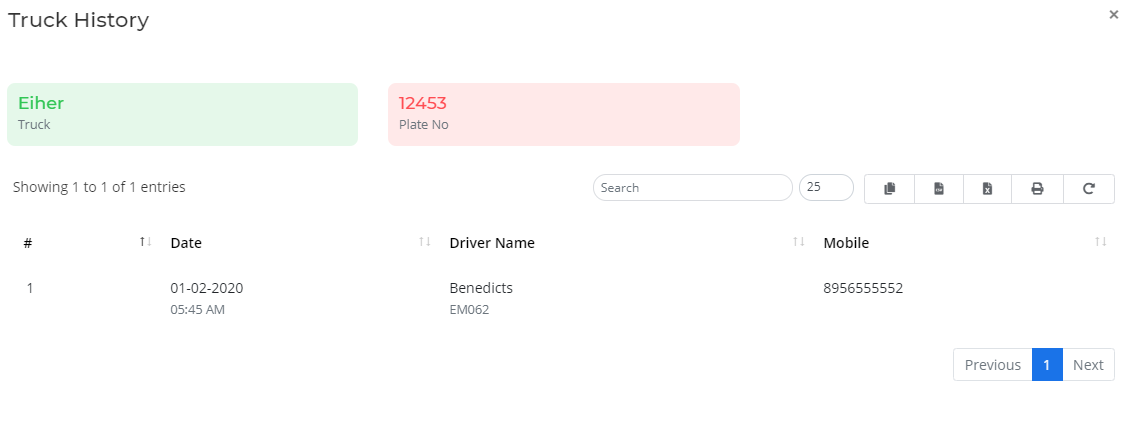
Double Clicking on the Column gives you the list of drivers associated earlier and currently with the truck along with the mobile number.
The Video inserted below explains you the working of " Driver Manager " to have a better understanding
Accounting
Accounting section has four sub segments,
- Terminal Cost
- Maintenance Cost
- Truck Payable
- Truck Aging
Terminal Cost
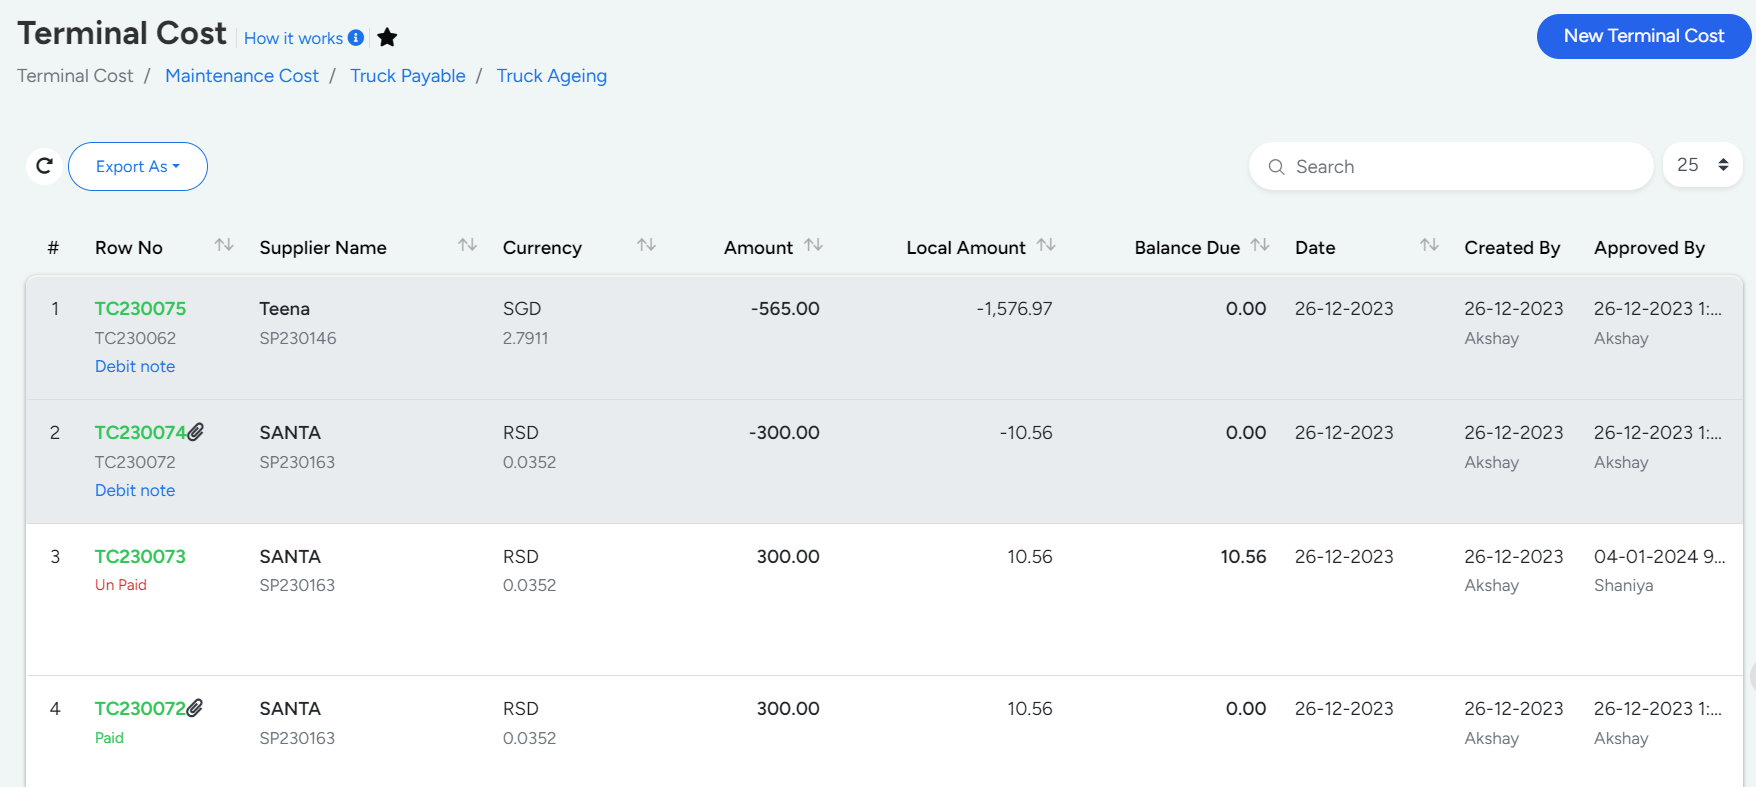
Terminal Cost has the list of Amount paid / allocated to each terminal .
Approved Terminal Cost is indicated in Green Colour and Unapproved Terminal Cost is indicated in Red Colour.
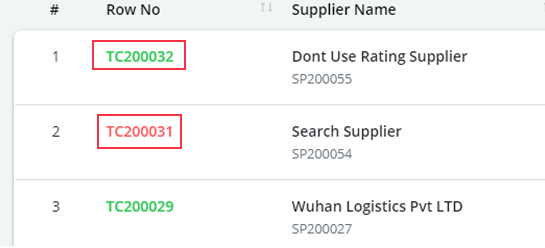
Terminal Cost must be approved to create Payment Vouchers.
Approved Data cannot be edited unless it is disapproved again.
How to Create New Terminal Cost
- Step 1
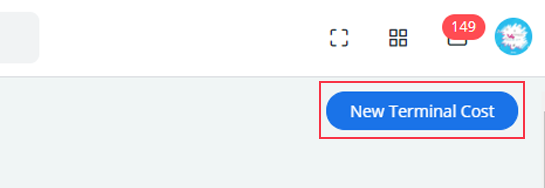
- Go to Transportation --> Accounting --> Terminal Cost --> New Terminal Cost.
- Step 2
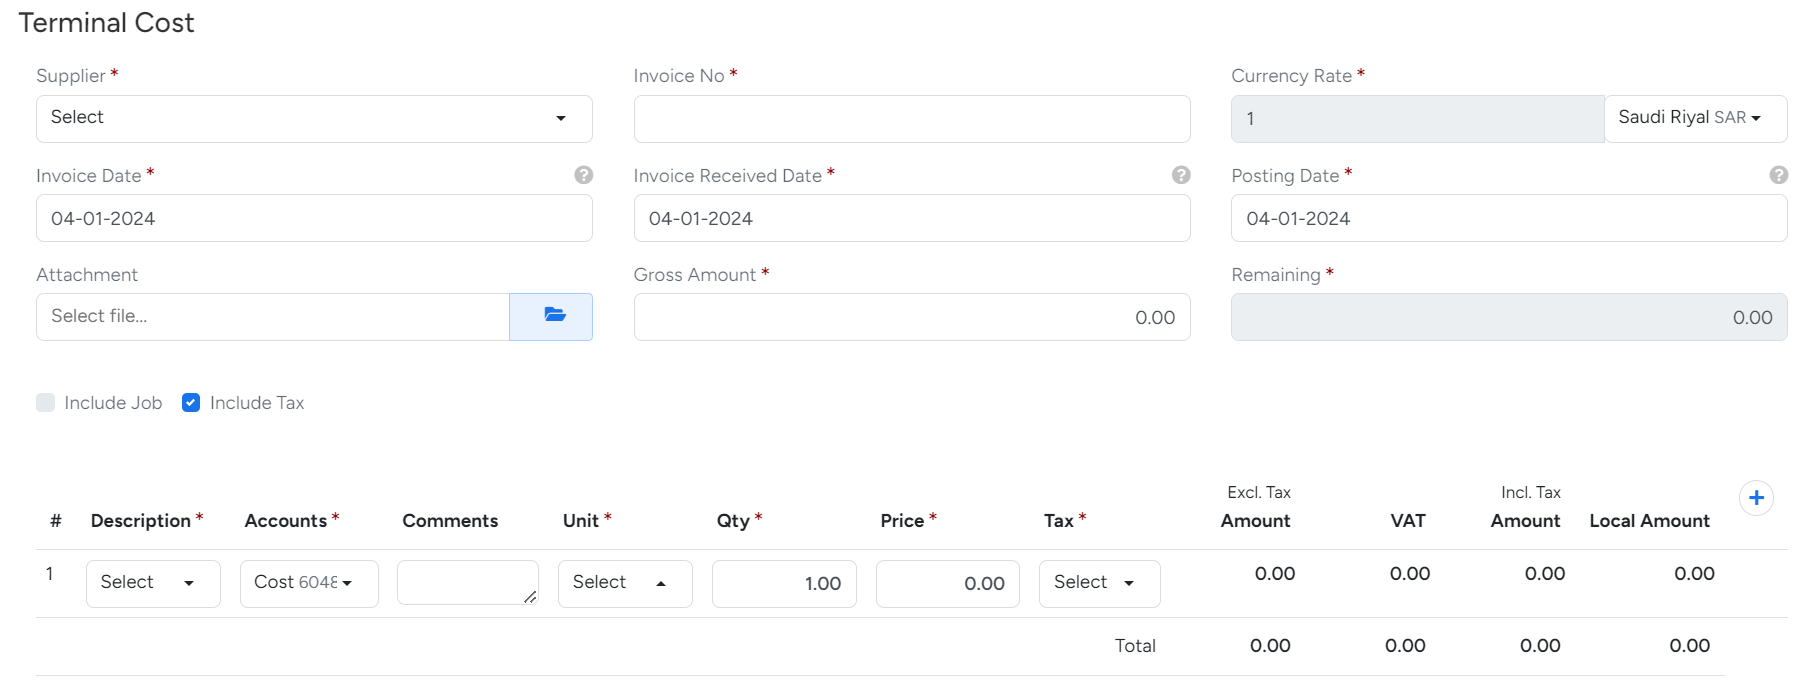
- Select the Supplier(*) , Fill the Invoice Number (*), Invoice Date and Posting Date.
- Step 3
- Upload the document if you have any.
- Step 4
- Fill the Gross Amount (*).
- Step 5
- Fill the required details like job, description, quantity, Price and Tax.
- Step 6
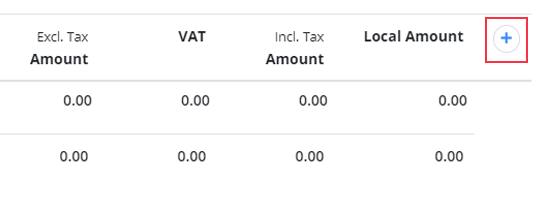
- Add multiple jobs if required using the "+" button available.
- Step 7
- Click Save and Proceed.


Payment Vouchers of Approved Costs can be created from Finance --> Vouchers.
Flow Chart
Actions Performed
Right Click on the column to get the following,
- Approve ( on Unapproved data)
- Disapproved (on Approved data)
- Print (both unapproved and approved)
- View (both unapproved and approved)
- Edit (on unapproved )
- Delete (on unapproved)
- Upload (both unapproved and approved)
The Video inserted below explains you the working of " Terminal Cost " to have a better understanding
Maintenance Cost
Maintenance Cost furnishes the amount spent on the vehicles. It involves the attributes like , serviced truck , associated supplier, Amount with Tax.

How to Create New Maintenance Cost
- Step 1
- Go to Transportation --> Accounting --> Maintenance Cost --> New Maintenance Cost.
- Step 2
- Select the Supplier(*) , Truck(*).
- Step 3
- Fill the Invoice Number (*), Invoice Date and Posting Date.
- Step 3
- Upload the document if you have any.
- Step 4
- Fill the Gross Amount (*).
- Step 5
- Fill the required details like description, quantity, Price and Tax.
- Step 6
- Add multiple jobs if required using the “+” button available.
- Step 7
- Click Save and Proceed.
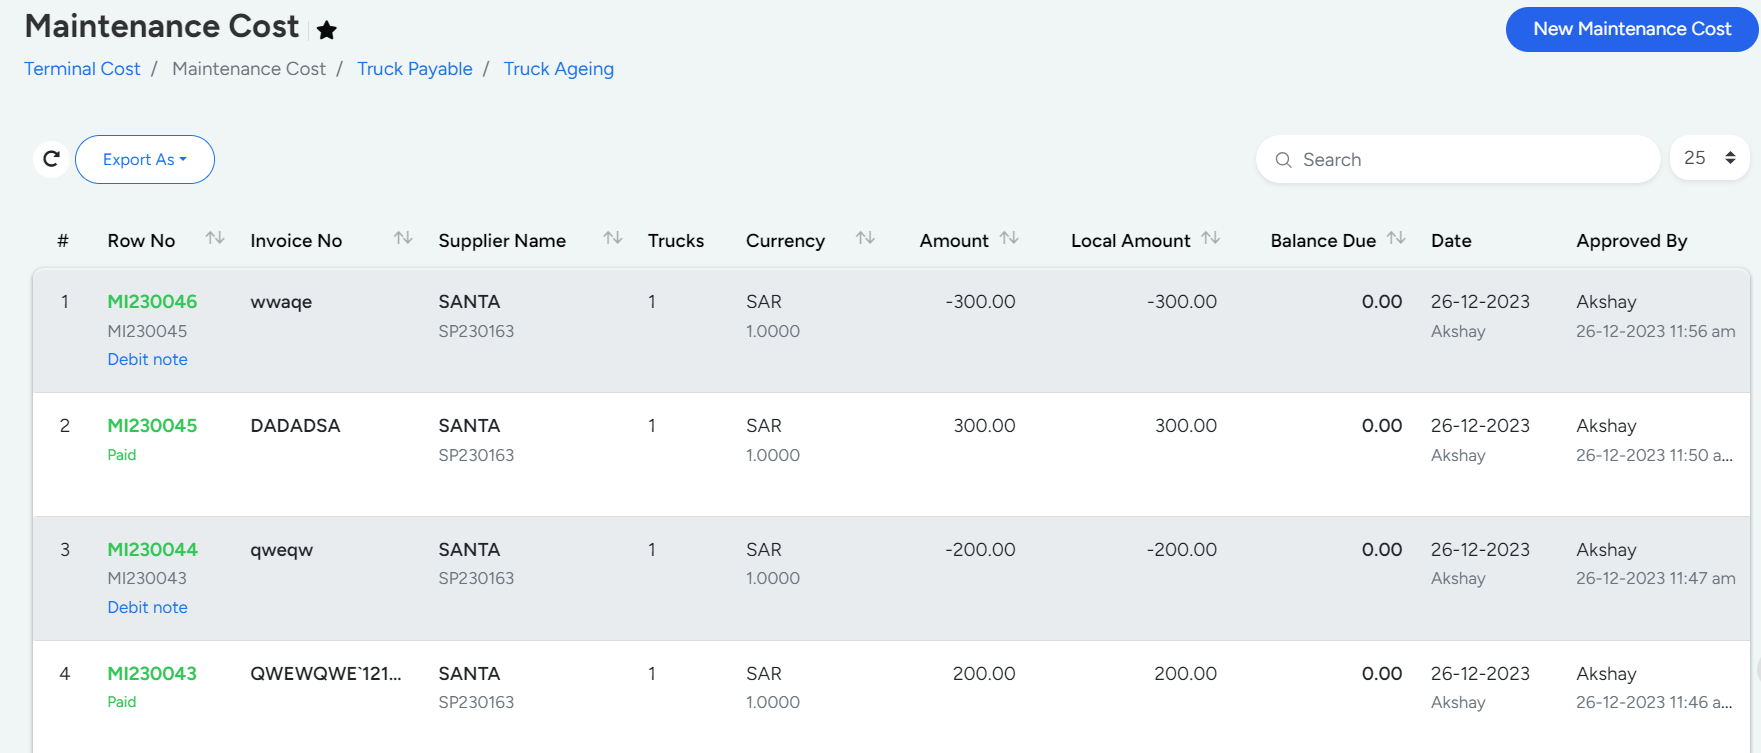
The default State of Maintenance Cost after Creation is Unapproved. This needs to be approved to create payment vouchers and for further steps.
Unapproved Maintenance Cost is indicated in Red Colour and Approved Cost in Green Colour.
Flow Chart
Actions Performed
Right Click on the column to get the following,
- Approve ( on Unapproved data)
- Disapproved (on Approved data)
- Print (both unapproved and approved)
- View (both unapproved and approved)
- Edit (on unapproved )
- Delete (on unapproved)
- Upload (both unapproved and approved)
Truck Payable
Truck Payable furnishes Vouchers and Allowance involved with Trucks and Drivers.
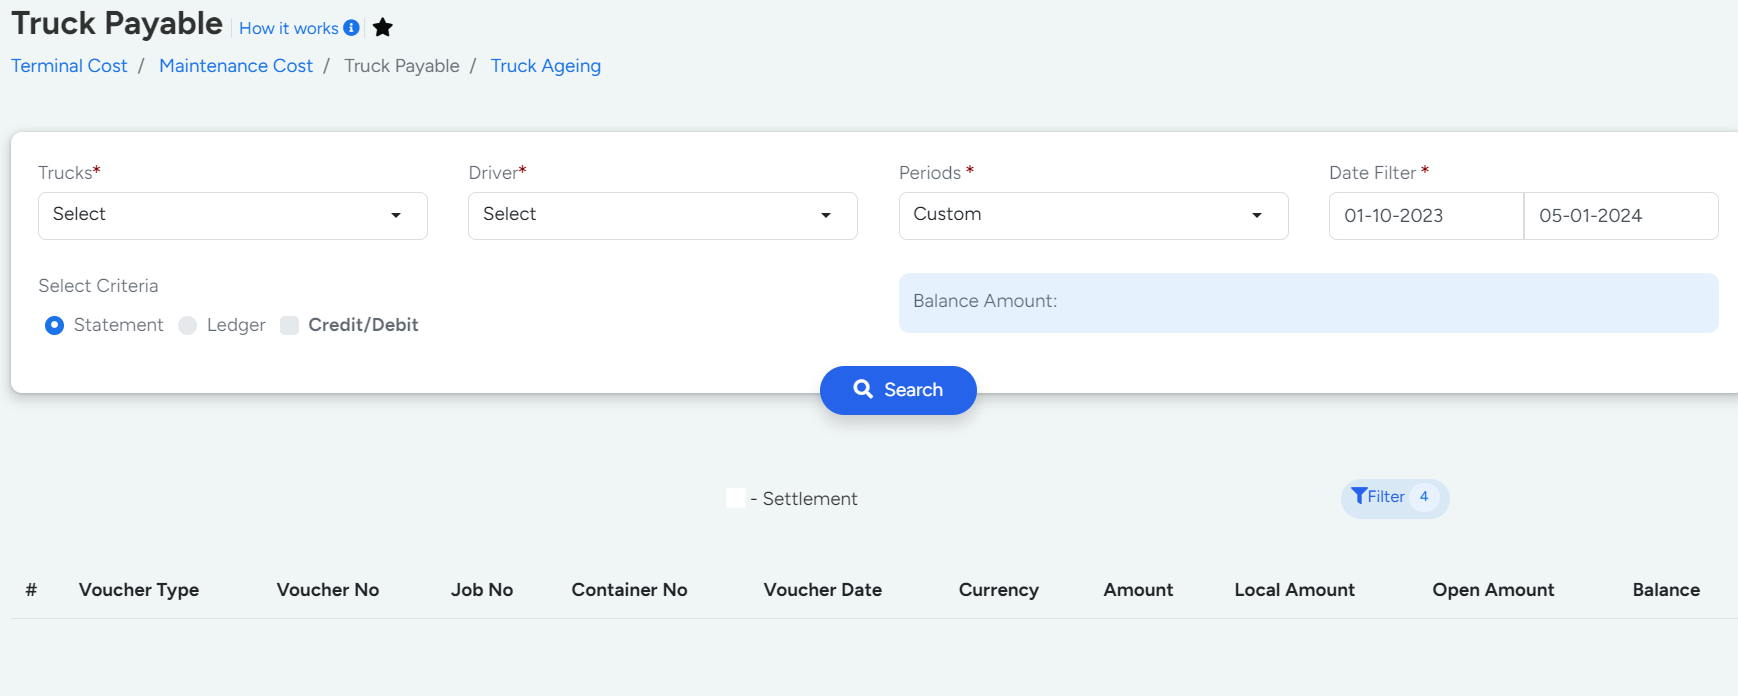
- Either Truck(*) or Driver(*) needs to be selected to list the details.
- The filters applied are,
- Driver(*) or Truck(*)
- Start Date and End Date.
- The data are divided into 3 sections,
- Statement
- Advanced Items
- Ledgers
- Credit / Debit can be enabled if the credit / debit amount needs to be included .
- Advanced Items
- Advanced Items has a list of data related to Driver / Truck (based on the selection made) which are paid.
- Ledger
- Ledger has a combination of both statements and Advanced Items based on the Selection made.
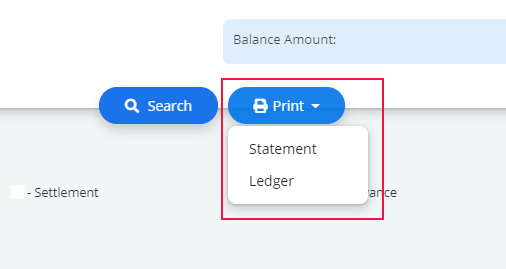
- Print Button
-
next to Search has two options in the dropdown.
Statement : To print a list of data in statement alone.
Ledger : To print a list of data in Ledger alone.
The Total Amount (as per the data selected) involved will be displayed on the top section.

The Video inserted below explains you the working of " Truck Payable " to have a better understanding
Truck Aging
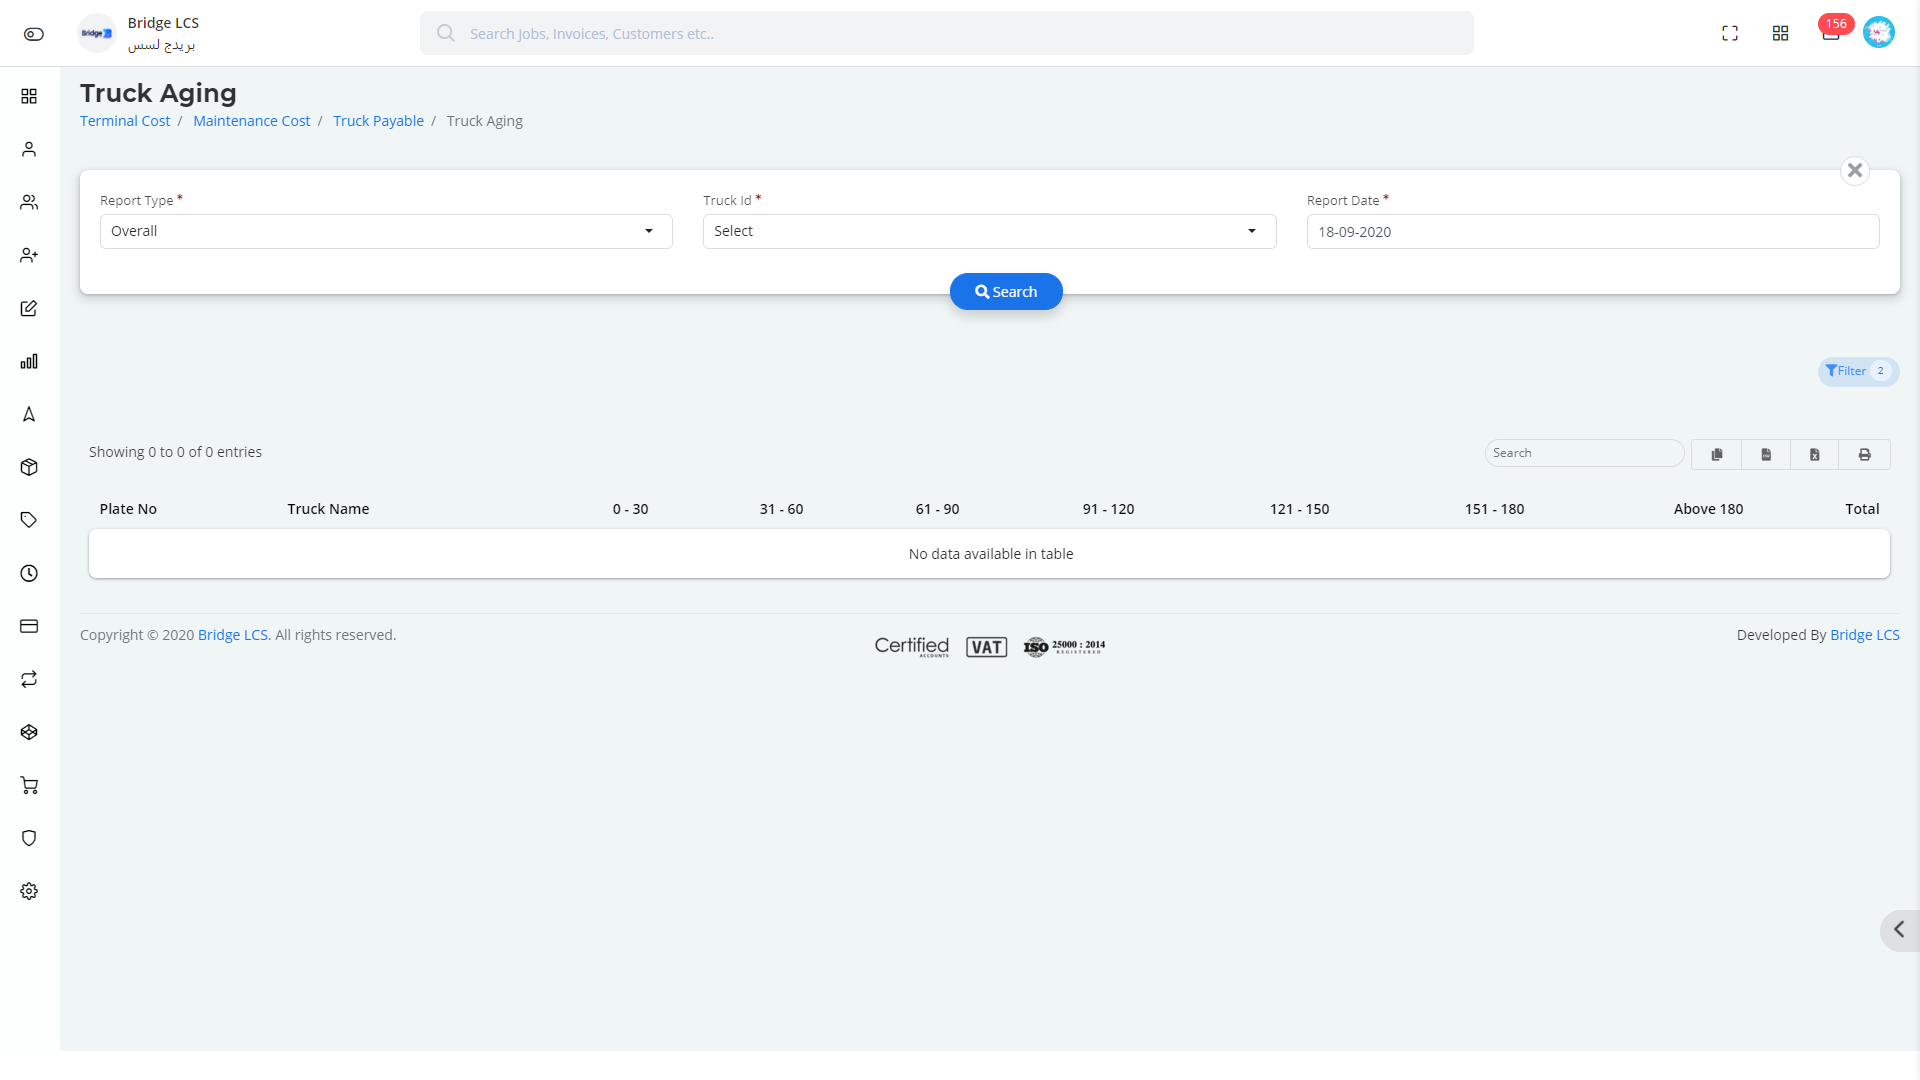
Truck Aging works based on the following filters,
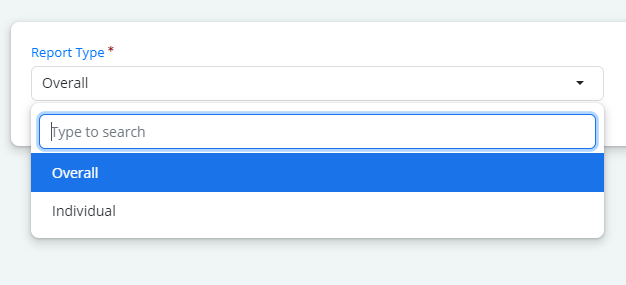
- Report Type(*) { Individual / Overall}
- Truck Id (*)
- Report Date (*) - the date till which the report needs to be fetched.
- Case 1
- If the Report Type is selected as Individual, then the details of Trucks Selected will be displayed specifically one below the other with columns like Voucher No, Date, Job No, Interval and Total Amount.
- Case 2
- If the Report Type is selected as Overall, then the details of Trucks Selected will be displayed in general with columns like Plate No, Truck Name and amount involved in different time periods.
The Total Amount based on the selection is displayed on the last row of the table.
The Video inserted below explains you the working of " Truck Aging " to have a better understanding
Truck Reports
The Truck Report section explains the kind of report involved in transportation.
Overview
The Overview Section provides you the synopsis of Cost, Income , Maintenance and Movements Report on a monthly basis.
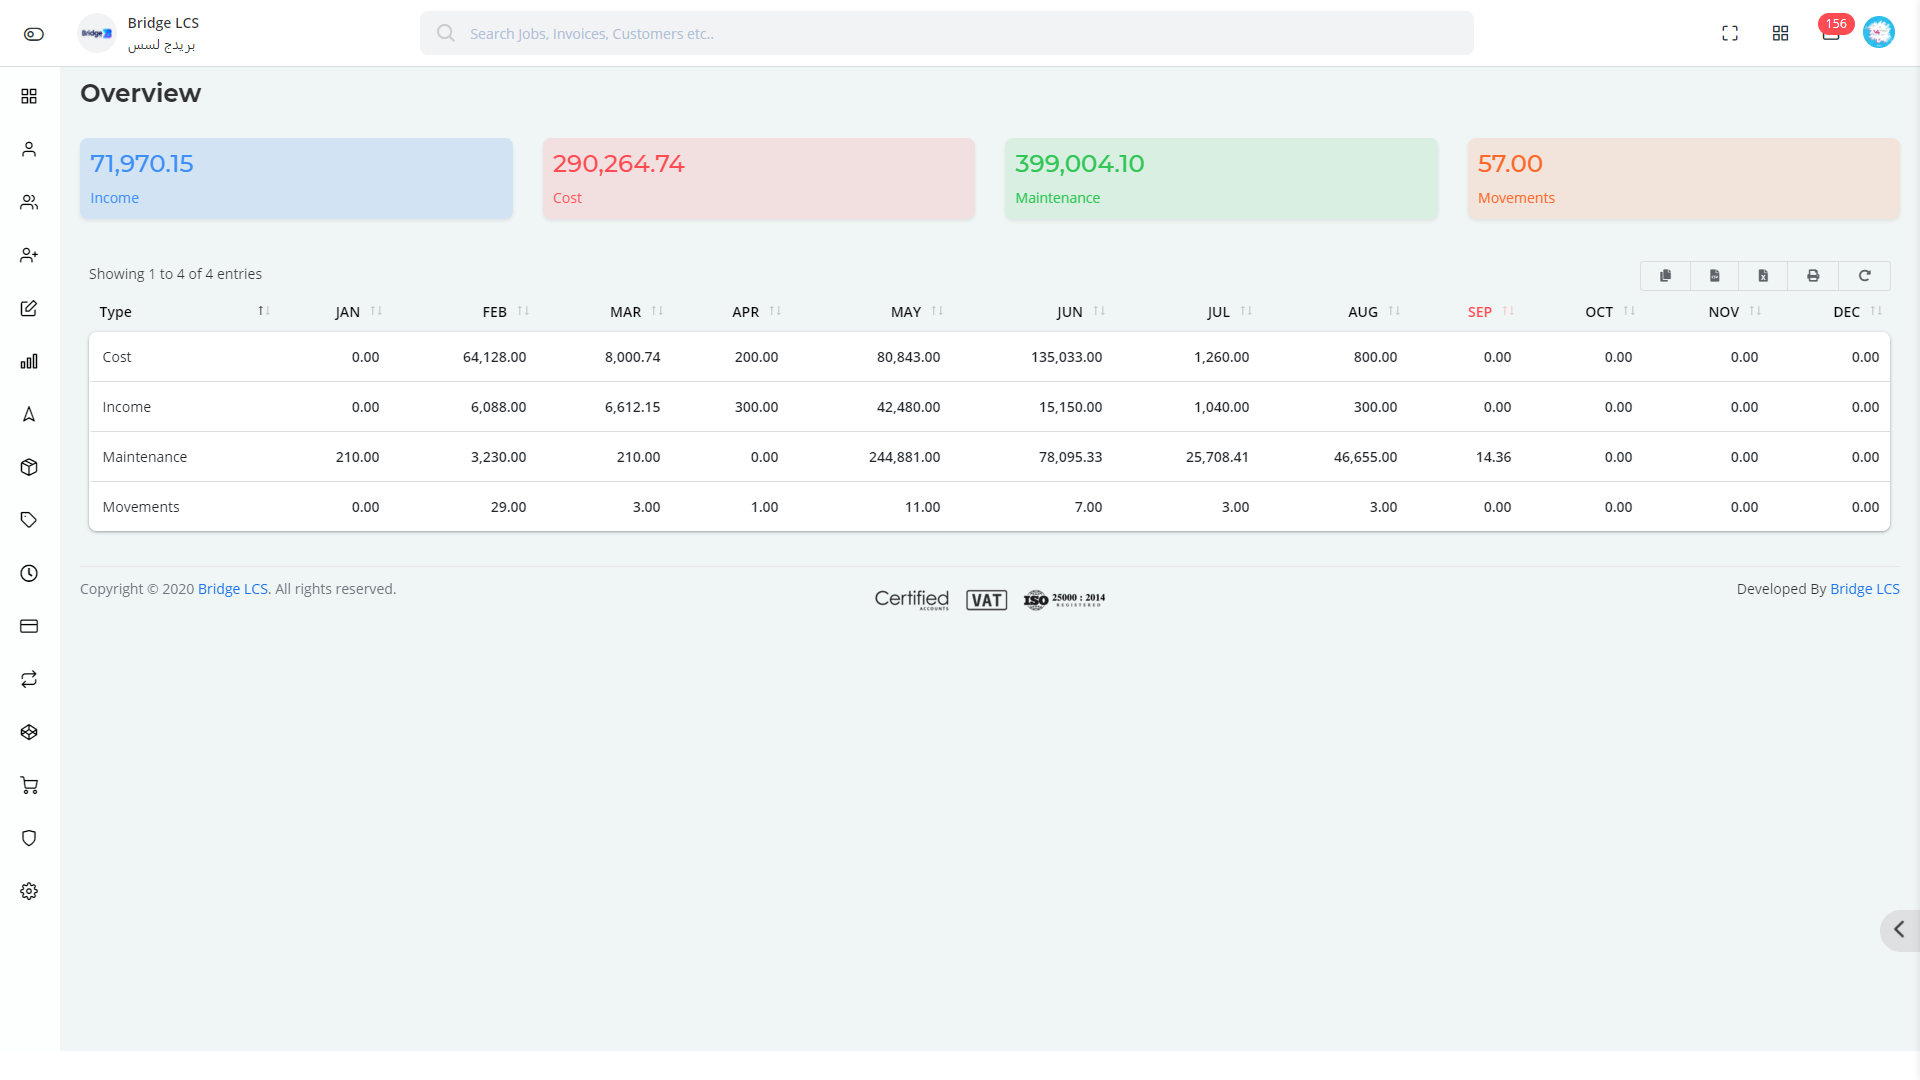
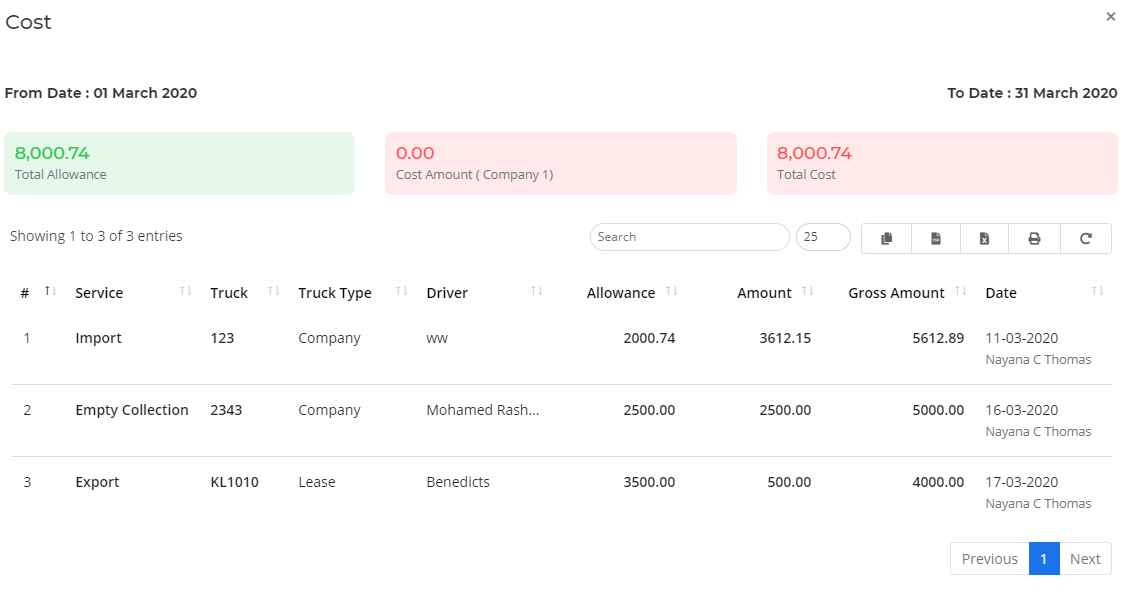
Clicking over the data given under a particular month gives you the detailed view of services involved along with the amount in a popup window.

The popup window also contains Total Allowance, Cost Amount and Total Amount.
The Top Section of Overview has 4 different segments which redirect to the respective, by clicking over it .
Section 1
Section 1{Income} indicted in blue colour, redirects the user to Income Report.

Income Report
Select the Start Date(*), End Date(*) and Click Search to display the required details.
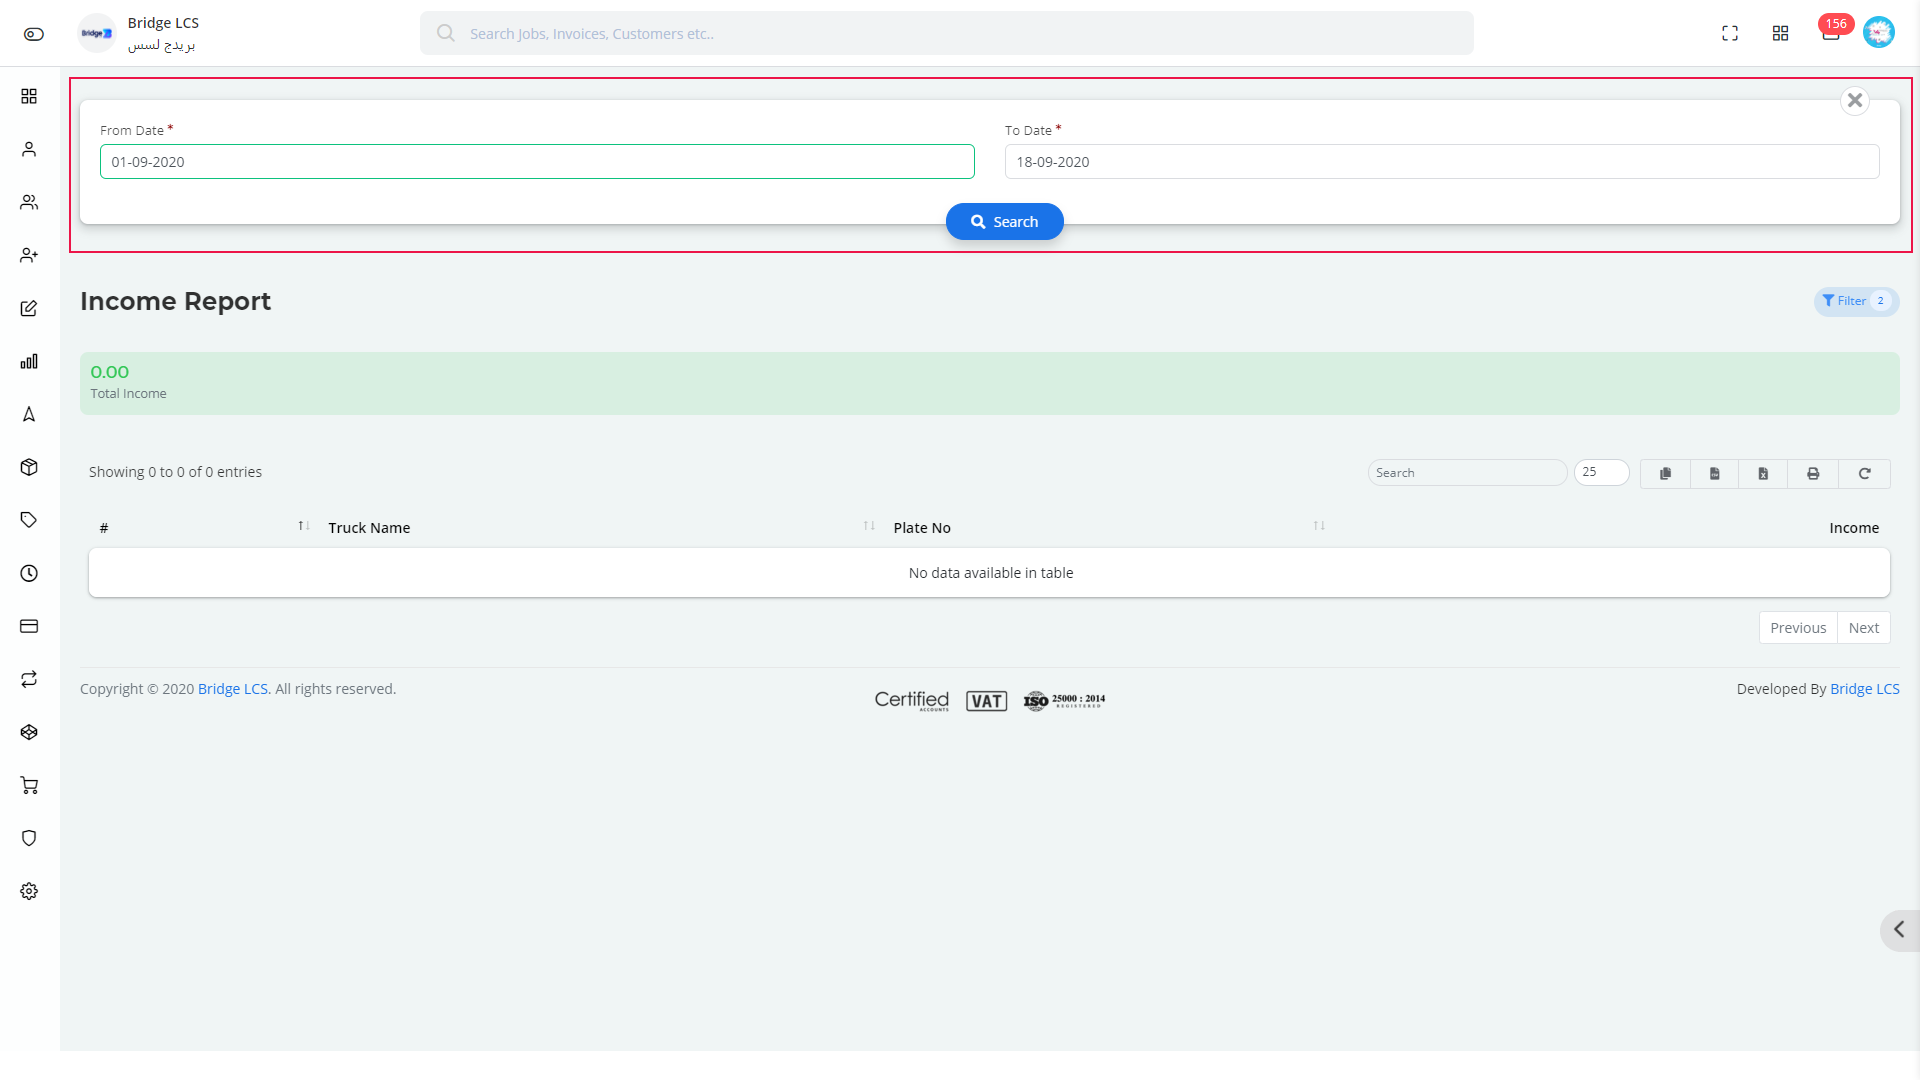
List of Trucks with Attributes like Plate No and Income are displayed.

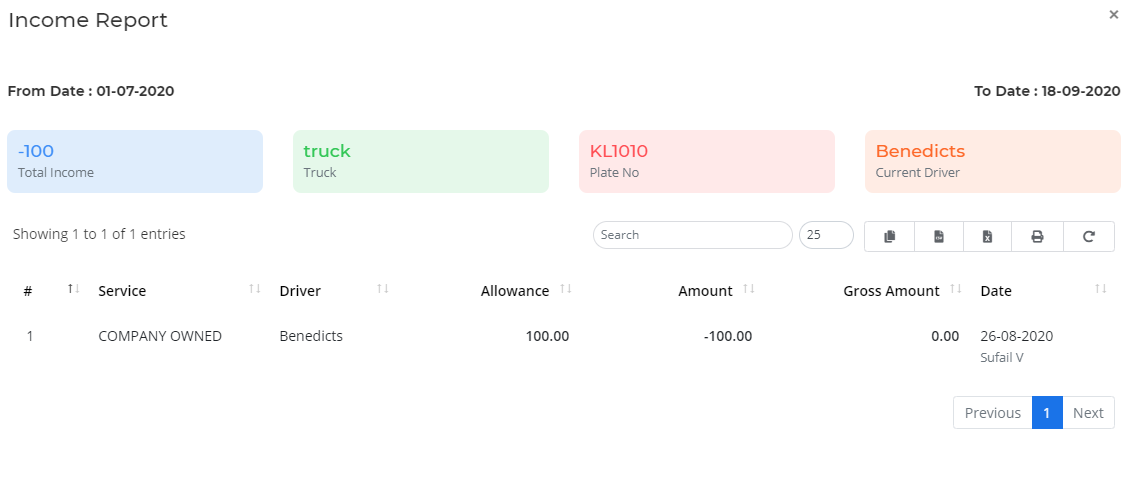
Double Clicking on the Column gives the list of services involved with the respective truck.
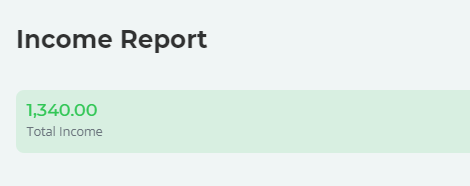
Total Income is displayed in the top based on the filters applied.
Section 2
Section 2 {Cost}indicated in peach color, redirects the user to Truck Allowance Report.

Cost Report
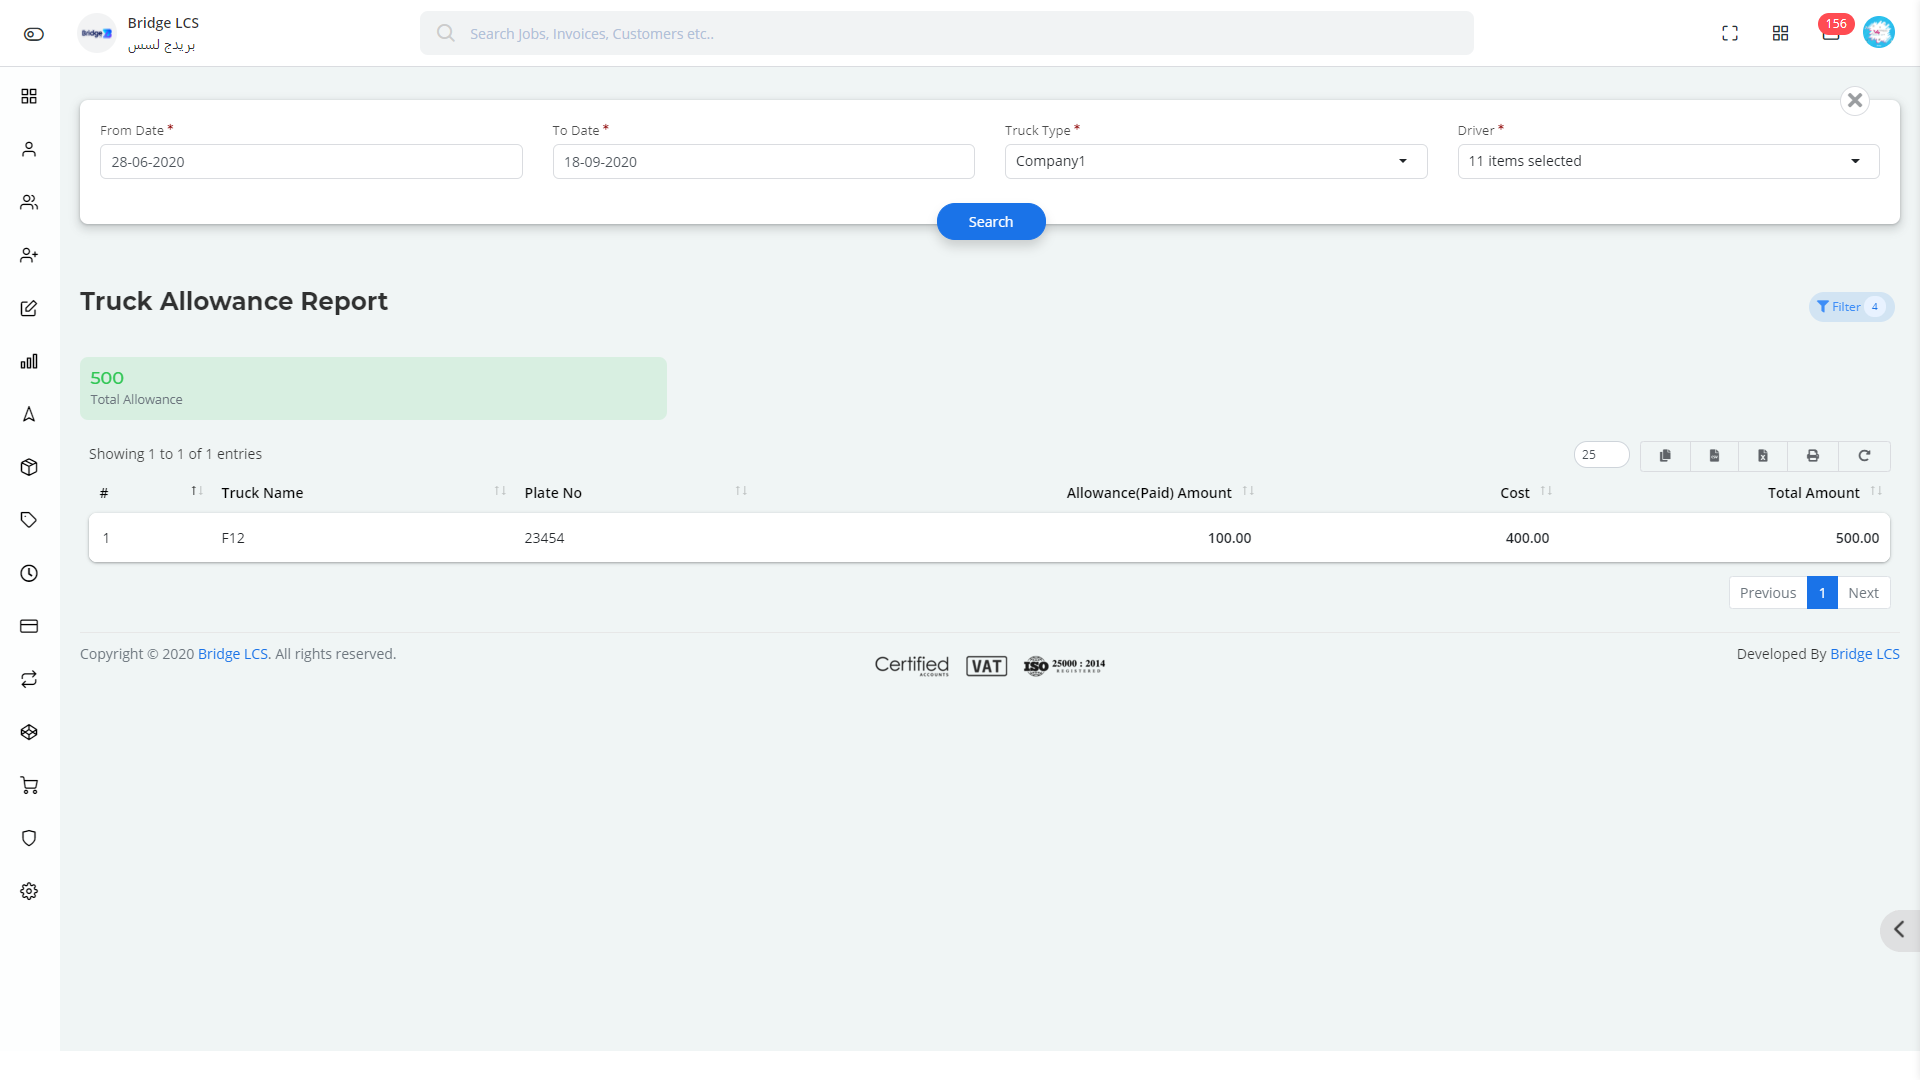
- From Date and Start Date (*)
- Truck Type (*)
- Driver (*)
The List displayed has details like Truck Name, Plate No, Allowance paid to Driver , Profit earned and Total Amount of Service.
The total Allowance made is listed in the top section based on the filters made.
Section 3
Section 3 {Maintenance}indicated in green color, redirects the user to Truck Maintenance Report.

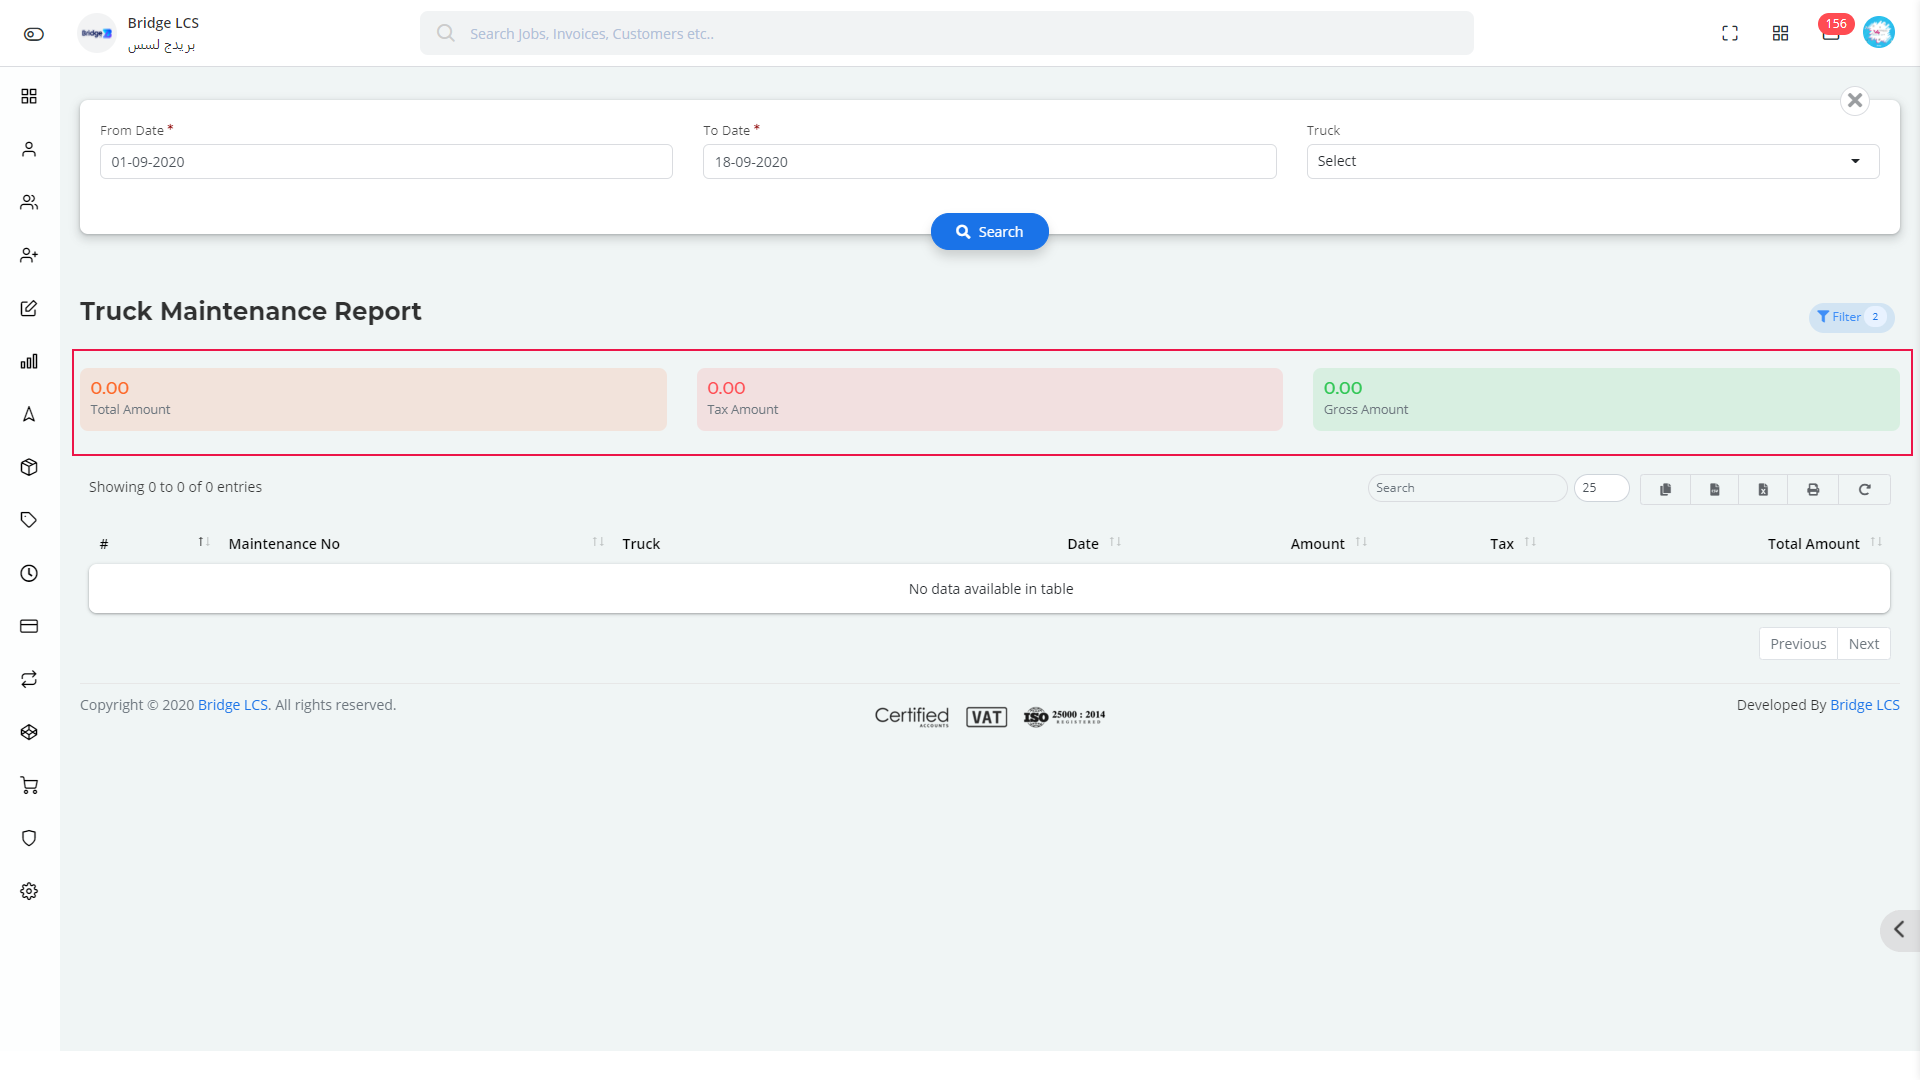
Truck Maintenance Report
The filters mentioned below needs to be applied to get the required data,
- From Date and Start Date (*)
- Truck
The list of data is provided with details like Maintenance No, Truck, Date and Amount with Tax.
Total Amount, Tax Amount and Gross Amount will be displayed in the middle section of the page based on the filters selected .
Section 4
Section 4 {Movement}indicated in peach color, redirects the user to Movement Report.

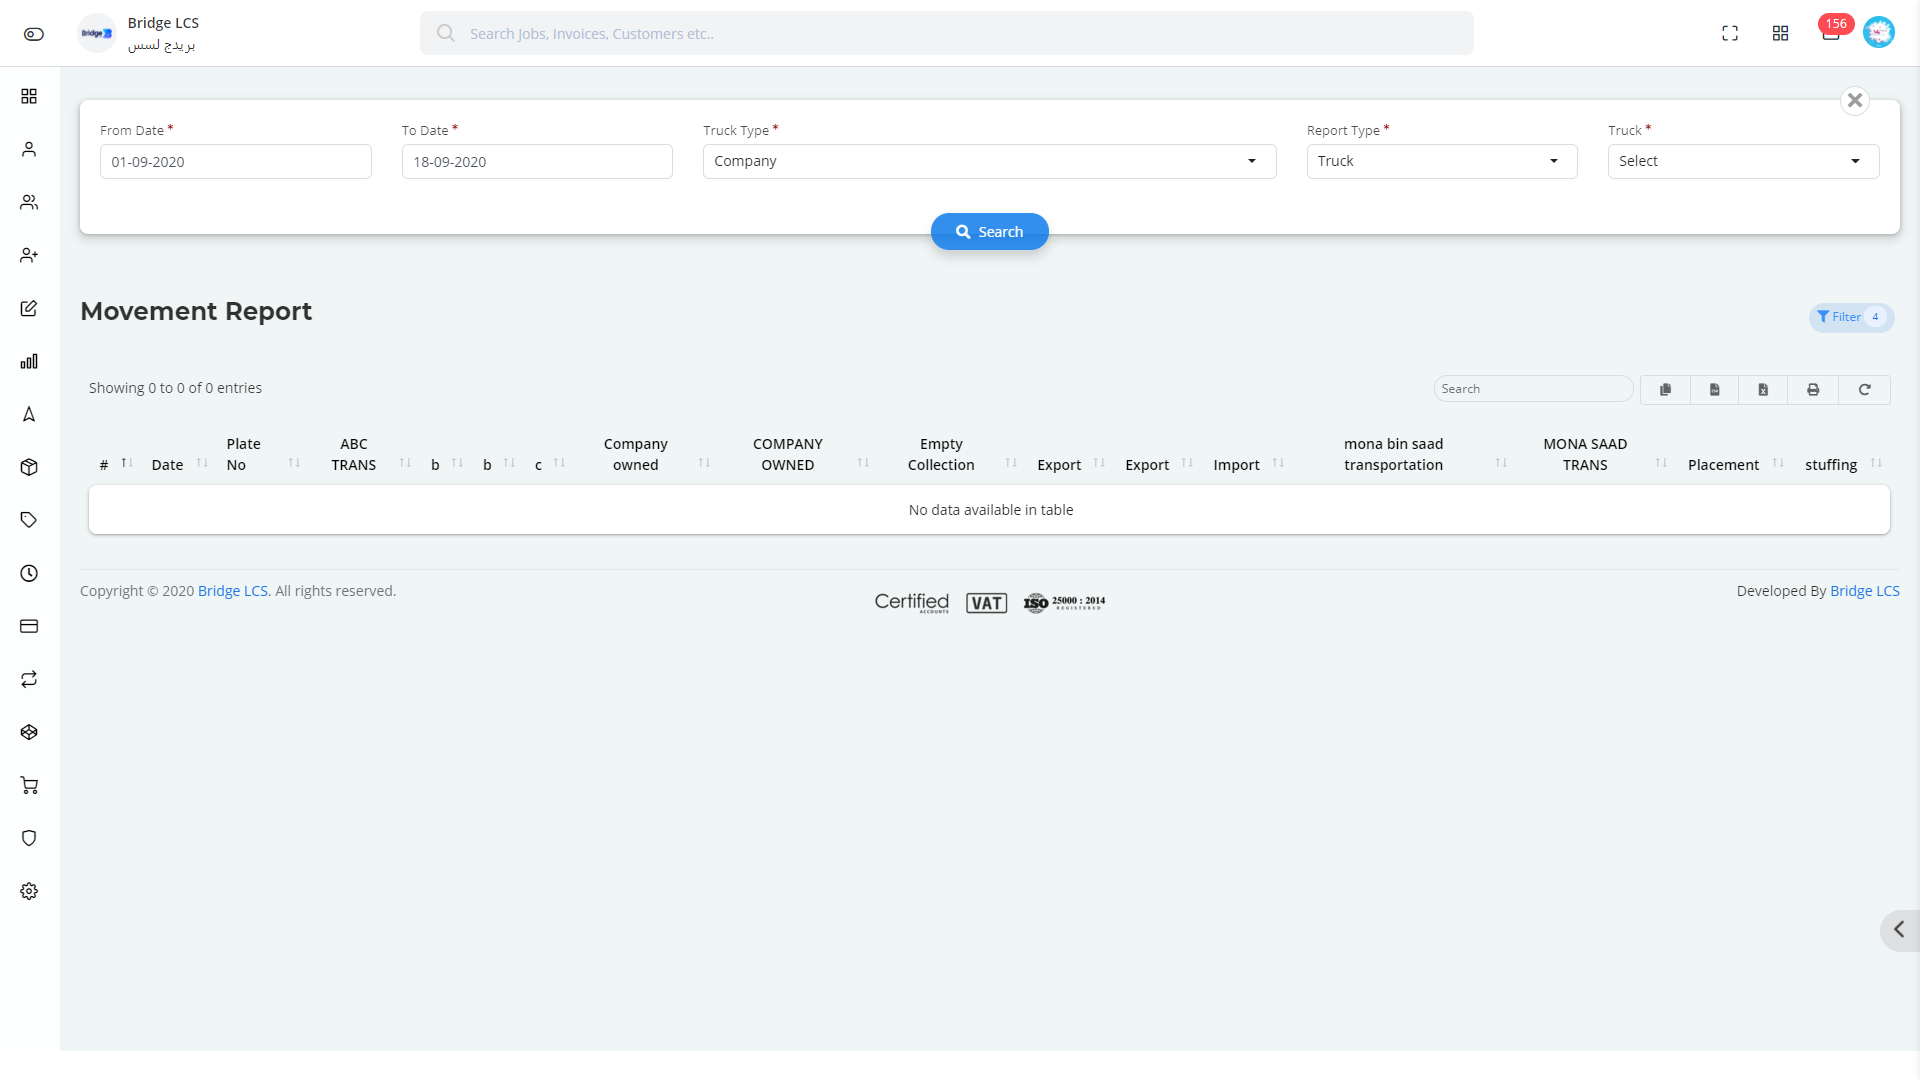
Movement Report
The filters mentioned below needs to be applied to get the required data,
- From Date and Start Date (*)
- Truck Type(*)
- Report Type(*){Driver / Truck }
- Truck / Driver (*) {Based on the Report Type
If the report type is Driver then the list of data is provided with details like drivers, placement , stuffing , service movements based on the drivers and date selected.
If the report type is Truck then the list of data is provided with details like Vehicle Plate No, placement , stuffing and service movements which indicates the number of times the selected truck is used for a particular service based on the Truck and date chosen.
The Video inserted below explains you the working of " Truck Reports " to have a better understanding
Expense Report
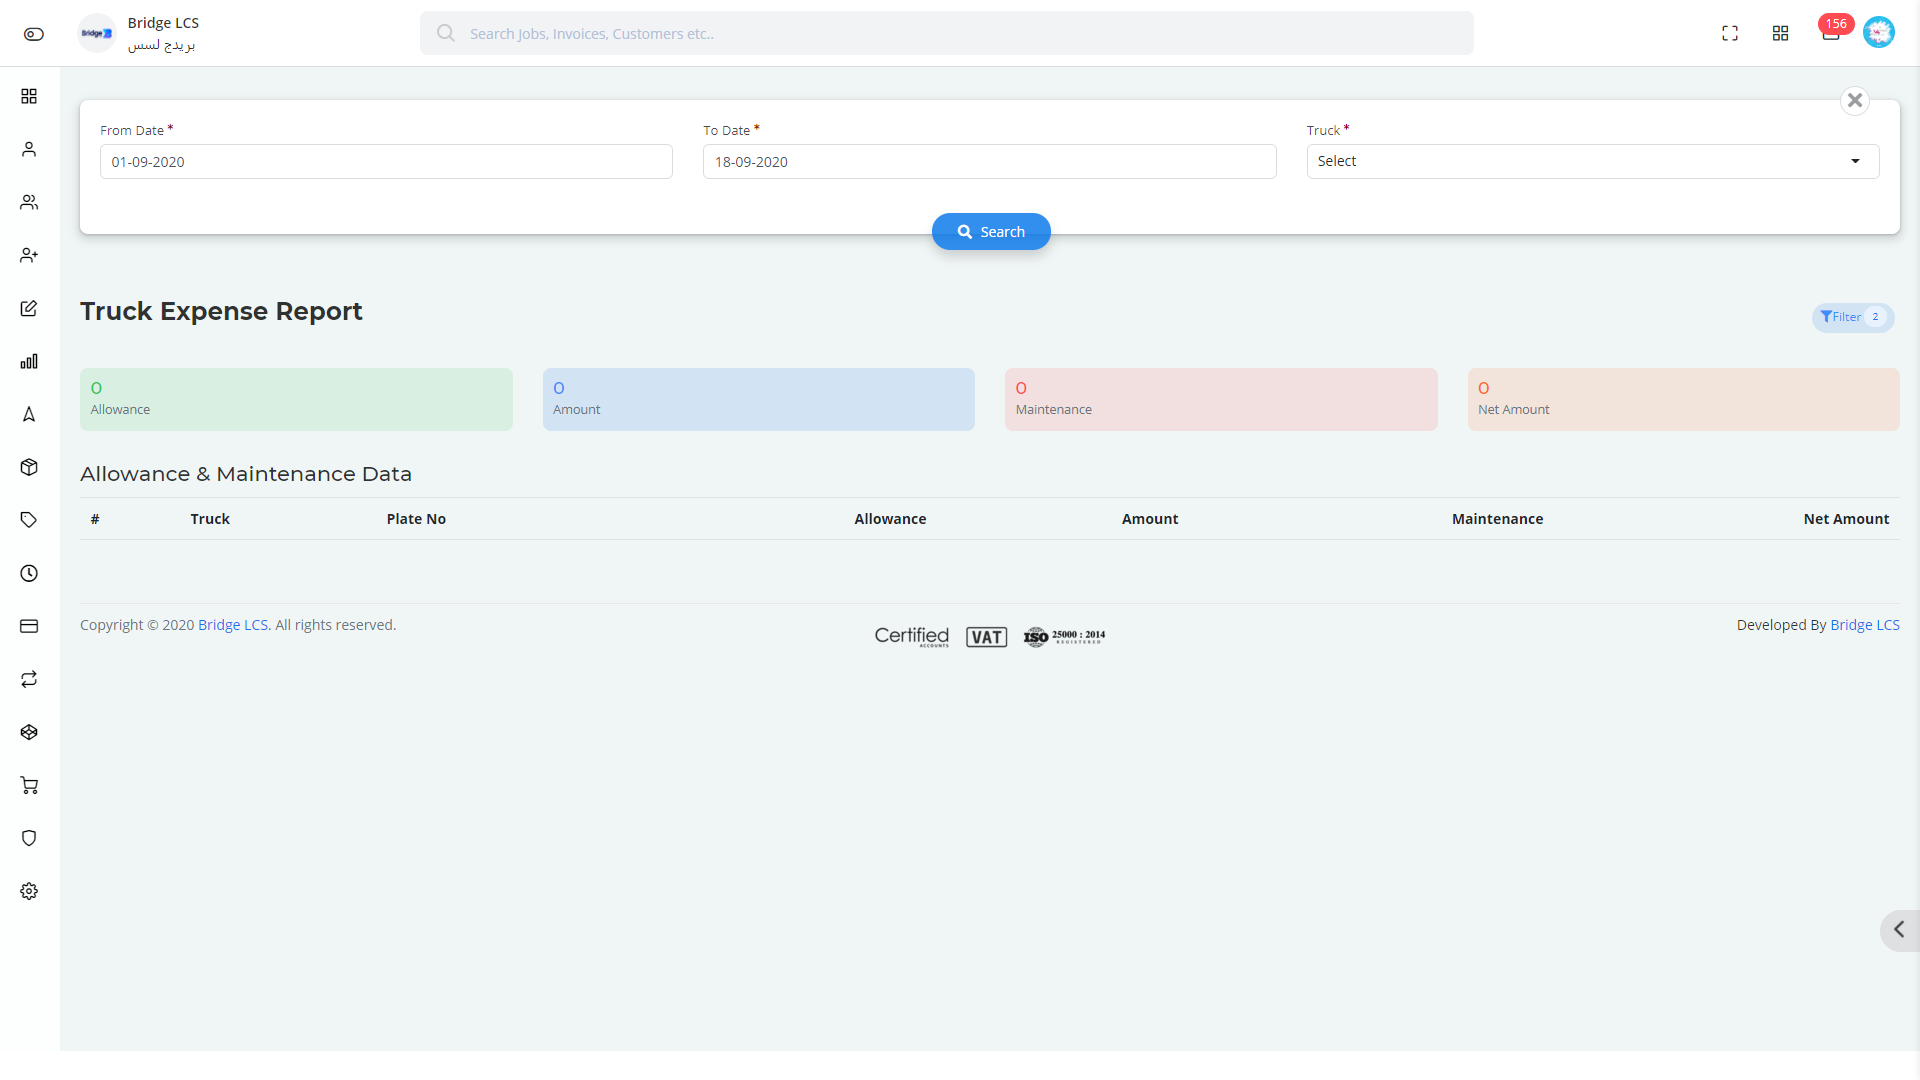
Expense Report furnishes the expenses made on the vehicle in total including the Allowance and Maintenance details.
The filters mentioned below needs to be applied to get the required data,
- From Date and Start Date (*)
- Truck (*)
Click Search to fetch the required data.
The list has attributes like Plate No, Allowance, Amount, Maintenance Amount based on the Truck Selected.
This also shows the sum of the amount of all the trucks selected, in the middle section.
Service Report
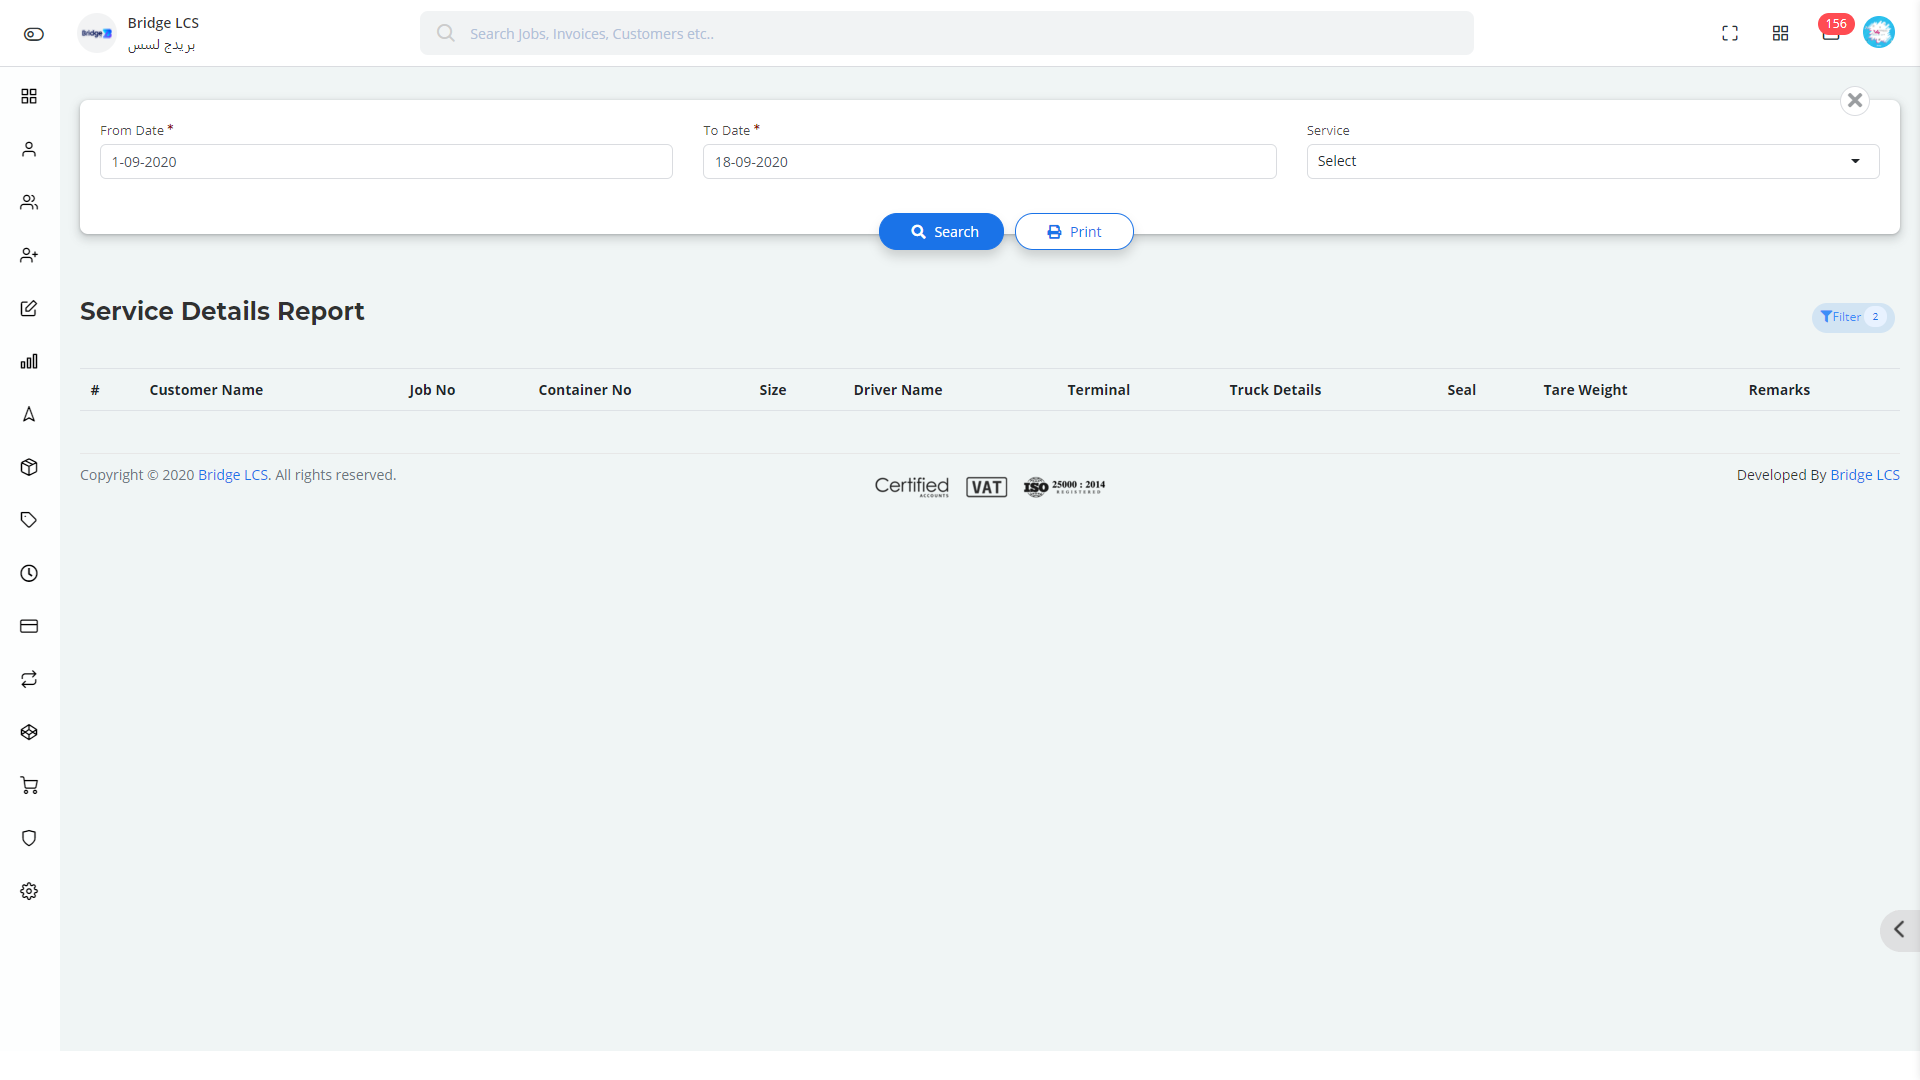
Service Report gives the synopsis of all the services involved in transportation.
The filters mentioned below needs to be applied to get the required data,
- From Date and Start Date (*)
- Service (*)
Click Search to fetch the required data.
The list has attributes like Customer Name, Driver Name, Truck details and Tare weight.
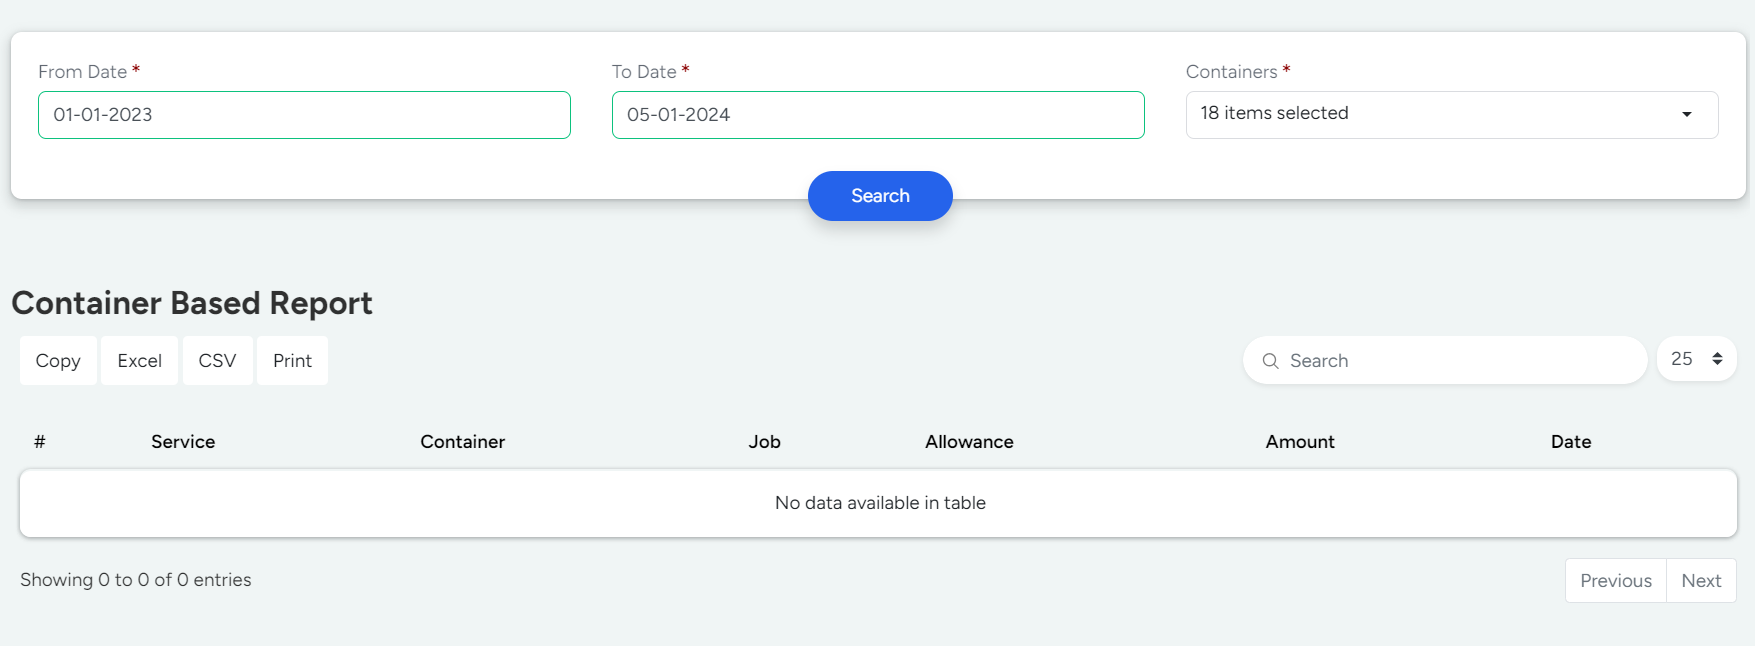
Container Based Report
The filters mentioned below needs to be applied to get the required data,
- From Date and To Date (*)
- Containers
The list of data is provided with details like Service,Container,Job,Allowance,Amount and Date.
You have the option to Copy,export it in both Excel and CSV formats and Print the report.
Advanced Features : (applicable to all sub segments)
- Data which has a document uploaded into it is represented with an attachment symbol along with the row no.
- Double Clicking on the Column gives you the view of attributes given.
- Data can be sorted alphabetically with the help of a double headed arrow available along with the column.