Status
Status further has two Subdivisions.
Job Status
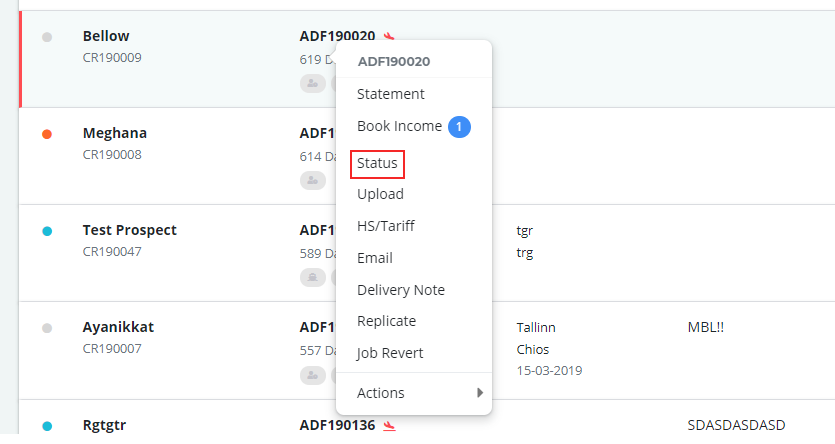
Individual Job Status can be updated in operations module by following the steps given below
- Step 1
- Operations --> Jobs --> Pending Jobs / Completed Jobs
- Step 2
- Right Click over the job --> Status --> proceed
The steps mentioned above do not work if you want to update the status in bulk. In order to update status in bulk, use the method explained in this module. In this module list out the pending jobs whose status not been updated today.
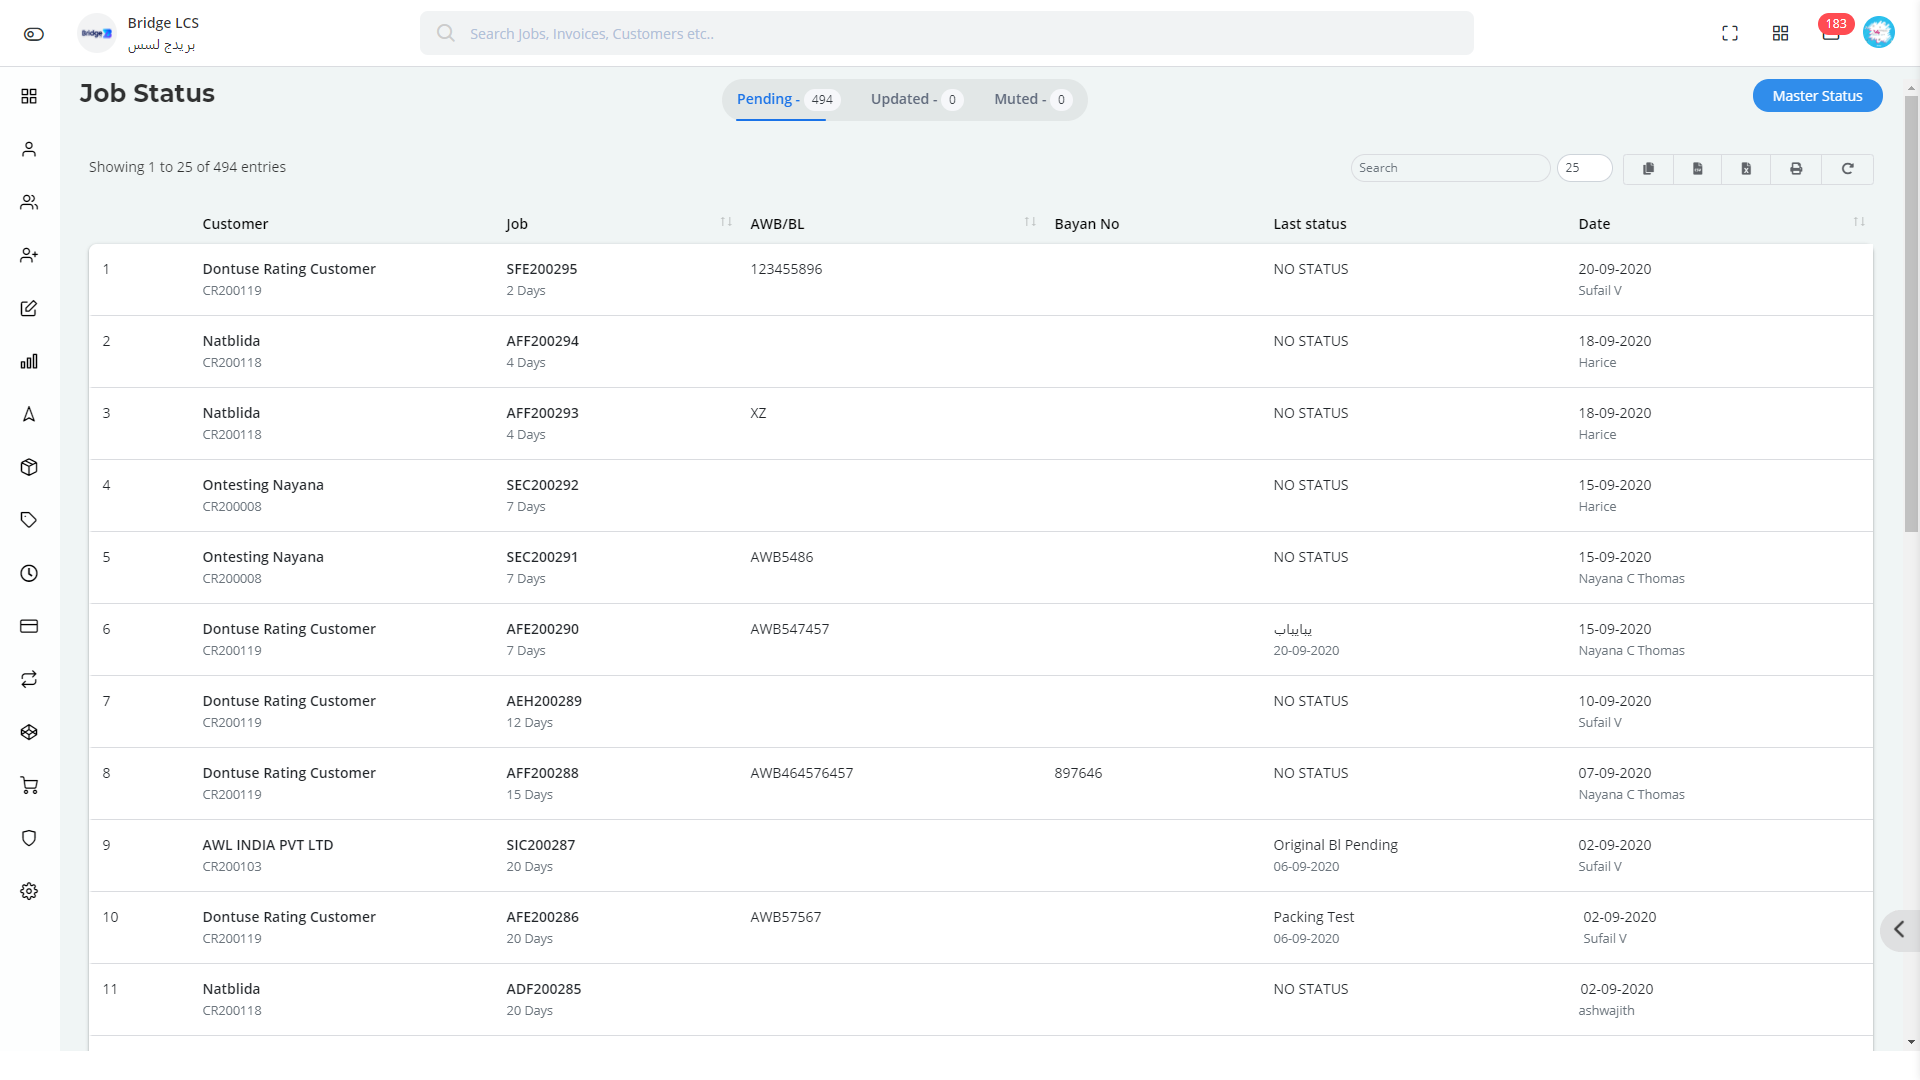
Job Status breakdown into 3 different groups
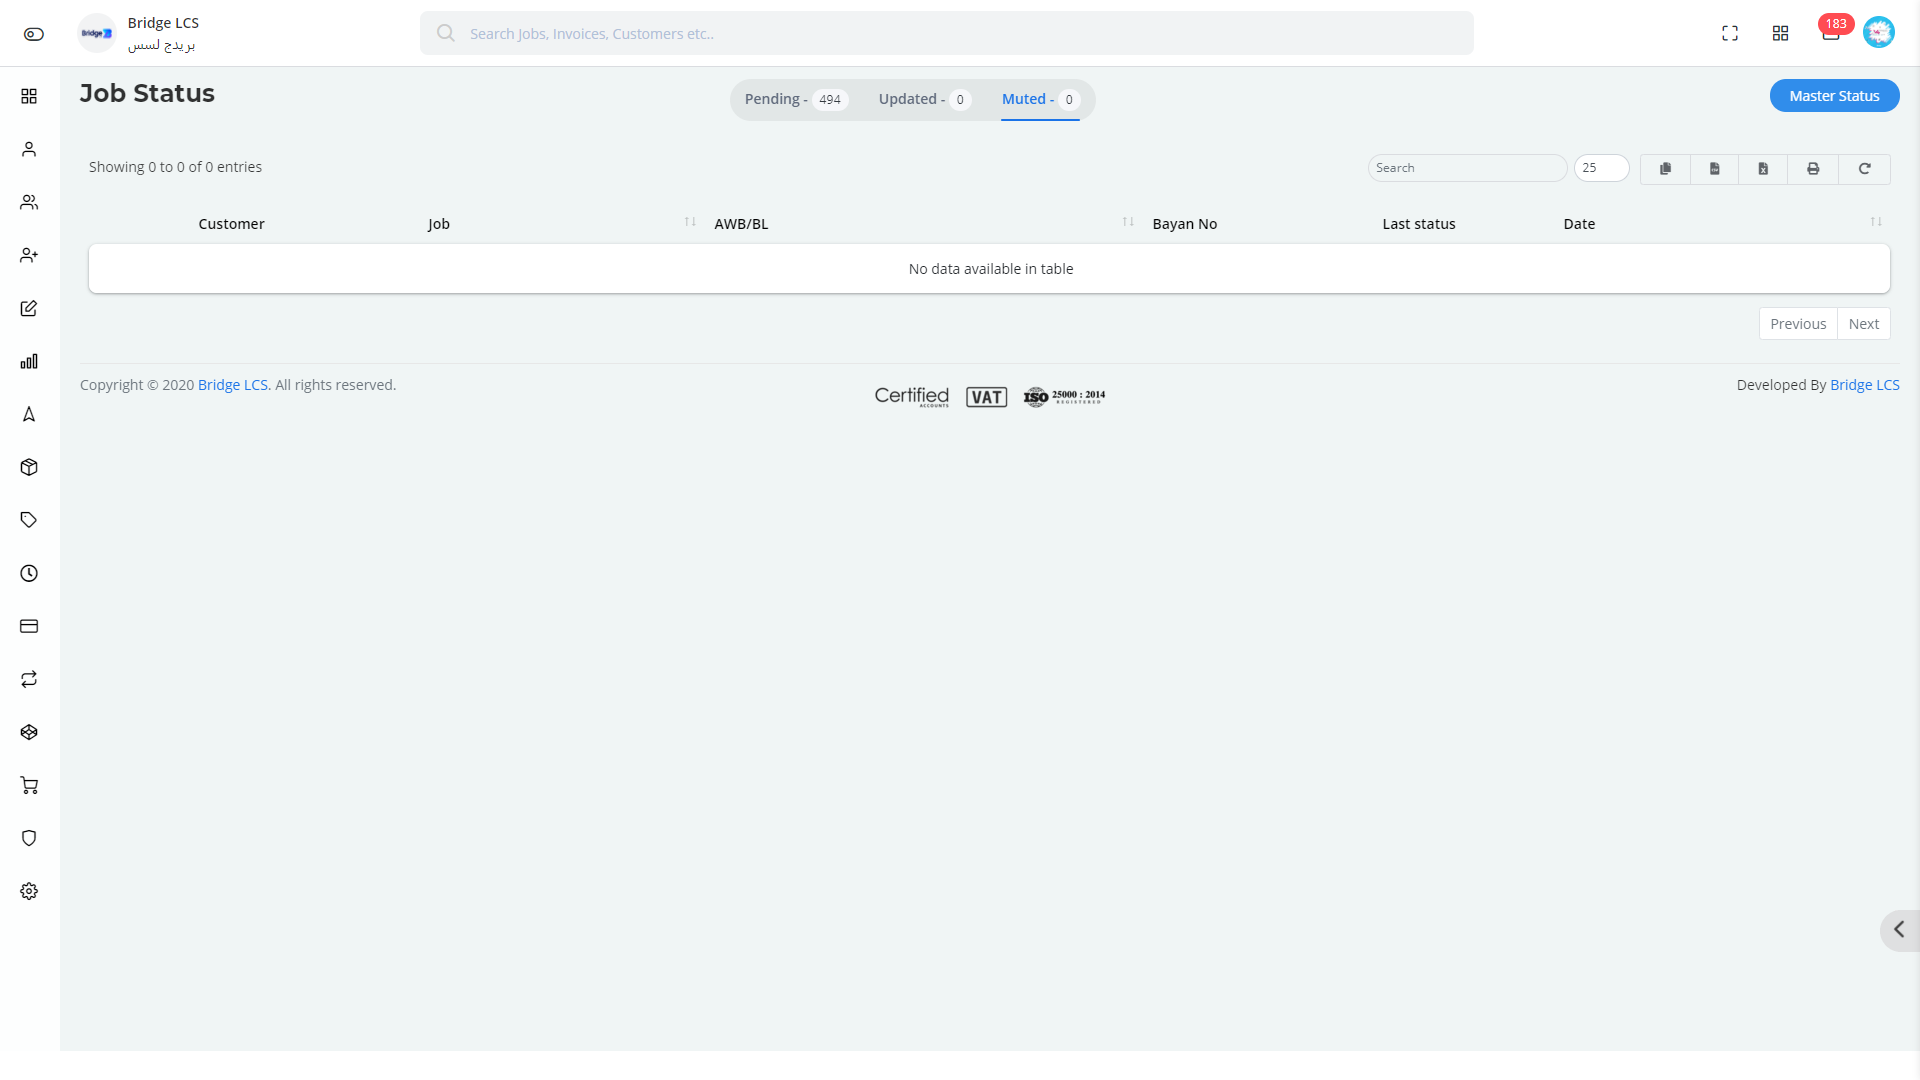
- Pending
- Updated
- Muted
Pending Jobs Status
This furnishes the list of jobs whose status has not been updated.
Double clicking on the job gives you the view of the job details.
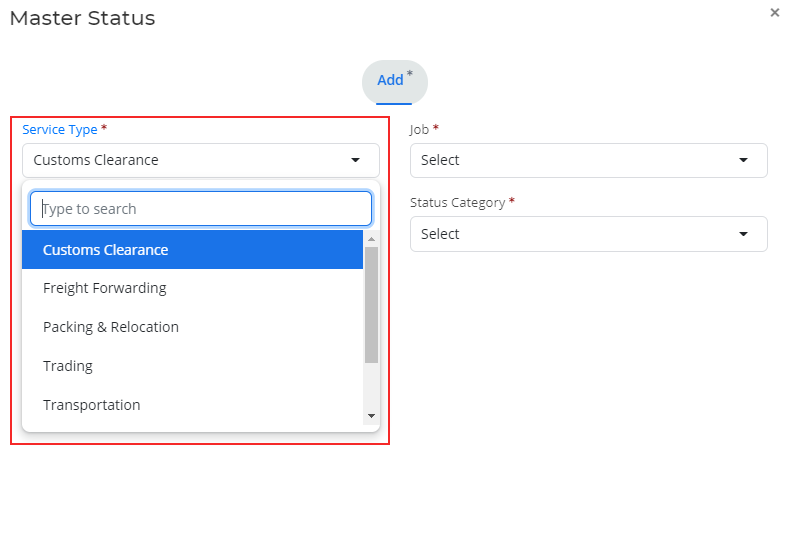
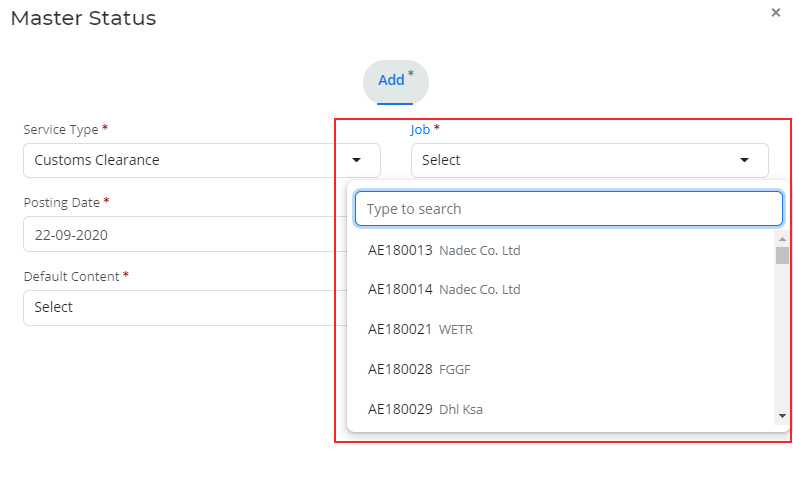
Status can be updated in bulk by following the steps mentioned below,
- Step 1
- Status --> Job Status --> Master Status
- Step 2
- Service Type --> Select the type of service you wish to proceed with
- Step 3
- Job --> Select the list of jobs whose status should be updated
- Step 4
- Status Category --> depending upon the type of service selected you will get the list of options to be updated.
- Step 5
- Default Content --> Choose Appropriate content to be sent to customers / Create your own by selecting the custom option.
- Step 6
- Save to proceed or clear to refill the data.

Actions Performed
- Status
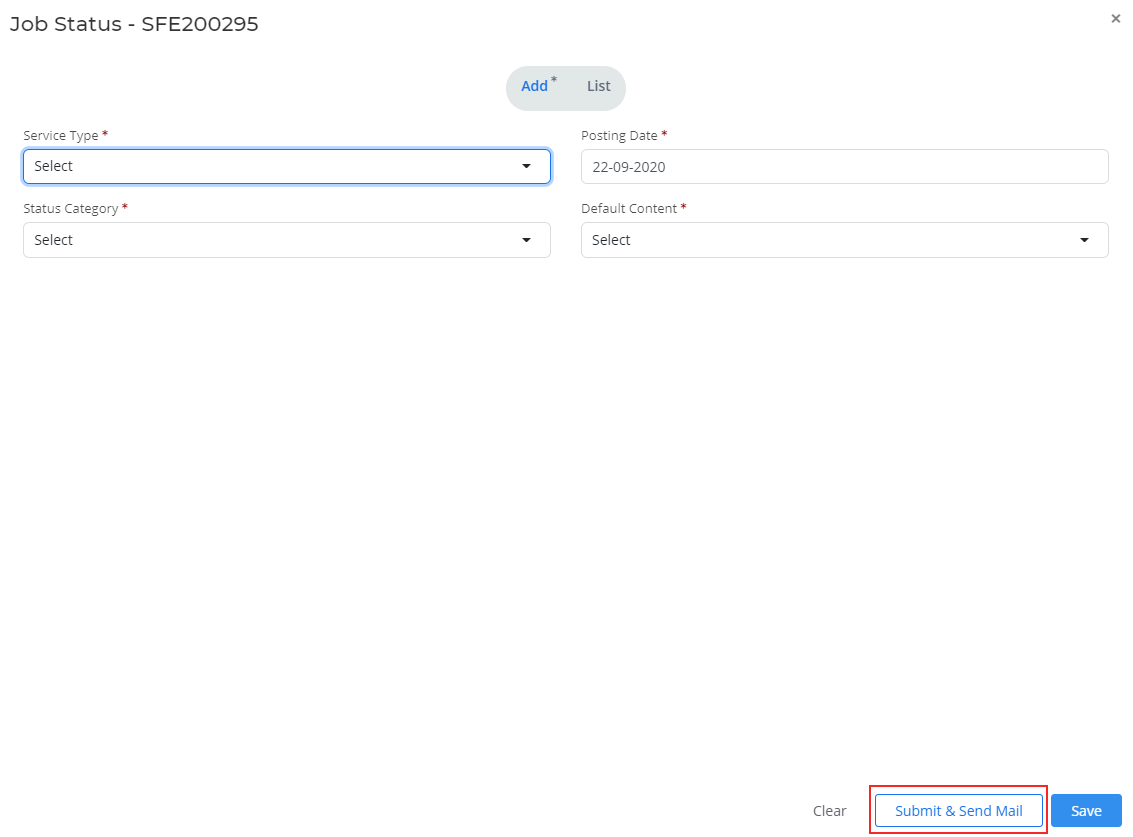
- Right Click on the job --> Save / Send Current Status to the customers.
- Mute
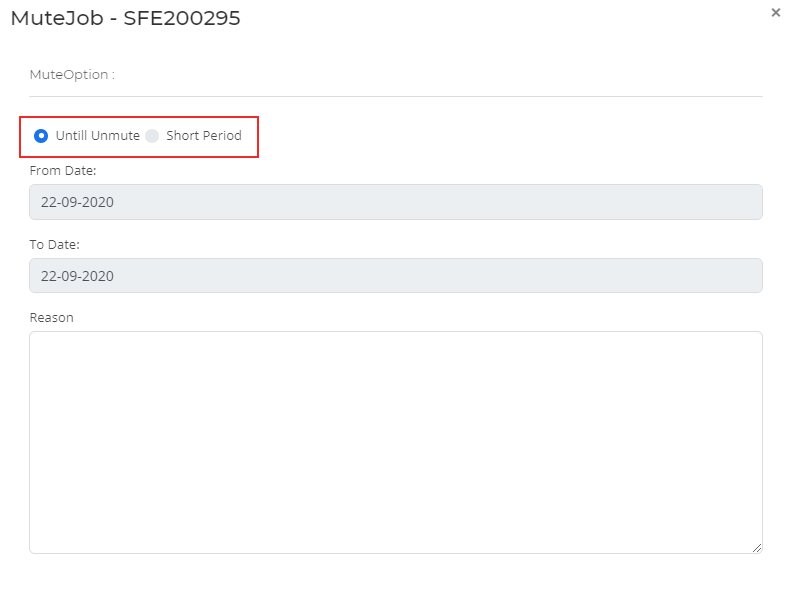
- Jobs Status can be muted if required .
- Case 1 : Short Period : From Date and End Date to be mentioned as Mute Period along with reason to be muted.
- Case 2 : Until Mute : Reason to mute must be given which can be unmuted later.
Updated
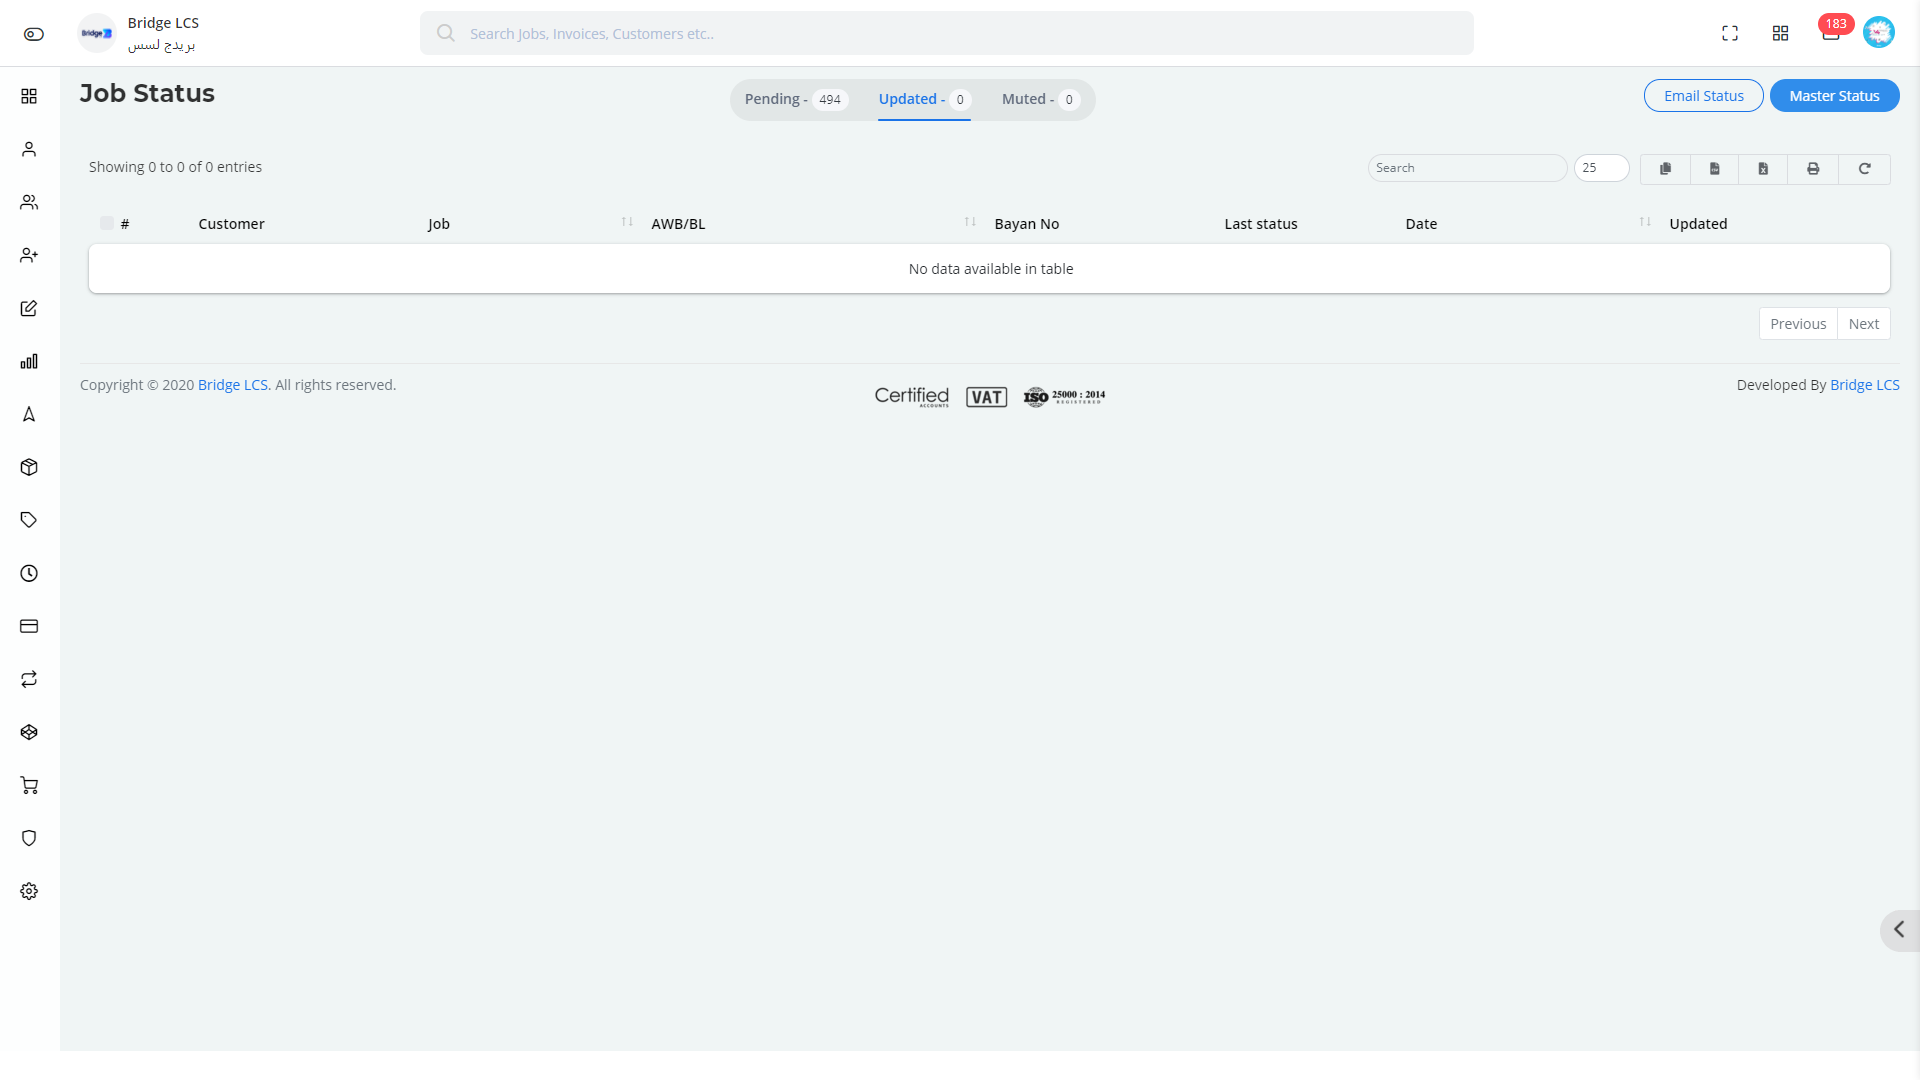
This section has a list of jobs whose status has been modified or updated to the customers.
Double clicking on the job gives you the view of the job details
Updated Status return backs Pending Status in 24 hours.
Flow Chart
Actions Performed
Status - Right Click on the column → Save / Send Current Status to the customers.
Mute - Jobs Status can be muted if required .
- Case 1 : Short Period : From Date and End Date to be mentioned as Mute Period along with reason to be muted.
- Case 2 : Until Mute : Reason to mute must be given which can be unmuted later.
Email Status
If you want to send email in bulk , you can use the option available in the right corner.
Step 1 : select the list of jobs with saved status.
Step 2 : Click on Email Status to send email in bulk.

Muted Job Status
- This lists the job that is being muted for a certain period.
- Double clicking on the job gives you the view of the job details
- Muted Job can be unmuted by the following,
- Job Status --> Muted Jobs.
- Right Click --> Unmute
The Video inserted below explains you the working of " Job Status " to have a better understanding
Bill of Lading
Categories
- Airway Bill
- Seaway Bill
- Way Bill
Airway Bill
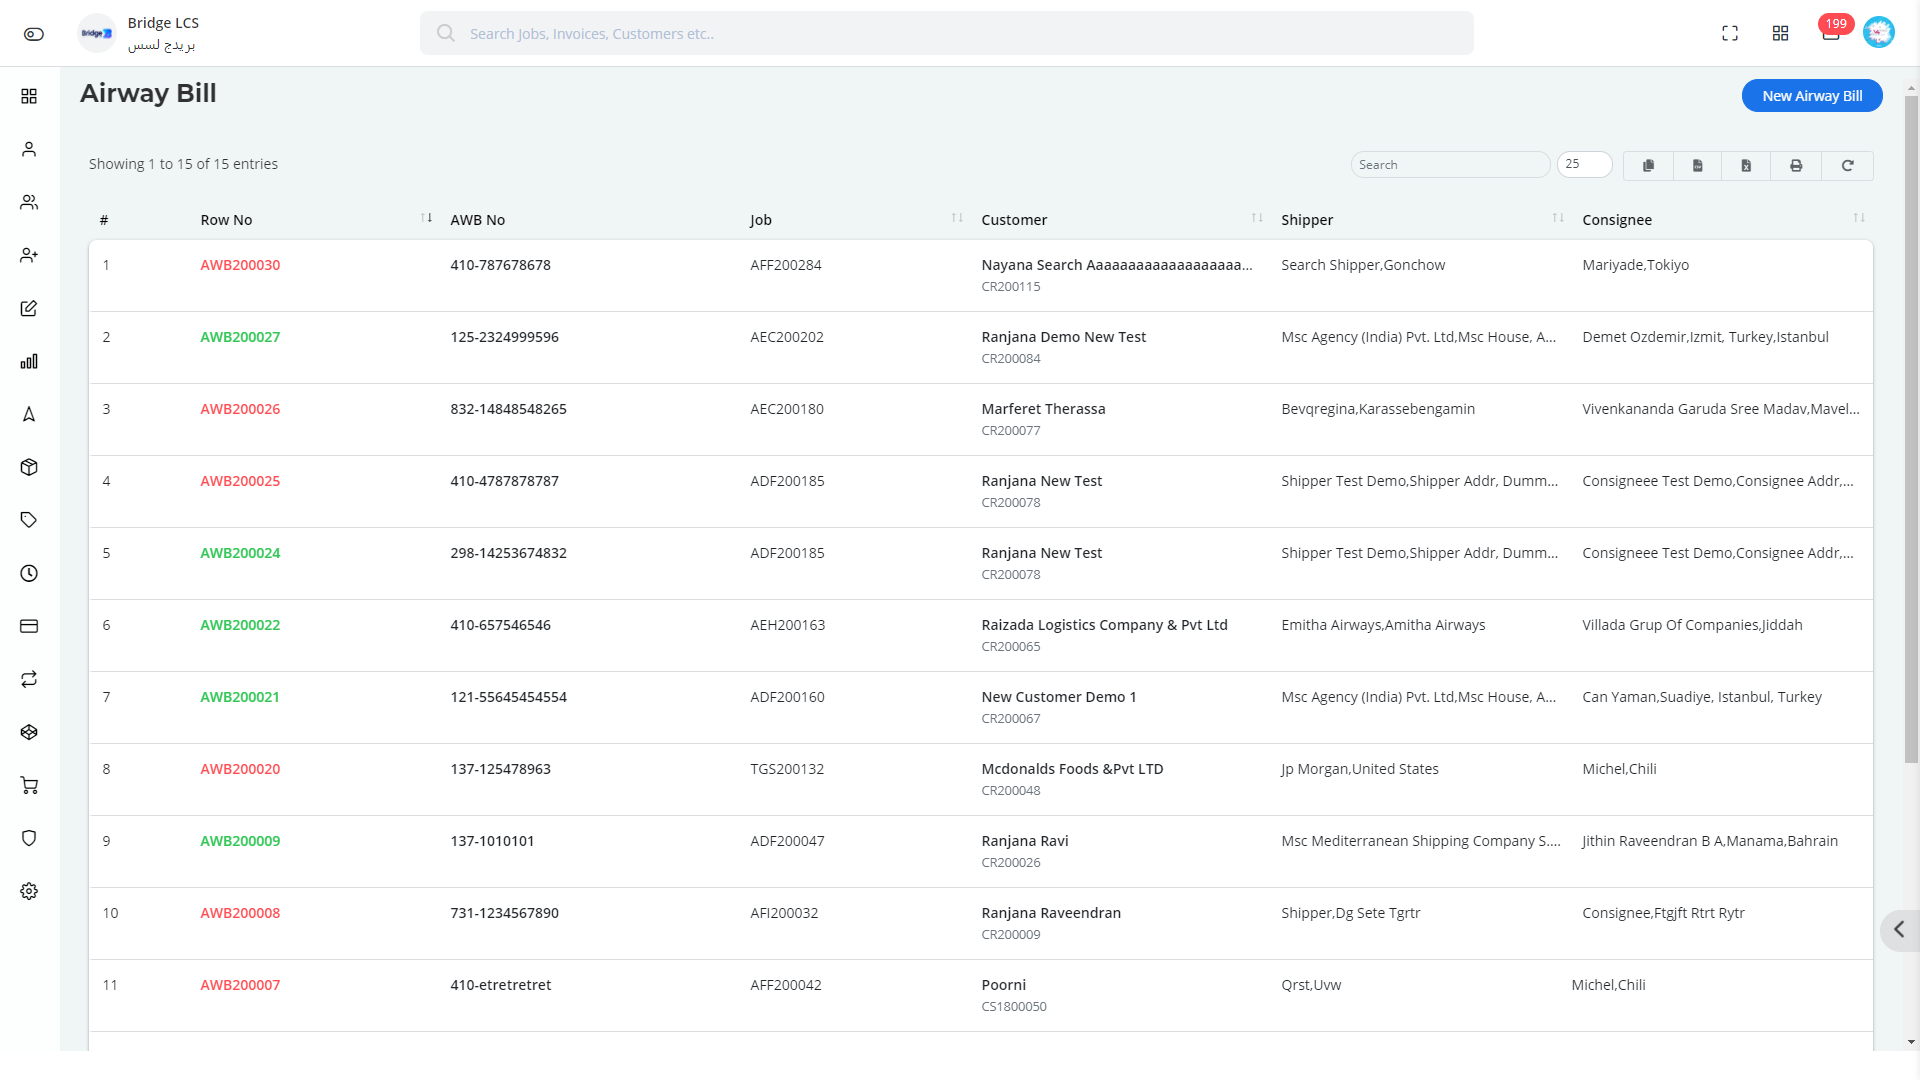
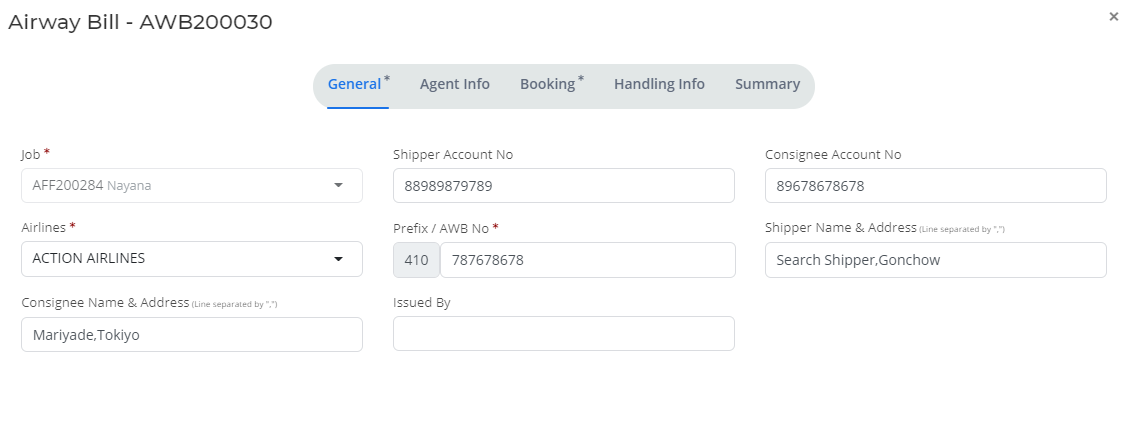
To Create Airway Bill do the following,
- Step 1
- Status --> Bill of Lading --> Airway Bill
- Step 2
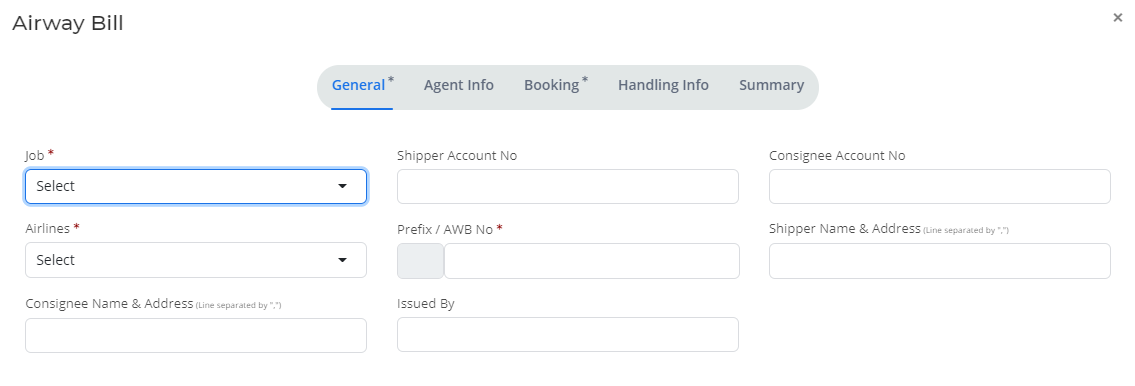
- New Airway Bill --> four sections need to be filled.
- Step 3
- General(*) : General Sections needs to be filled with Job, Airlines, Consignee details and AWB No.
- Step 4
- Agent Info : Agent created earlier can be chosen from the dropdown available or new agent can be created.
- Step 5
- Booking (*) : Routing details must be fed .
- Step 6
- Handling Info and Summary must be filled with the details required to proceed.
- Step 7
- Click on Save to proceed.
Flow Chart
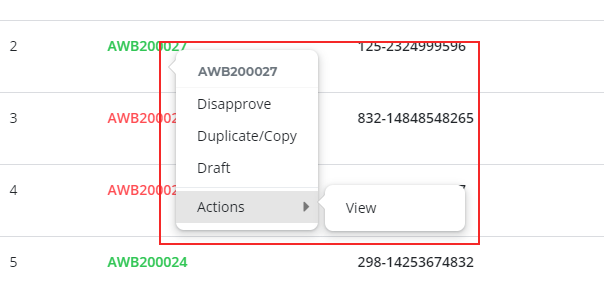
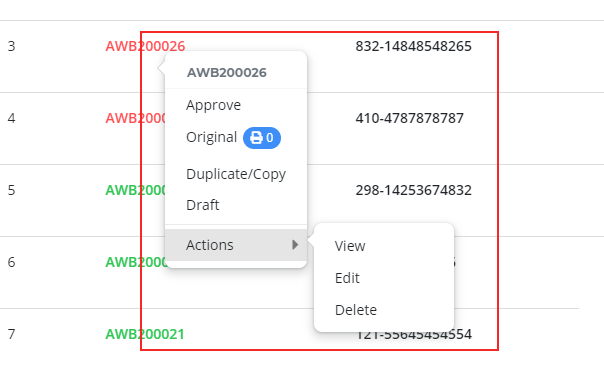
Actions Performed (on Approved Documents)
- Disapprove
- Original-Only possible to take maximum 3 original prints.
- Duplicate / Copy
- Draft
- View
Actions Performed: (on Unapproved Documents)
- Approve
- Original -Only possible to take maximum 3 original prints.
- Duplicate / Copy
- Draft
- View
- Delete
- Edit
Advanced Features
Double Clicking on the Column provides you the view of Bill Details.
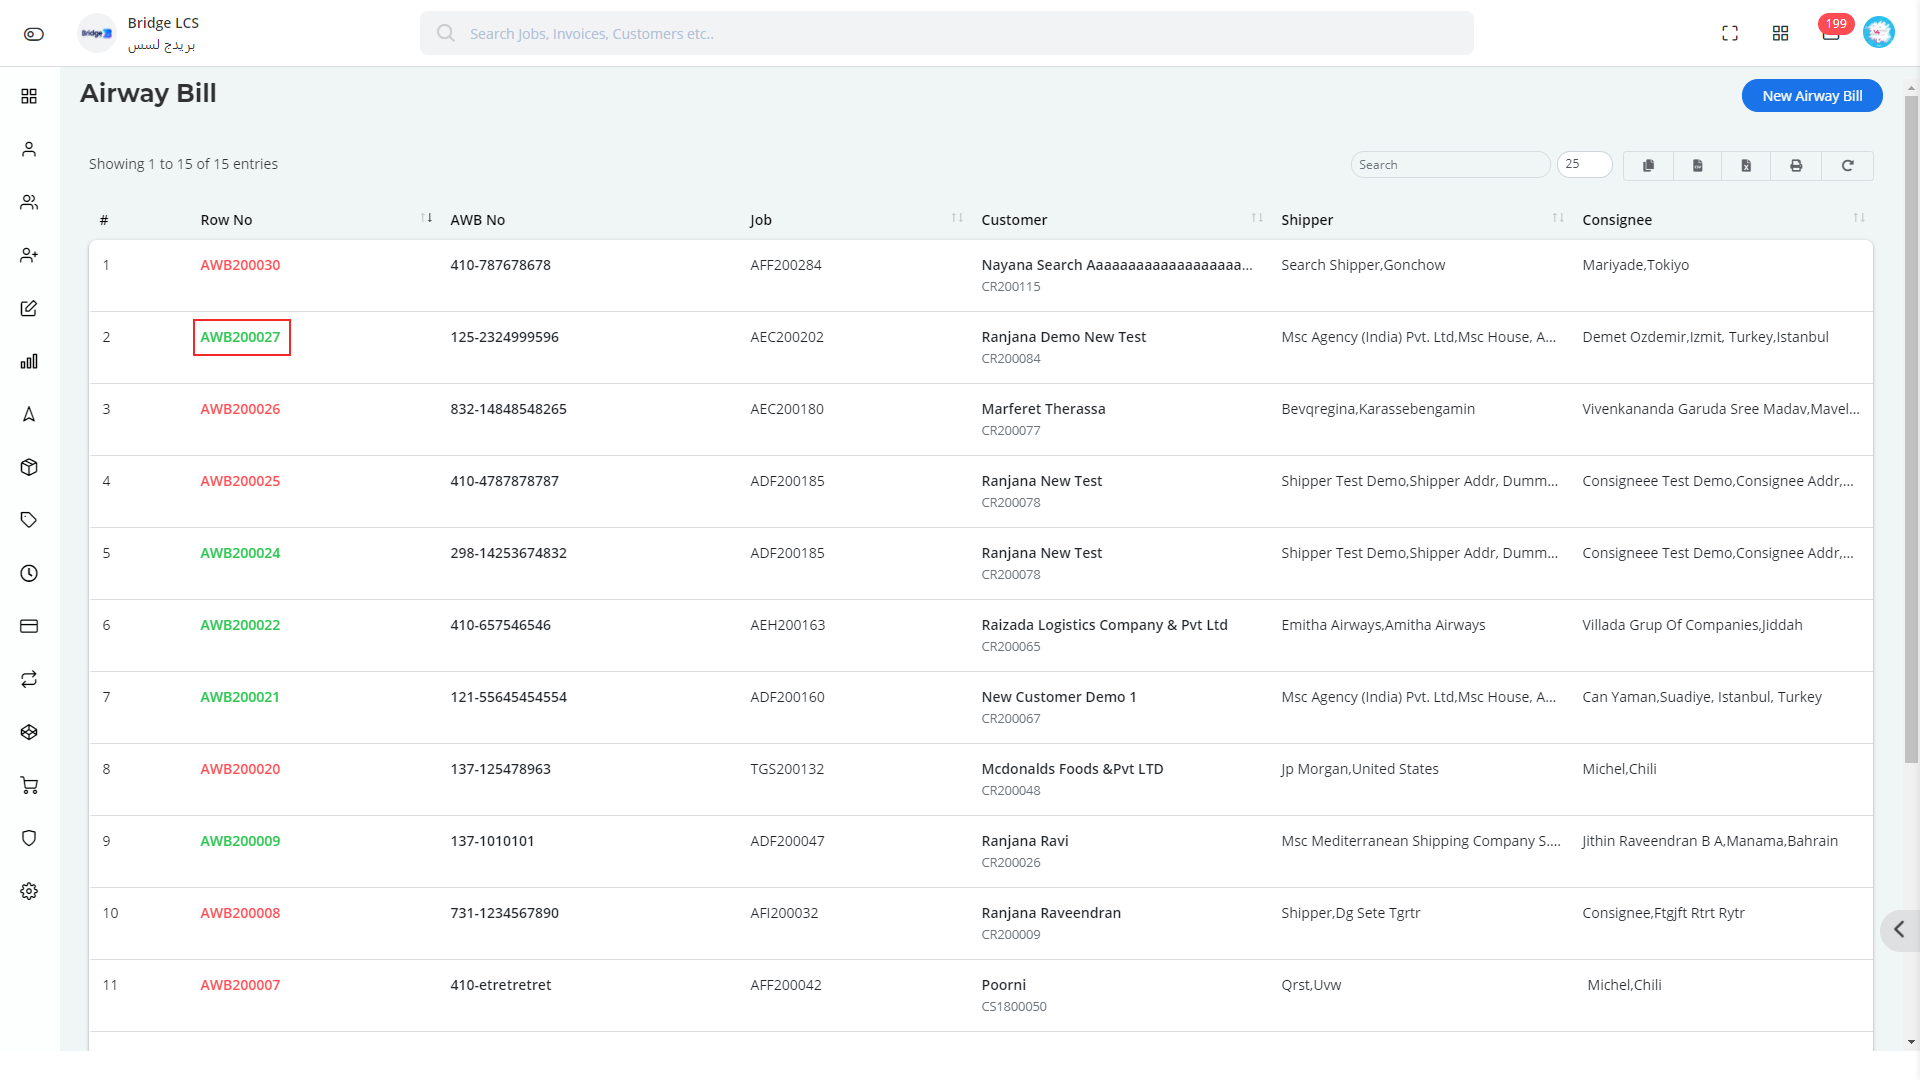
Approved Bill is indicated by a Green Row No
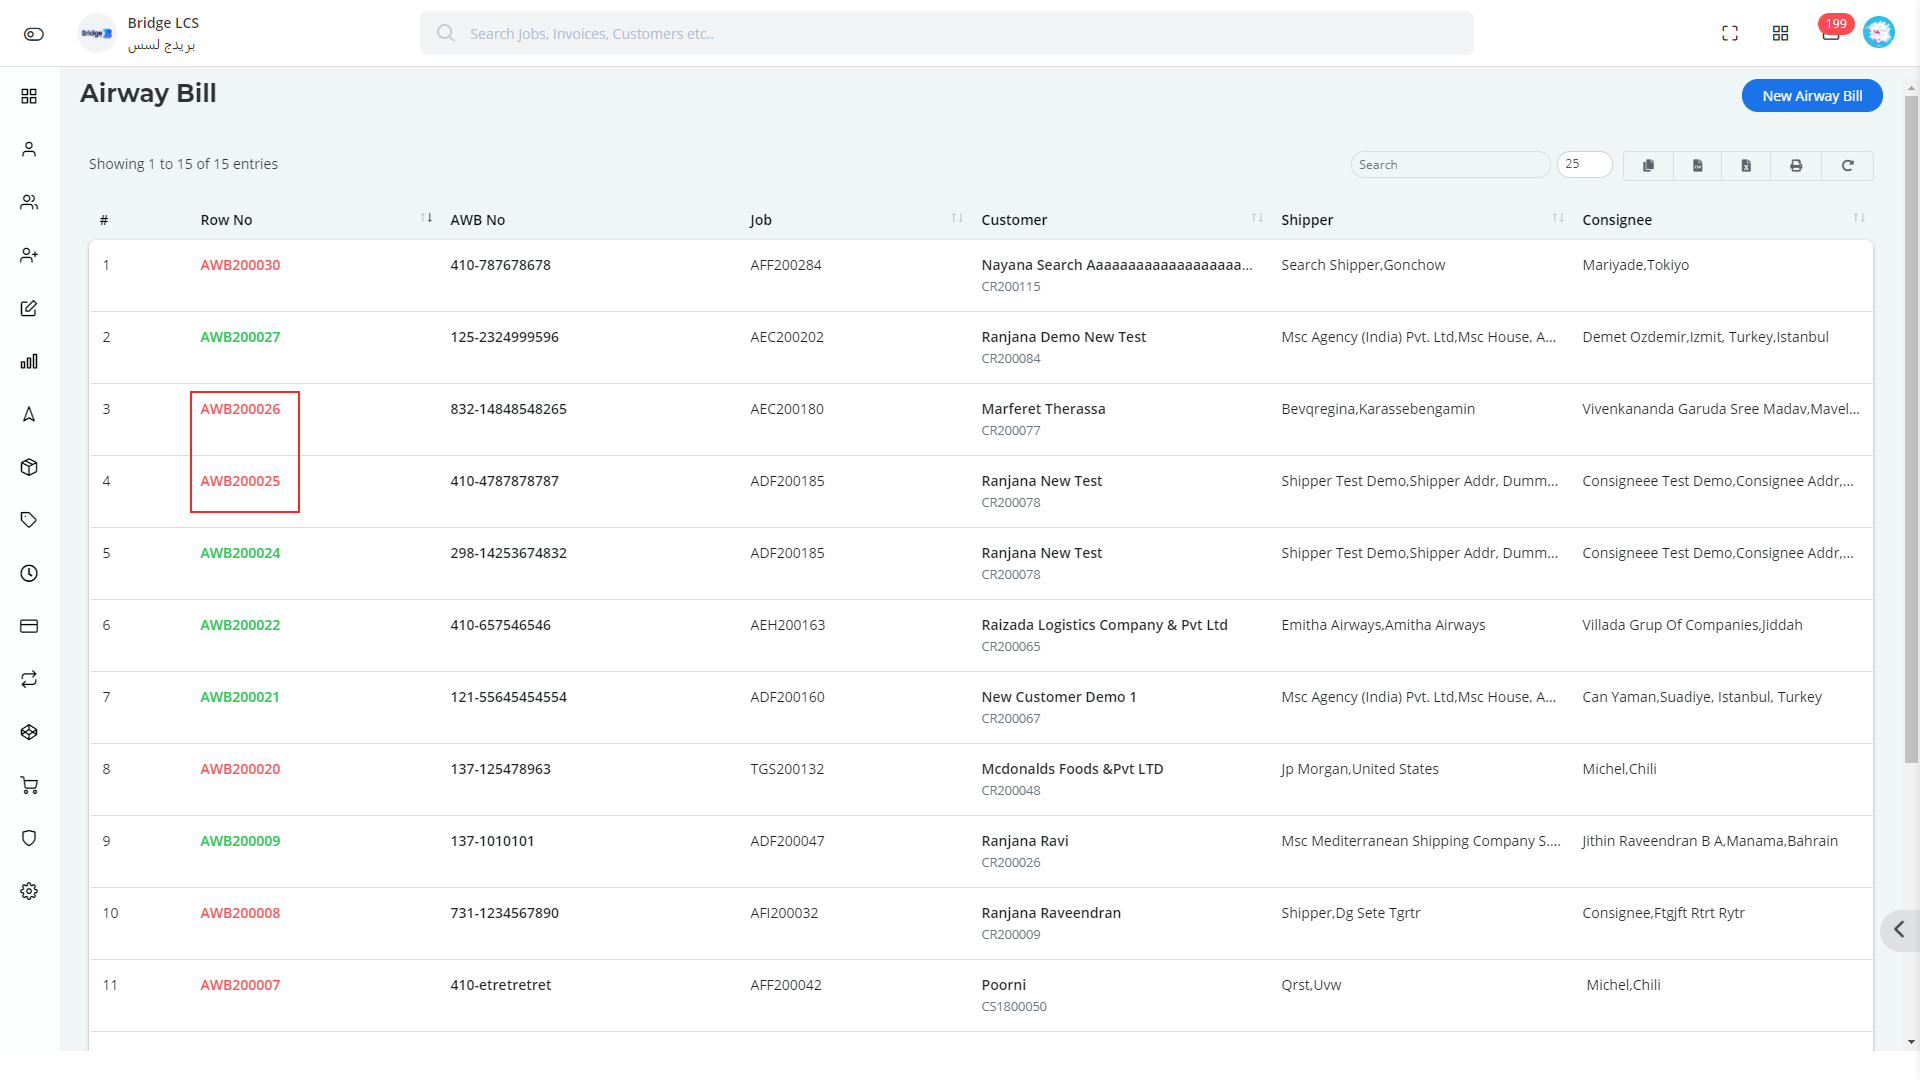
The Unapproved Bill is indicated by a Red Row No .
Data can be sorted alphabetically. Sort Option is indicated by a double sided arrow one
facing upwards and other facing inwards.
The Video inserted below explains you the working of " Airway Bill " to have a better understanding
Seaway Bill
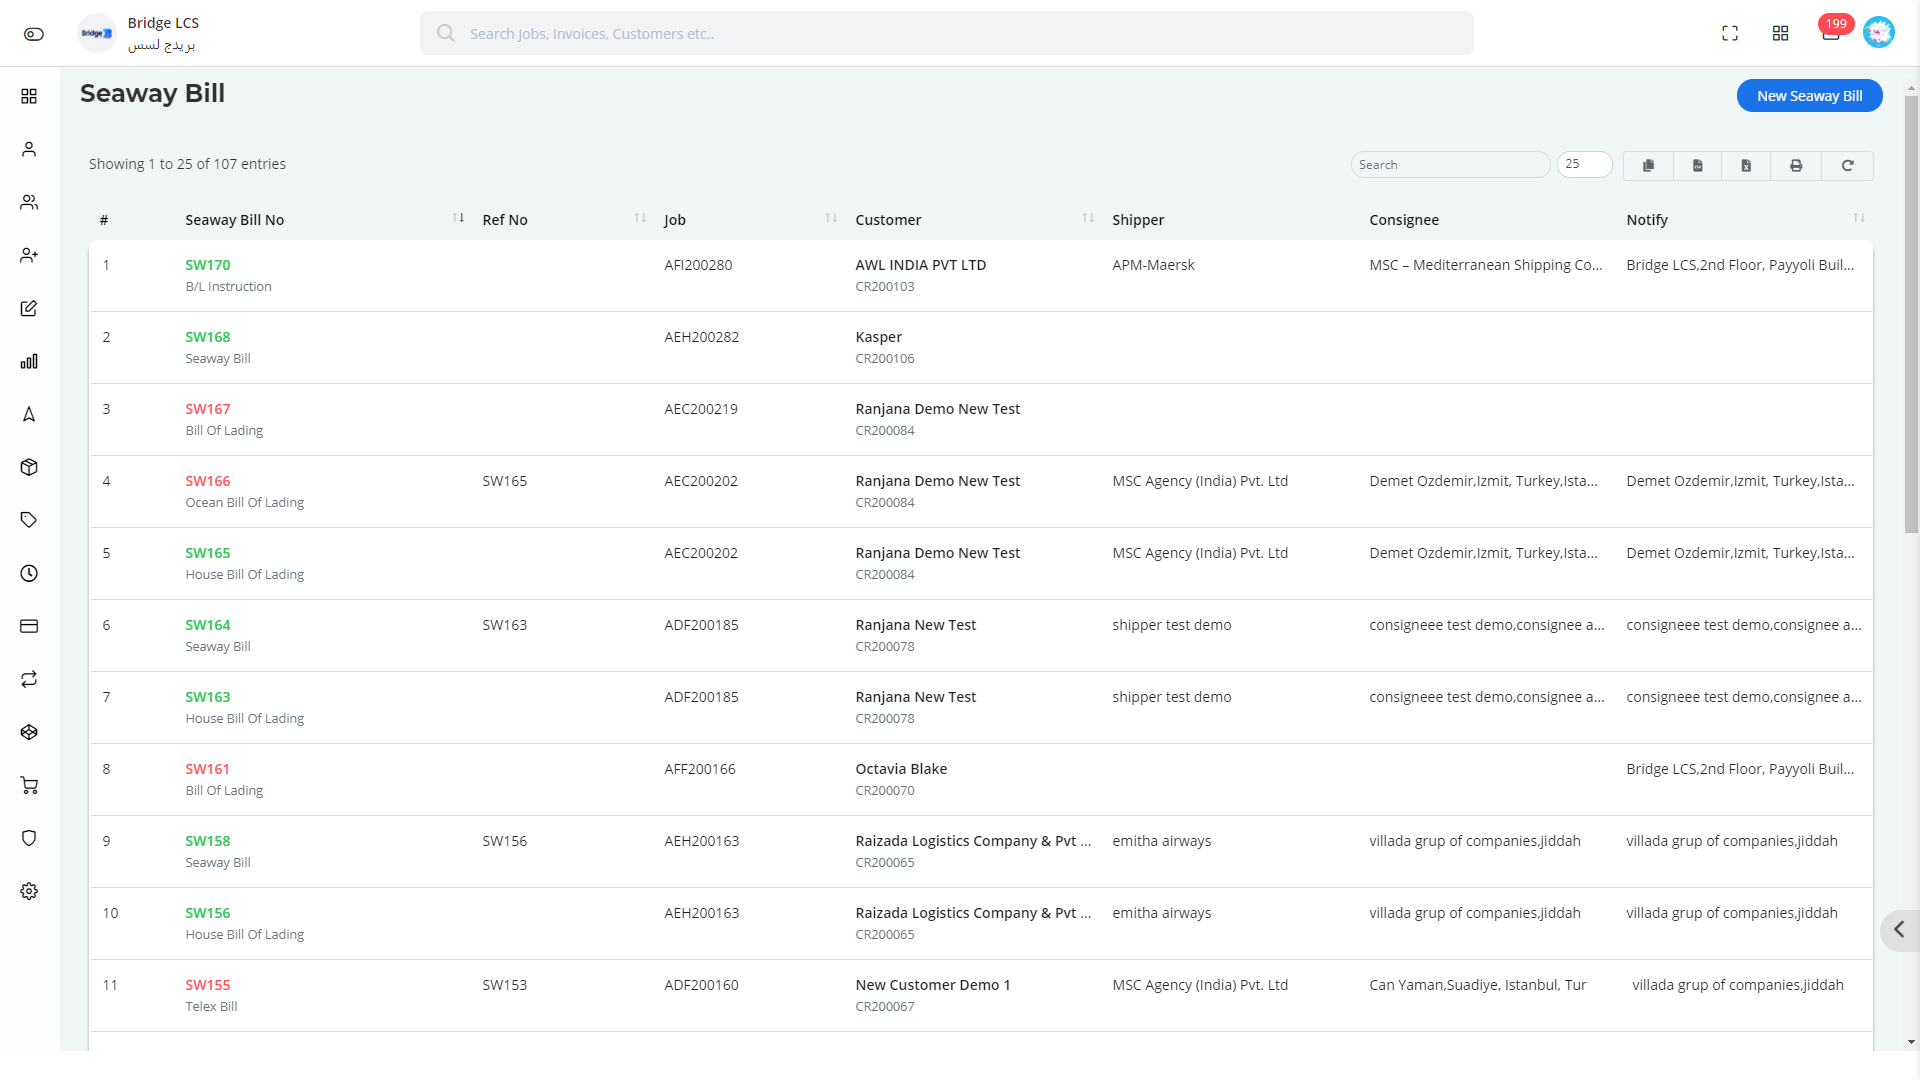
- Step 1
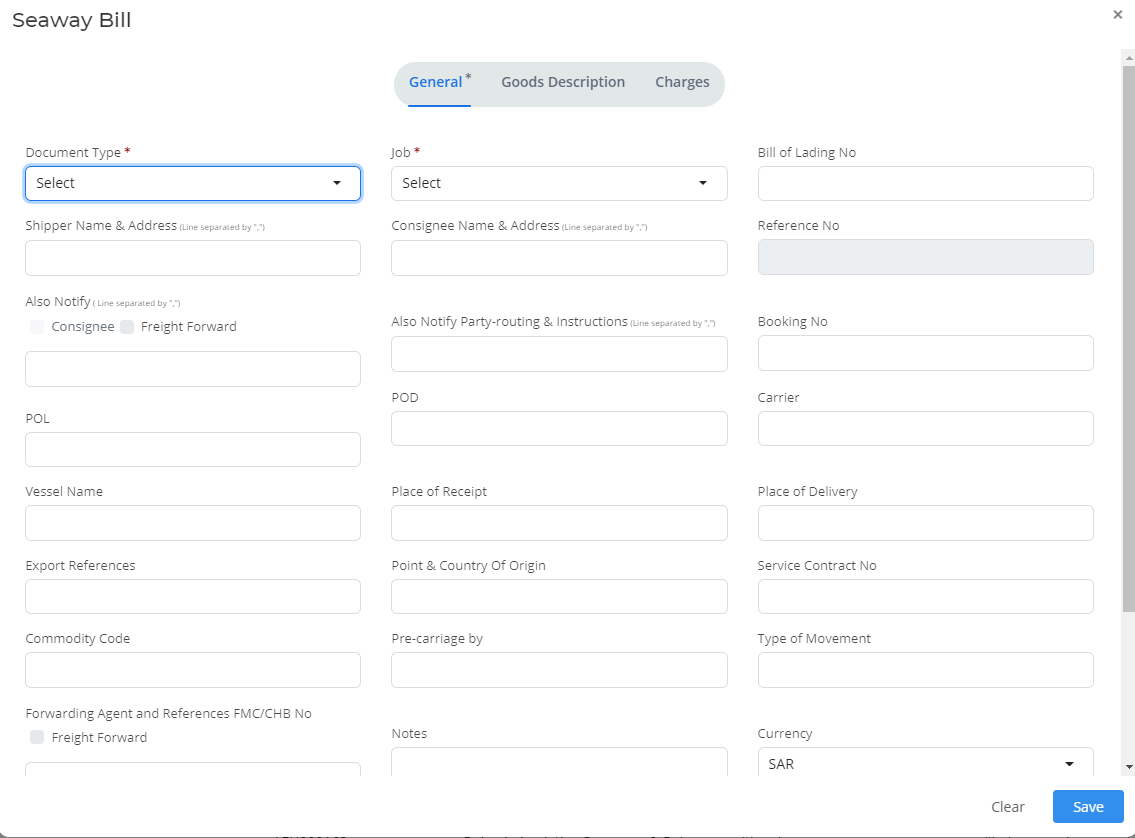
- Go to Seaway Bill → New Seaway Bill Bill has three sections to be filled
- Step 2
- First Section is General(*) which is need to be filled with Job and Routing details
- Step 3
- Goods Description is the second section which needs to be verified as it fetches the data from the job module.
- Step 4
- Final Section is Charges which needs to be filled with the required details to complete the bill.
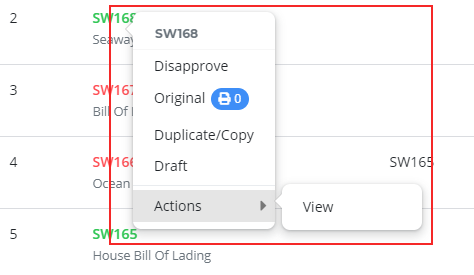
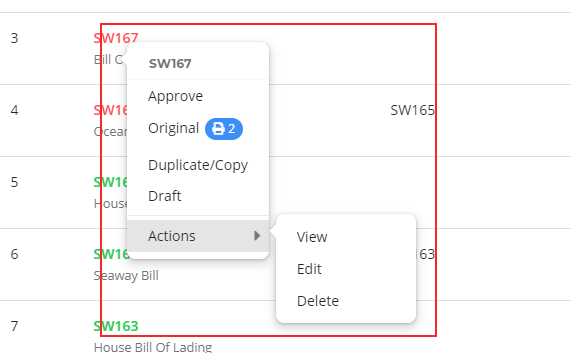
Actions Performed(on Approved Documents)
- DisApprove
- Original
- Duplicate / Copy
- Draft
- View
Actions Performed : (on Un Approved Documents )
- Approve
- Original
- Duplicate / Copy
- Draft
- View
- Delete
- Edit
Advanced Options
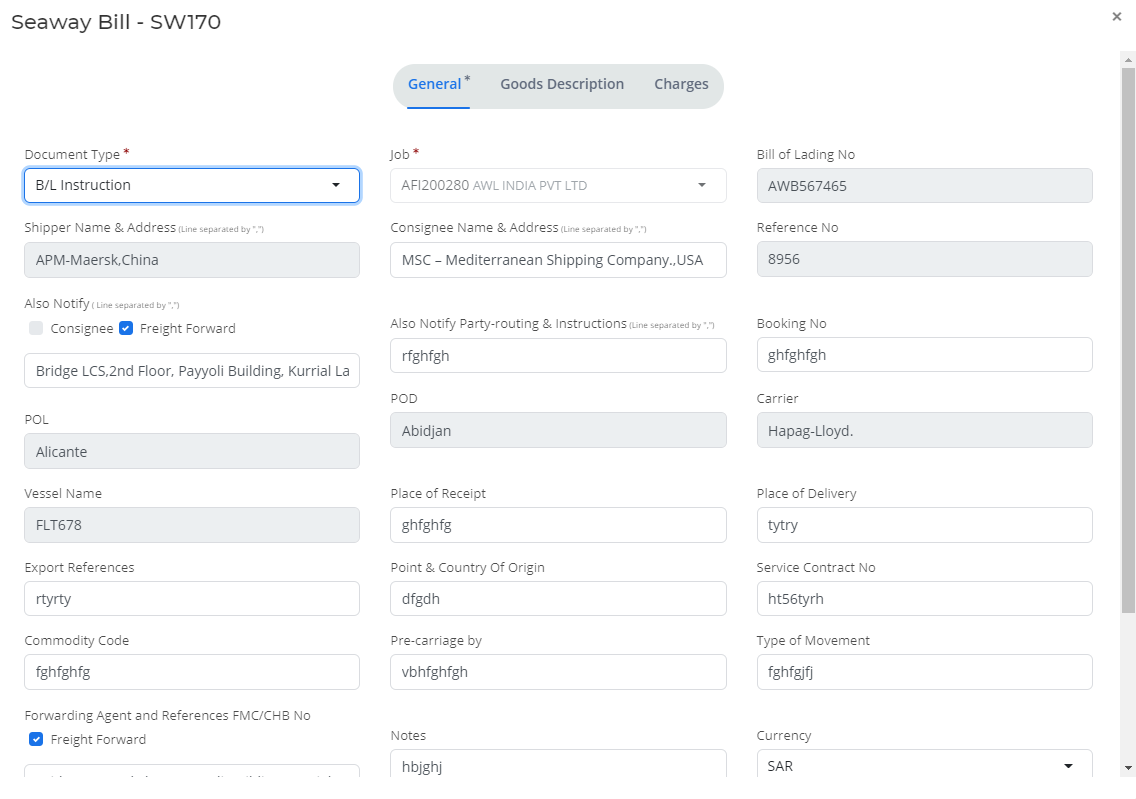
Double Clicking on the Column provides you the view of Bill Details.
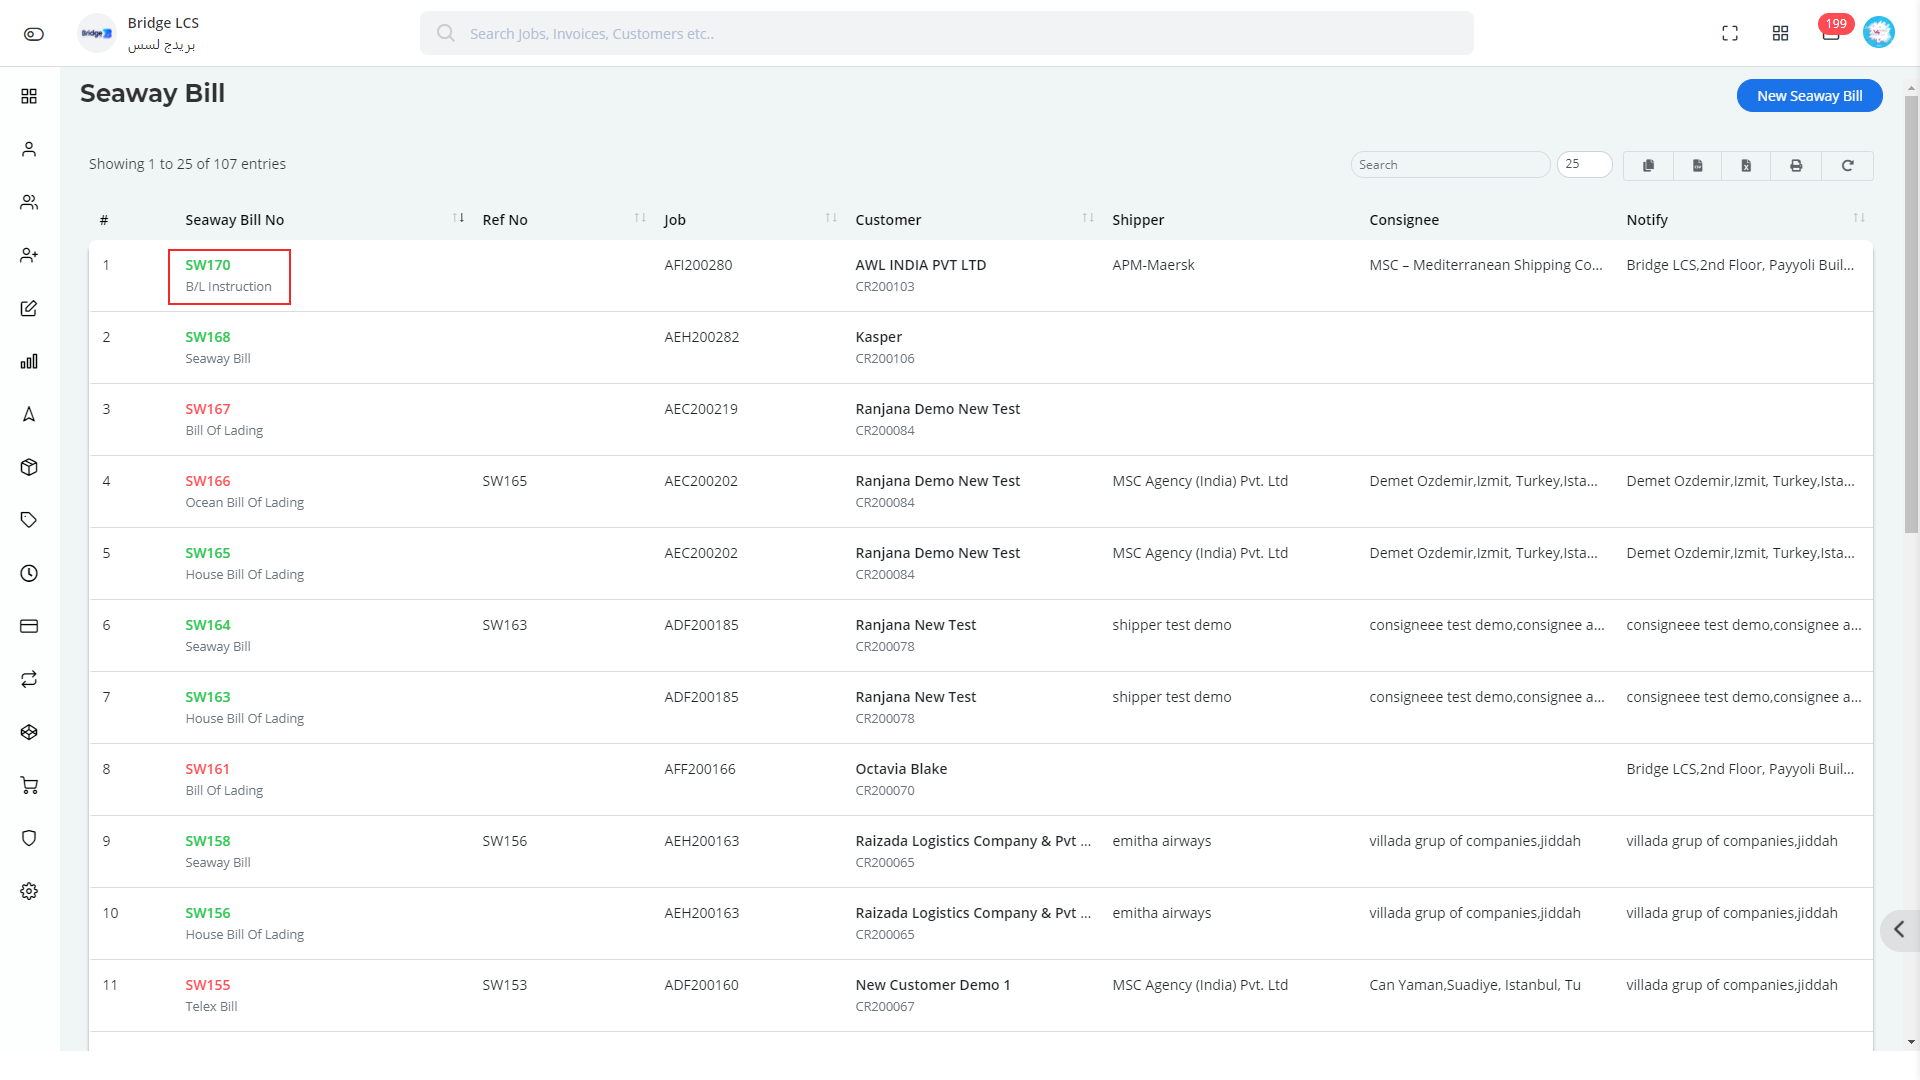
Approved Bill is indicated by a Green Row No
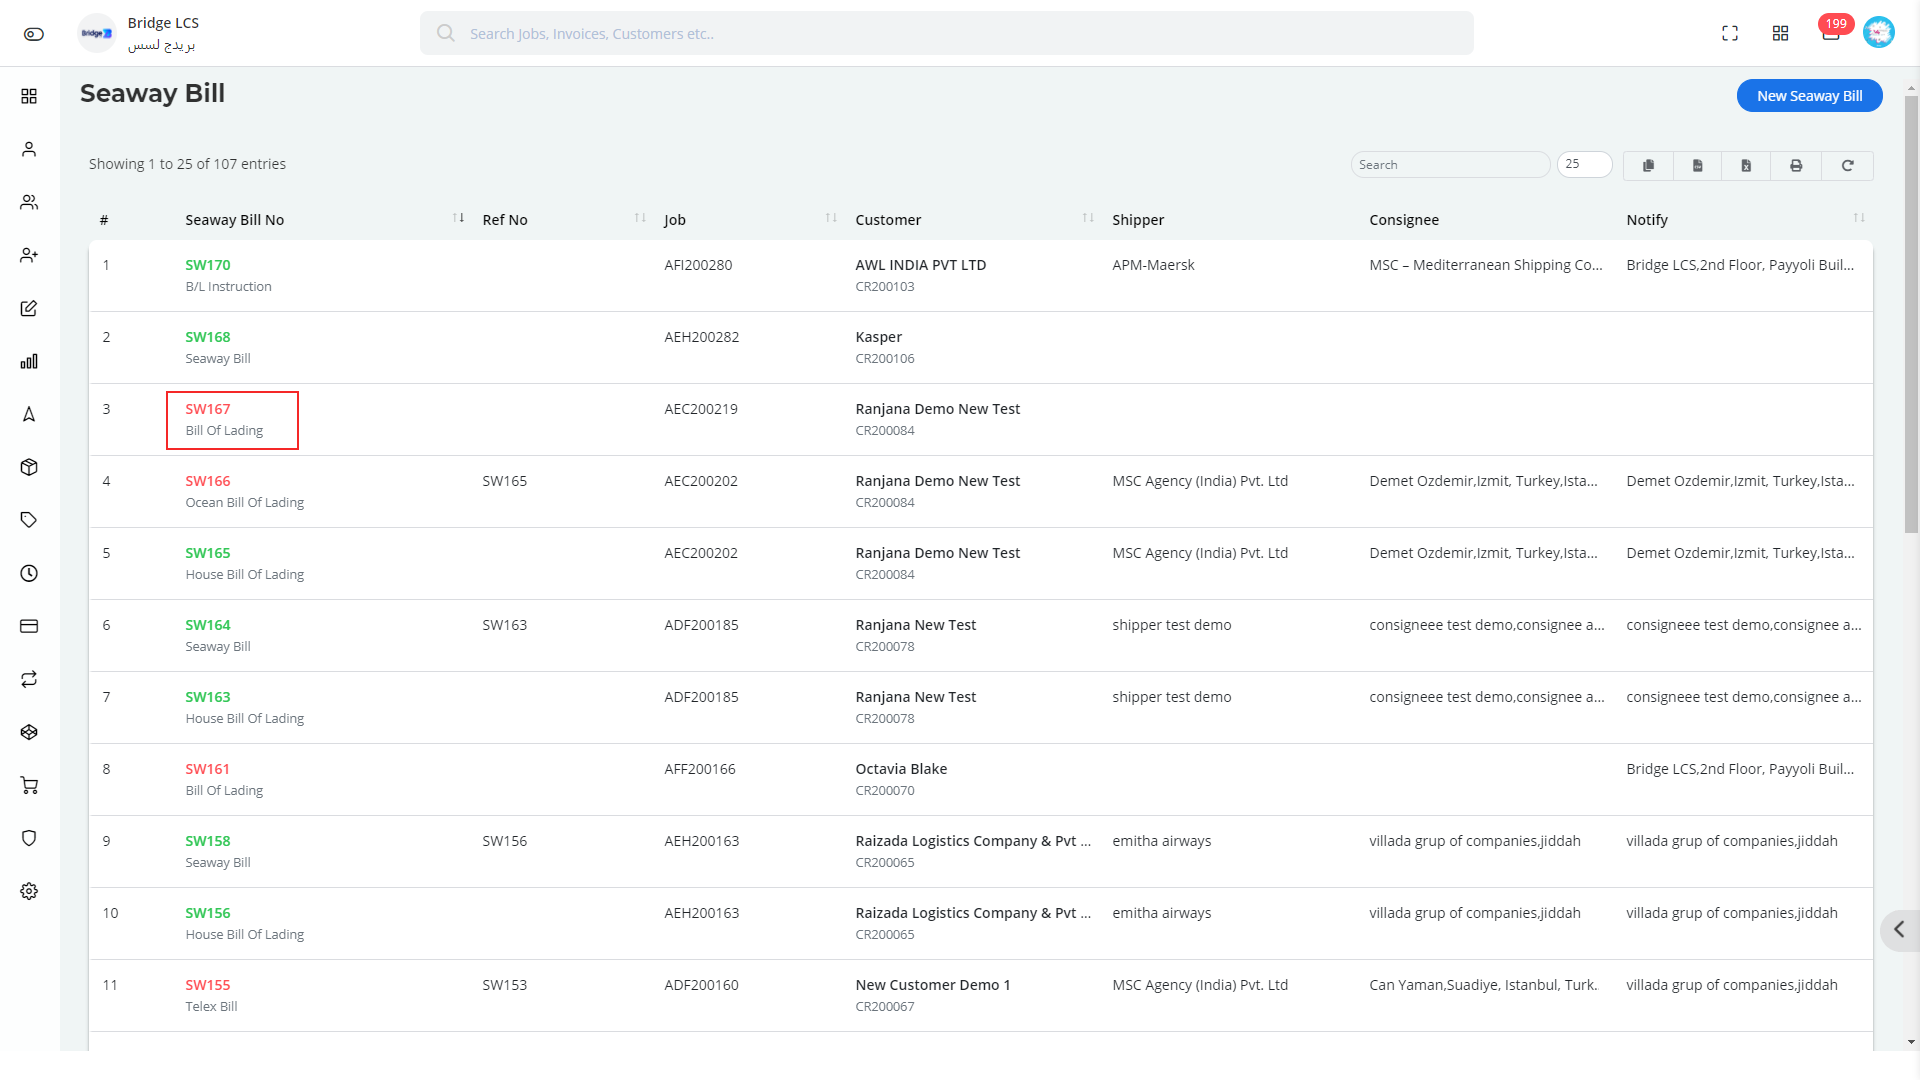
The Unapproved Bill is indicated by a Red Row No .
Data can be sorted alphabetically. Sort Option is indicated by a double sided arrow one
facing upwards and other facing inwards.
The Video inserted below explains you the working of " Seaway Bill " to have a better understanding
WayBill
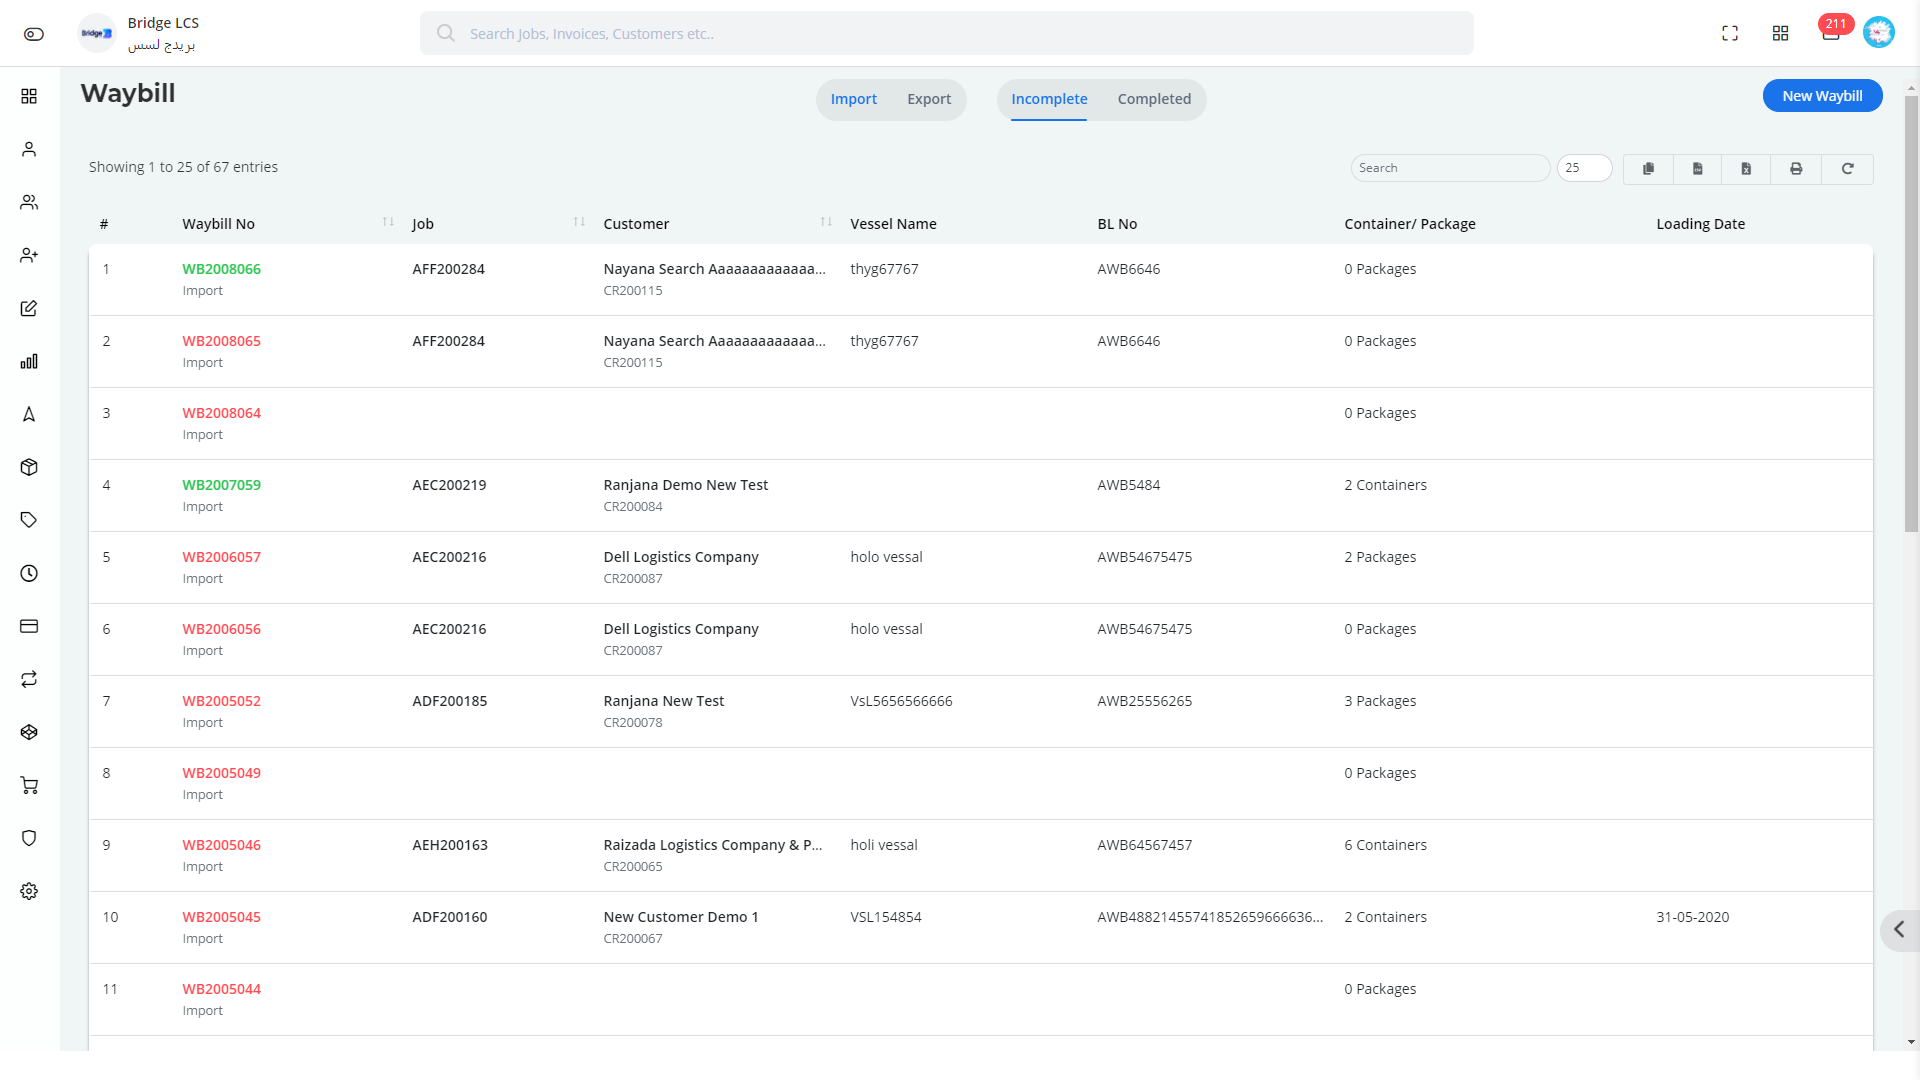
Waybill provides you the end to end shipment details along with consignee details.
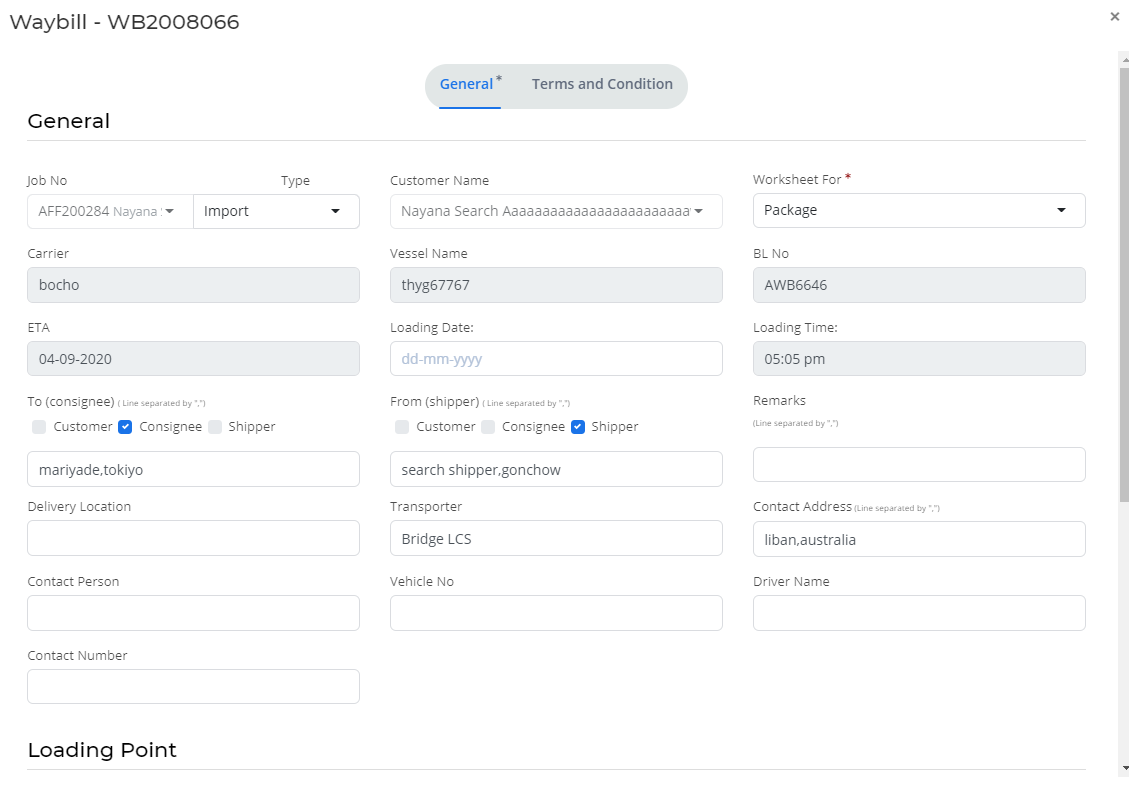
This has four different sections which includes import, export, complete, Incomplete. WayBill Can be created by the following steps,
- Step 1
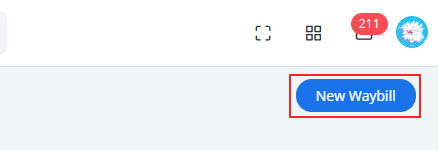
- Waybill --> New Waybill
- Step 2
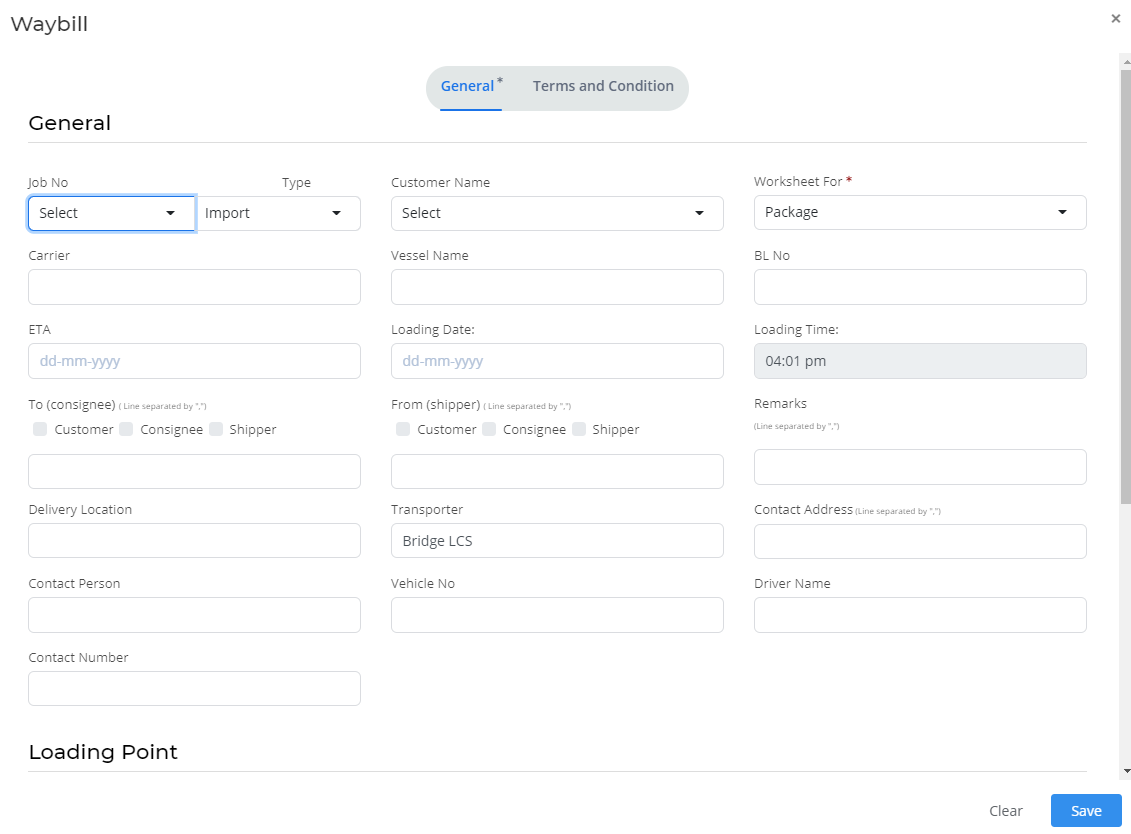
- Section 1 - General Section needs to be filled with details of job, consignee, routing and package/container details.
- Step 3
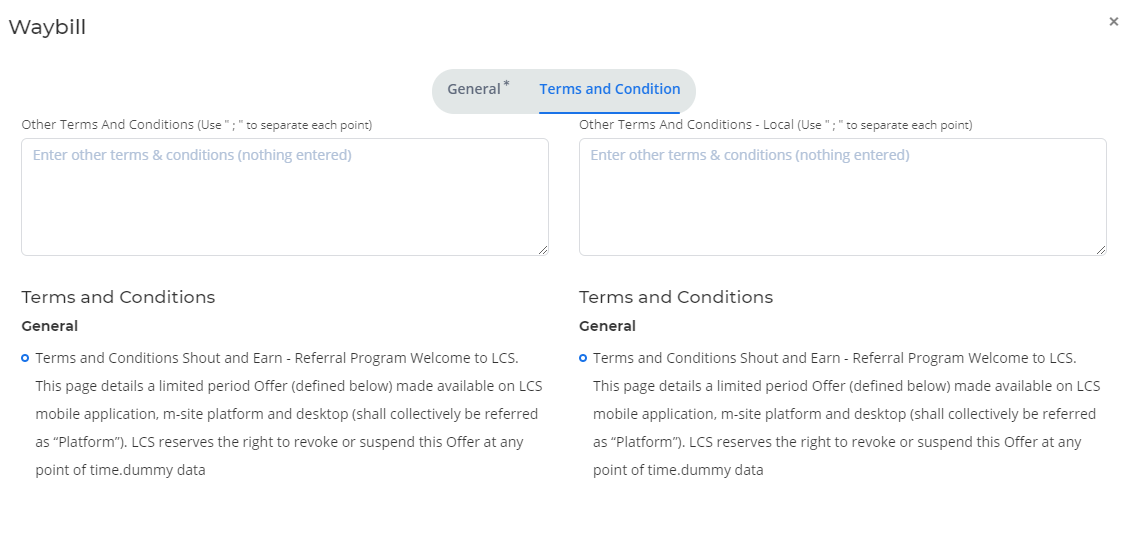
- Section 2 - Terms and Conditions can be modified if required.
- Import
- Import section includes a list of bills of jobs that are being imported .
- Export
- The Export Section has a list of bills of jobs that are being exported.
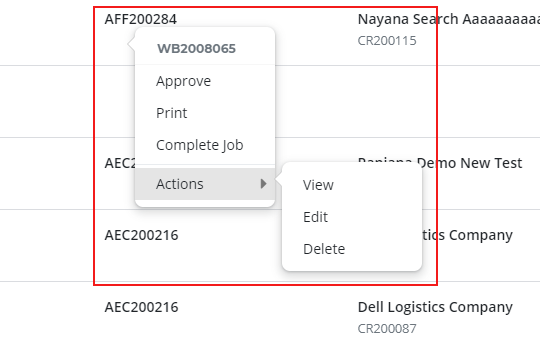
Actions Performed : (applicable on both Import and Export Sections )
- Approve
- Disapprove
- Complete Job - This needs to be marked once the goods reach the port.
- View
- Edit
- Delete
- Incomplete
- It furnishes a list of jobs which has not reached the consignee yet.
- Complete
- It furnishes a list of jobs which has reached the destination.
Jobs need to be marked as “Completed” to move the same from Incomplete to Complete Section .
Actions Performed
- Approve
- Disapprove
- Complete Job - This needs to be marked once the goods reach the port.
- Incomplete Job
- View
- Edit
- Delete
Working of Way Bill Module
This work under four cases
Let's assume Import, Export as Segment 1 and Incomplete, Complete as Segment 2.
- Case 1
- If the user marks Import from Segment 1 and Incomplete from Segment 2, then they can view the list of incomplete imported jobs.
- Case 2
- If the user marks ImporIt from Segment 1 and complete from Segment 2, then they can view the list of completed imported jobs.
- Case 3
- If the user marks Export from Segment 1 and Incomplete from Segment 2, then they can view the list of incomplete exported jobs.
- Case 4
- If the user marks Export from Segment 1 and complete from Segment 2, then they can view the list of completed imported jobs.
Advanced Features : (Applicable to all Sections)
Double Clicking on the column gives the view of data entered.
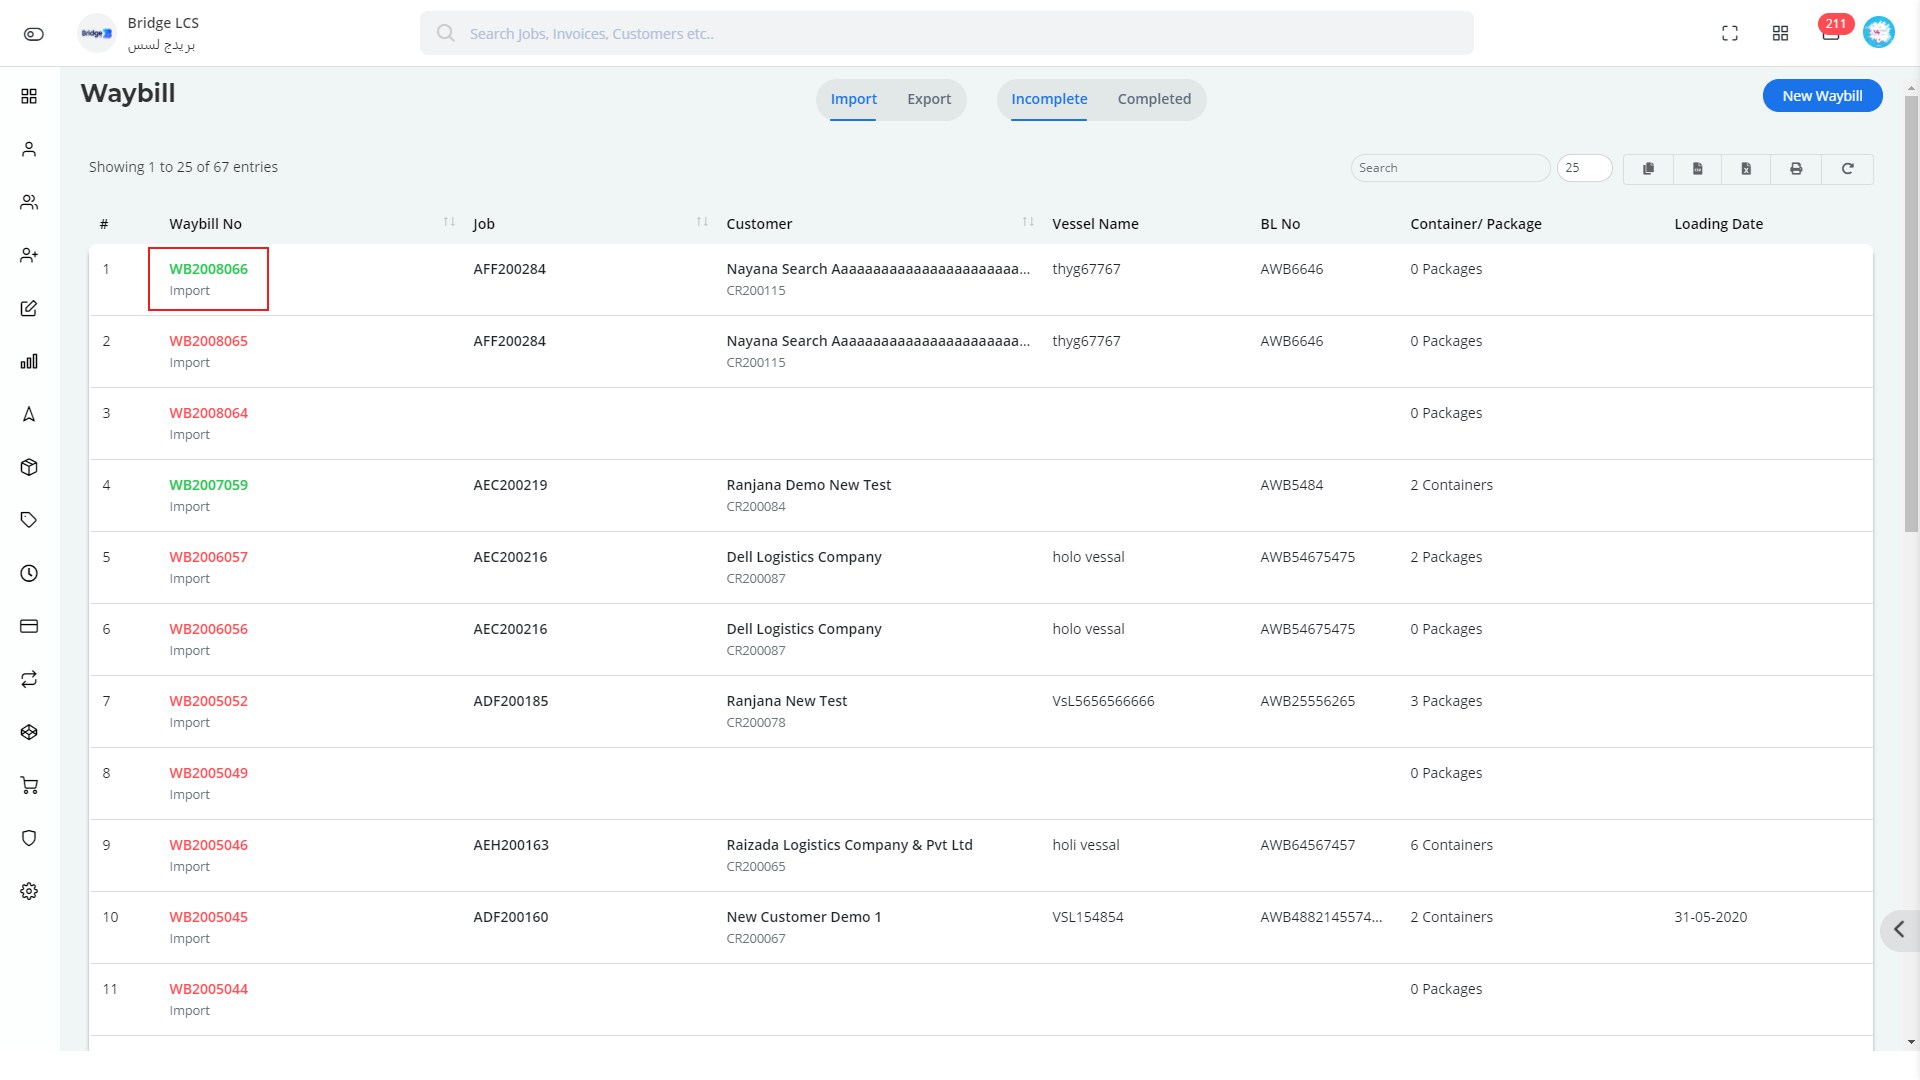
WayBill No in Green Colour indicates that the bill is approved.
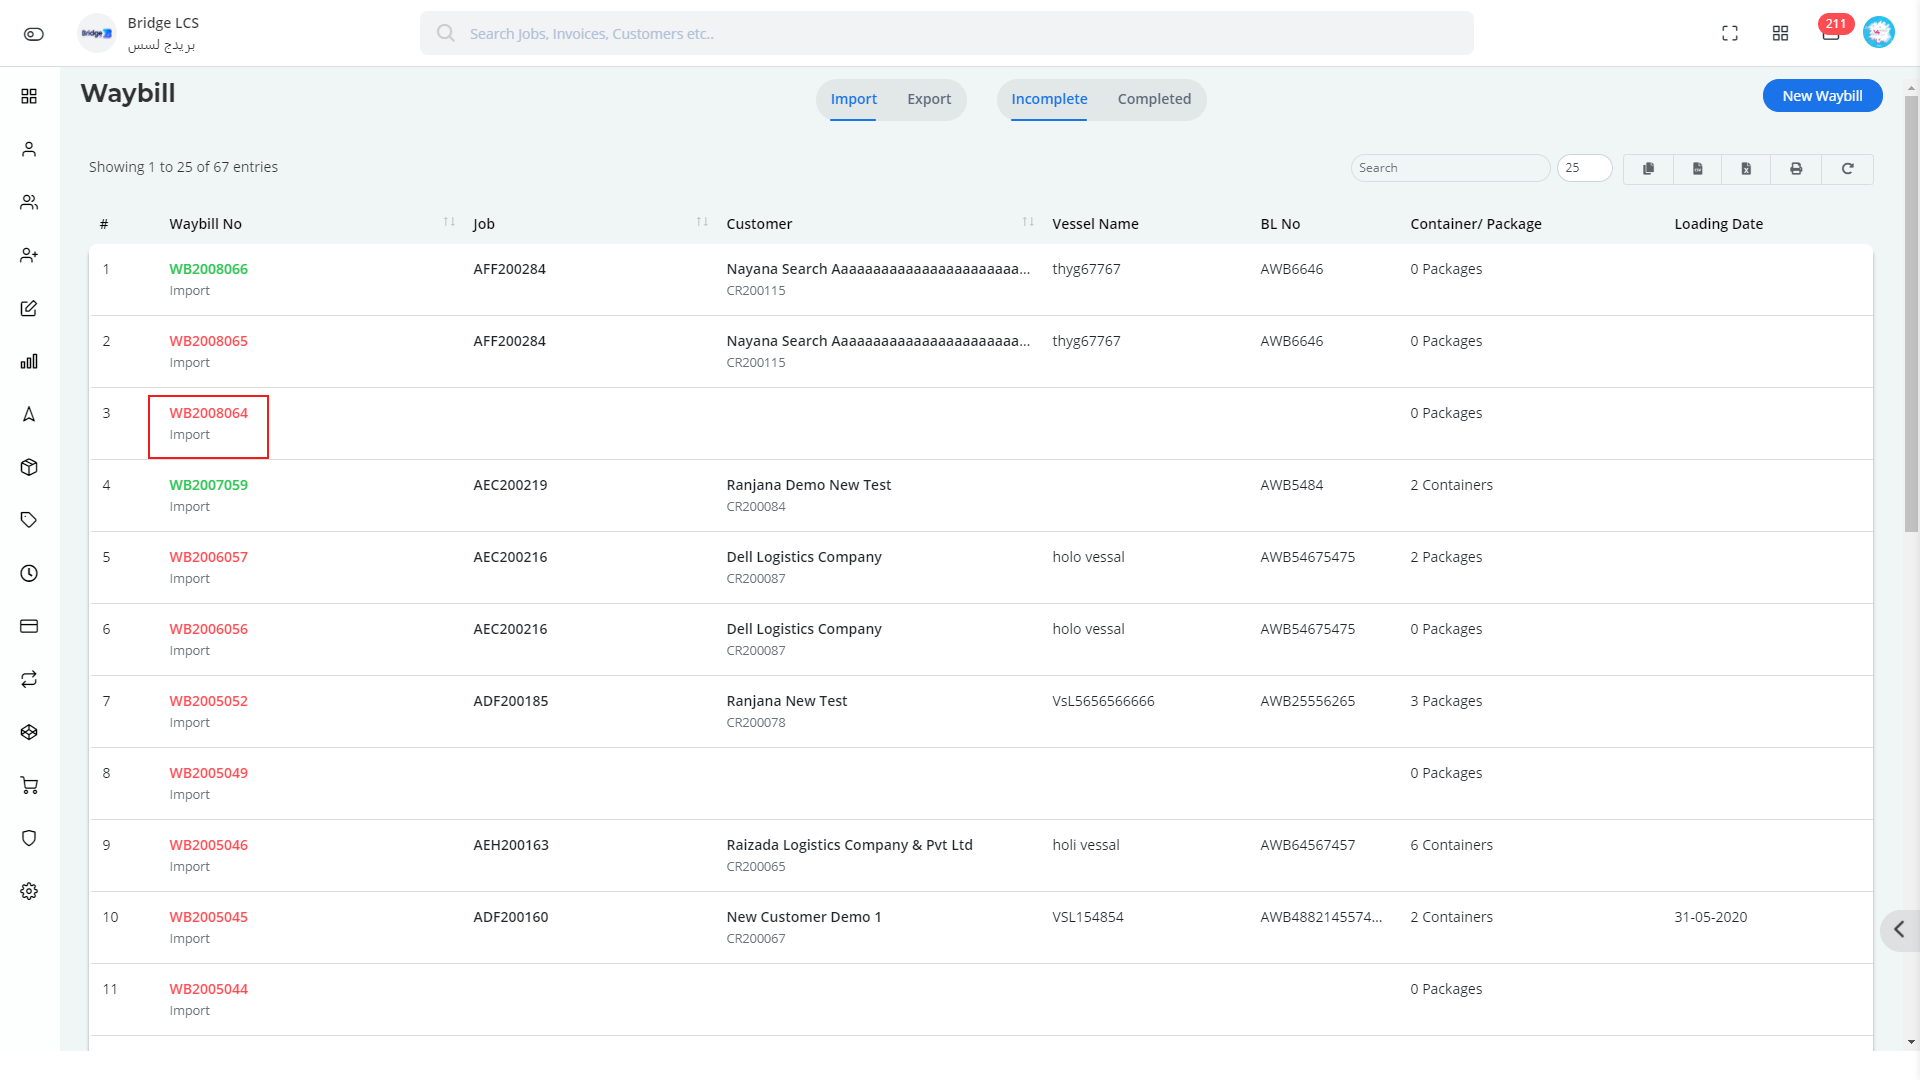
WayBill No in Red Colour indicates that the bill is not approved.
Column wise Sorting is possible that works in an alphabetical manner.
The Video inserted below explains you the working of " Way Bill " to have a better understanding
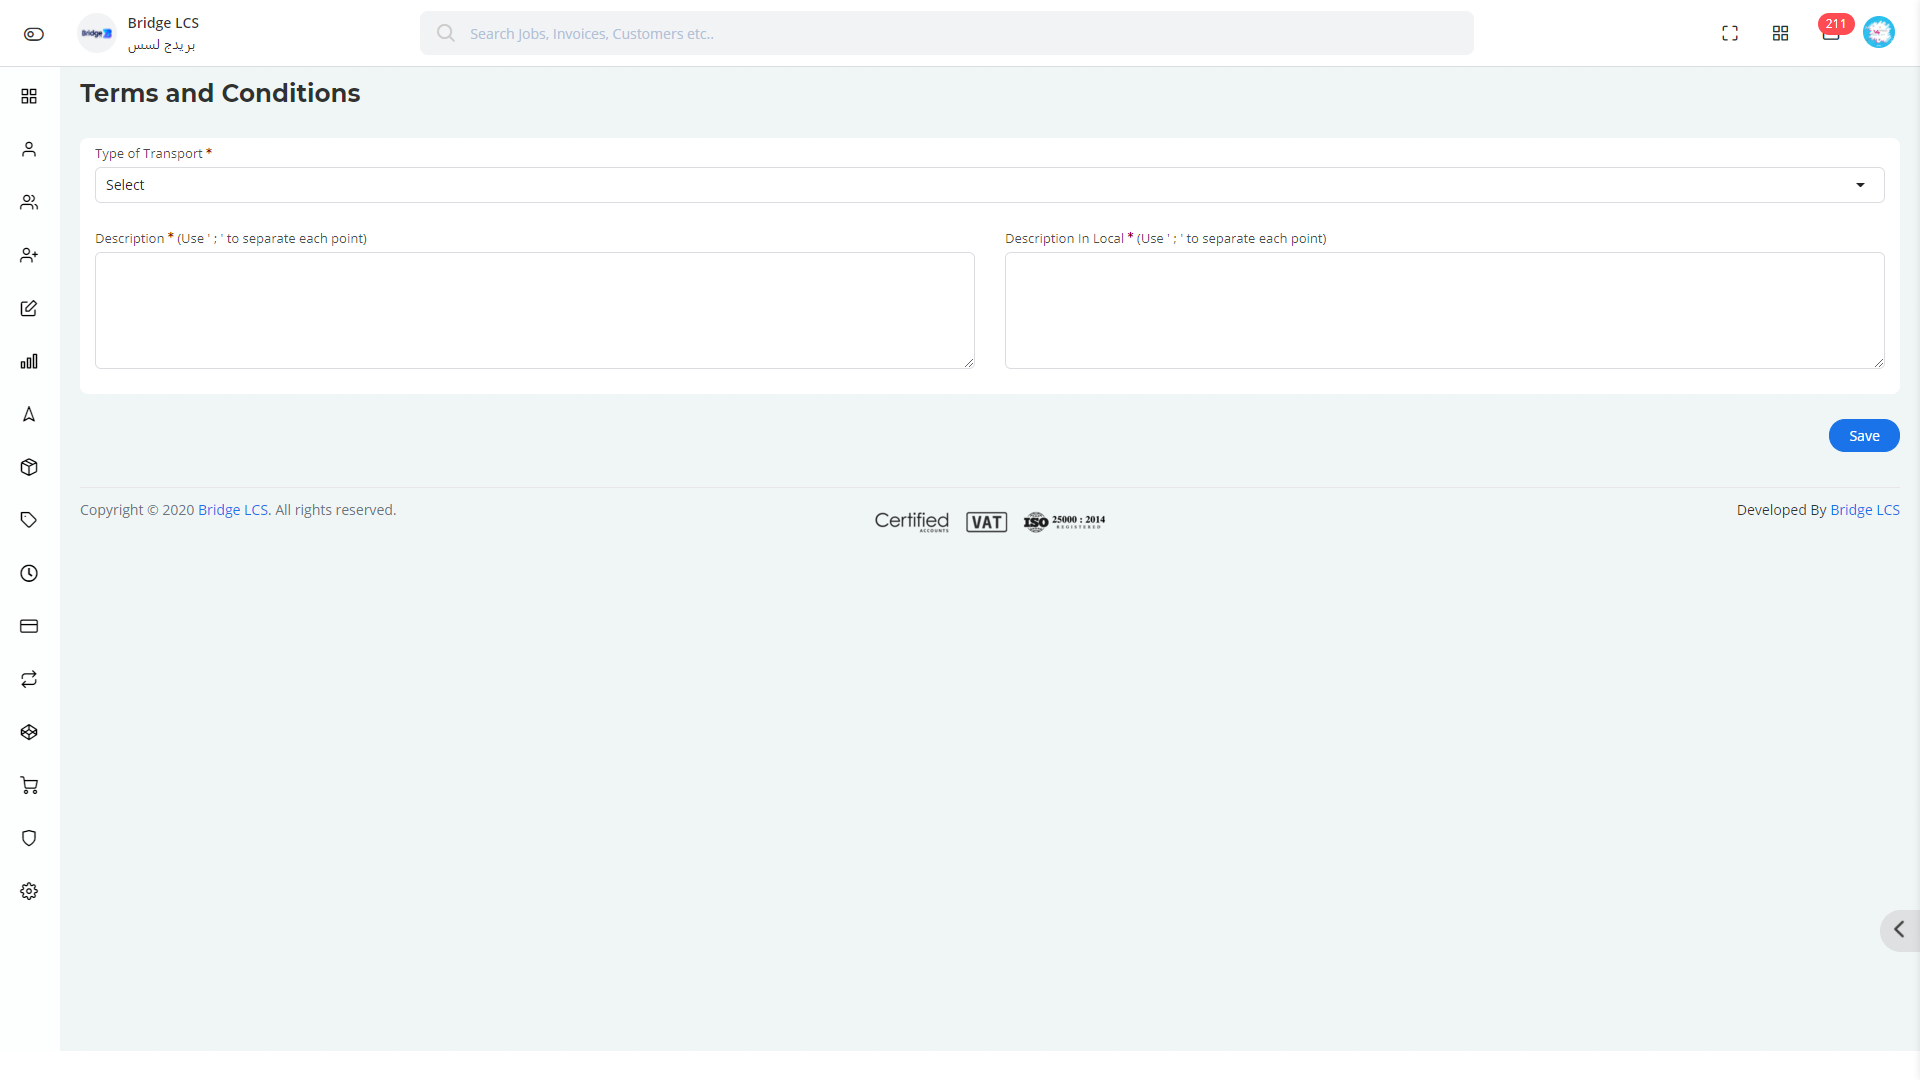
Terms and Condition
Terms and Condition is the final Section of Status Module where you can create your own terms which is followed by your organisation .
Steps to be followed,
- Step 1
- Select the type of Transport (*)
- Step 2
- You will get a default content which can be modified as per your convenience.
